How to See the ISS Through a Telescope (Tracking Guide 2026) | Telescope Advisor
Telescope Advisor Logo Telescope Advisor
Comet NEOWISE glowing above Earth's atmosphere — photographed by an astronaut from the International Space Station, July 2020

ISS TRACKING GUIDE · 2026

How to See the International Space Station Through a Telescope

Yes — you can see the ISS, its solar panels, and even its truss structure with a backyard telescope. Here’s exactly how to track it.

408 km

Orbital Altitude

109 m

Solar Array Width

28,000 km/h

Orbital Speed

~92 min

Orbital Period

By Telescope Advisor Editorial Team Published: Updated: Editorial Standards

Can You Really See the ISS Through a Telescope?

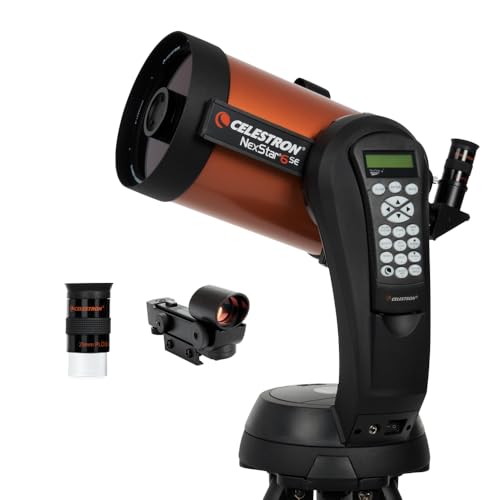
Yes — and it’s genuinely spectacular. At 408 km altitude, the International Space Station spans about 55 arcseconds at zenith (close to Jupiter’s angular size at opposition). With a 150mm telescope at 100×, you will see the cross-shaped solar array wings and the main pressurized truss. At 200× on a steady night, the individual solar panel pairs are distinct.

The challenge isn’t magnification — it’s tracking. The ISS crosses a 1° eyepiece field in roughly 3 seconds at 100×. You either follow it manually (a real skill, but learnable) or use a GoTo mount with app-based TLE tracking (much easier).

What you CAN see

  • ✓ Cross-shaped solar array structure (any 70mm+)
  • ✓ Distinct solar panel wing pairs (100mm+)
  • ✓ Main truss and module silhouettes (150mm+)
  • ✓ Dramatic brightness changes during pass
  • ✓ Occasional docking vehicles on nearby passes

What you can’t see

  • ✗ Window details or the cupola clearly (requires 300mm+)
  • ✗ Astronauts
  • ✗ Fine antenna or truss detail (atmospheric turbulence limits)
  • ✗ Daytime passes (sky too bright for detail)

What the ISS Looks Like at Different Magnifications

Angular size at zenith: ~55 arcseconds. Equivalent to Jupiter at opposition.

Instrument Magnification Apparent ISS Size What You See
Naked eye Bright moving dot (mag −4 peak) Bright star crossing sky in 6 min
Binoculars 10×50 10× ~9 arcminutes Elongated “H” shape visible on good passes
70mm telescope 50× ~46 arcminutes Clear cross shape, two solar array wings visible
100–150mm scope 100× ~92 arcminutes Four solar array pairs, truss, main modules — sweet spot
150–200mm scope 150× ~138 arcminutes (2.3°) Outstanding detail — individual panel pairs distinct, docked cargo vehicles sometimes visible
200mm+ scope 200×+ ~180+ arcminutes (3°+) Extreme detail — atmosphere becomes the limit; tracking is very hard

The Magnification Sweet Spot: 75×–150×

More magnification shows more detail, but it also shrinks your field of view — and at 28,000 km/h, the ISS crosses a 0.5° field in under two seconds. This is the core tension of ISS observing:

Too Low (<50×)

Easy to track, wide field — but the ISS looks like a bright bar with little structure. Good for first attempts.

Sweet Spot: 75–150×

Enough detail to resolve solar arrays and modules. Field of view large enough to keep ISS in frame for 3–5 seconds with practice.

★ Recommended

Too High (>200×)

Extraordinary detail when you’re on target — but the ISS spends more time outside the field than in it. Only practical with app-assisted GoTo tracking.

Practical eyepiece recommendation

For a 150mm f/8 telescope (1200mm focal length): a 15mm eyepiece gives 80× — ideal. For a 150mm f/5 (750mm focal length): a 9mm eyepiece gives 83×. Use a wide-angle eyepiece (60°–70° AFOV) for a slightly larger field at the same magnification.

How to Track the ISS: Step-by-Step

There are two methods. Manual tracking takes practice but works with any telescope. App-assisted GoTo tracking requires a compatible computerized mount and is dramatically easier.

Method A: Manual Tracking

Works with any telescope. Requires practice — most observers get it right by the 3rd attempt.

  1. 1 Predict the pass using Heavens-Above or NASA’s Spot the Station (free). Note the exact start azimuth, peak altitude, and end direction.
  2. 2 Set up & aim 30 seconds early. Point your scope at the spot in the sky where the ISS will appear. Use a red-dot finder, not an optical finder.
  3. 3 Start at 50× for your first attempt. Wide field = much easier to catch the ISS as it enters your view.
  4. 4 Track smoothly with your hands on the tube — not the focuser. Mirror the ISS’s apparent motion across the sky. It feels like panning a video camera.
  5. 5 Increase power on subsequent passes. Once you can consistently keep the ISS in a 50× field, step up to 100×. Most observers achieve 100× within 3–5 attempts.

Method B: App-Assisted GoTo Tracking

Requires a compatible GoTo mount + SkySafari Pro or Stellarium Plus. Easier and works at higher magnifications.

  1. 1 Connect your GoTo mount to your phone via Wi-Fi (SkyPortal dongle) or Bluetooth. NexStar SE series + SkyPortal is the most common setup.
  2. 2 Load current TLE data in SkySafari Pro — find the ISS under “Satellites.” The app downloads current orbital elements automatically.
  3. 3 Select the ISS and tap “Goto” about 2 minutes before the predicted pass. The mount slews to the predicted first-contact point.
  4. 4 When SkySafari switches to tracking mode, the mount follows the ISS’s TLE-predicted path in real time. Small corrections with the hand controller may be needed.
  5. 5 Result: You can use 150×–200× comfortably, with your hands free to adjust focus. This is how the best ISS images are captured visually.

★ When to Observe: The Twilight Window

The ISS is only visible when it’s in sunlight and your sky is dark. This means the 1–2 hours after sunset and the 1–2 hours before sunrise. Midday passes are invisible. The best ISS passes for visual observing are those where the ISS rises above 40° elevation — higher elevation = shorter distance = larger apparent size + less atmosphere to look through.

Apps & Tools for ISS Pass Predictions

All of these are free or have free tiers adequate for ISS tracking.

NASA Spot the Station

spotthestation.nasa.gov · Free

Official NASA tool. Set your location, get email/text alerts for upcoming passes. Best for beginners — shows rise time, peak altitude, and direction clearly.

Heavens-Above

heavens-above.com · Free

The gold standard for satellite predictions. Shows a sky chart for each pass, precise azimuth/elevation by minute, and magnitude. More technical — ideal for telescope observers who need to plan pointing positions in advance.

ISS Detector (Android)

Free / Pro upgrade

Real-time compass AR overlay — point your phone where the ISS will appear and ISS Detector superimposes the predicted pass path. Great for positioning your telescope before the pass starts.

SkySafari Pro (iOS / Android)

~$19.99

Required for GoTo mount tracking. Connects to NexStar SE mounts via Wi-Fi or Bluetooth and sends TLE-based ISS coordinates in real time so the mount follows the station automatically.

NASA Eyes (Desktop)

eyes.nasa.gov · Free

3D visualization of the ISS orbit in real time. Excellent for understanding the pass geometry, why some passes are overhead and others are low-horizon grazes.

Pass Planner tip

Strategy

Target passes with a maximum elevation above 45° — higher passes mean the ISS is closer (shorter slant range), so it appears larger and brighter. A zenith pass is ideal. Low-horizon passes (<20°) show the ISS through more atmosphere and at a greater distance.

Best Telescopes for Seeing the ISS

Any telescope works for a first look, but a computerized GoTo mount transforms ISS observing. Here are the three best options across budget tiers.

Editor’s Pick — Best for ISS Tracking
Celestron NexStar 6SE computerized telescope

Best GoTo Scope for ISS

Celestron NexStar 6SE

150mm f/10 Schmidt-Cassegrain · 1500mm focal length · Single-arm GoTo alt-az mount · SkyPortal Wi-Fi

The 6SE is the definitive ISS telescope. Its 150mm aperture hits the sweet spot for ISS detail, and the NexStar GoTo mount connects to SkySafari Pro for full automatic ISS tracking. At 100–150×, you will clearly see the solar array cross-structure. At 200× on a steady night, individual panel pairs and the main truss are distinct. The compact SCT optical design means minimal tube movement when you nudge the mount during tracking.

Celestron NexStar 5SE computerized telescope

Budget GoTo Pick

Celestron NexStar 5SE

125mm f/10 SCT · 1250mm focal length · GoTo alt-az mount · SkyPortal Wi-Fi

The 5SE brings GoTo ISS tracking to a lower price point. At 100× you will see the solar array structure clearly. The 125mm aperture is not as bright or sharp as the 6SE’s 150mm, but for ISS viewing — a magnitude −4 target — aperture is not the limiting factor. Tracking is.

Celestron NexStar 8SE computerized telescope

Premium Pick

Celestron NexStar 8SE

203mm f/10 SCT · 2032mm focal length · GoTo alt-az mount · SkyPortal Wi-Fi

If you want to photograph the ISS as well as observe it visually, the 8SE’s 203mm aperture and 2032mm focal length deliver serious image scale. At 200× with app-assisted tracking, the ISS fills roughly 6° of apparent field — you will see individual module silhouettes and the solar array rotation. The trade-off is that the longer focal length demands more precise tracking and a steadier atmosphere.

Note: A manual Dobsonian or alt-az refractor works for ISS observing — many observers get excellent views. The GoTo advantage is removing the skill barrier so you can focus on the view rather than the chase.

8 Practical Tips for Better ISS Observations

🎯

Pre-focus on a bright star first

Focus on a star near the ISS pass track 5 minutes before the pass. At 100×, there’s no time to focus once the ISS appears — you’ll lose it.

📒

Use a red-dot finder, not a cross-hair

Red-dot finders let you track the ISS with both eyes open. A cross-hair finder narrows your field of view too much when chasing a fast-moving target.

🌞

Target passes above 45° elevation

Higher passes = shorter distance to ISS = larger apparent size and better image quality. On a zenith pass, the ISS is at 408 km. On a 20° pass, it’s over 1,100 km away and appears 2.7× smaller.

🧠

Note which direction to rotate the scope

The ISS always travels in a generally W→E direction (prograde orbit). Knowing this before the pass starts means you’re never confused about which way to swing the tube.

📷

Try video at prime focus

A planetary camera or smartphone adapter at prime focus at 50× produces stunning video stills that reveal structural detail even shaky manual tracking obscures. Software like AutoStakkert! stacks the sharpest frames.

🕑

Allow 3 practice passes before judging

ISS tracking is a physical skill. Your first pass will be chaotic. By the third pass, most observers can consistently keep the ISS in a 1° field for 4–6 seconds at a time.

🌎

Check seeing conditions first

Atmospheric turbulence (poor seeing) kills fine ISS detail as much as it affects planetary viewing. Check Clear Outside or Meteoblue seeing forecasts before your session.

ISS flares and tumbling behaviour

The ISS occasionally produces dramatic brightness flares (up to magnitude −4 or brighter) as its solar panels catch the sun at optimal angles. Heavens-Above predicts these. During a flare, the ISS is dazzling even through a 70mm telescope.

Frequently Asked Questions

How fast does the ISS move across the sky?

On a high overhead pass, the ISS covers roughly 0.5° per second at peak speed. A good overhead pass takes about 5–6 minutes from first appearance to disappearance in Earth’s shadow. Low-horizon passes travel more slowly but the ISS appears smaller due to the greater slant distance.

Can I see the ISS with a cheap department-store telescope?

Yes, at low power (25–40×). A 60–70mm refractor on a shaky alt-az mount will show the ISS as a bright elongated cross — the structure is visible but not detailed. The bigger limitation is the mount’s stability during tracking, not the optics. If your scope wobbles when you touch it, tracking the ISS at any useful magnification becomes extremely difficult.

Do I need a tracking mount to see the ISS?

No — you can track it manually and many observers prefer manual tracking once they’ve practiced. But a GoTo mount with TLE-based tracking (NexStar SE + SkySafari Pro) is dramatically easier and allows higher magnifications. Without GoTo, ISS tracking above 100× requires considerable skill.

Can you photograph the ISS through a telescope?

Yes — and the results can be extraordinary. The best ISS images are taken in video mode with a planetary camera (ASI224MC, ZWO ASI585MC) at prime focus of a 150–200mm SCT, then stacked frame-by-frame. Single-frame photos with a DSLR also work. The challenge is tracking: video captures hundreds of frames in a few seconds so the sharpest can be selected and stacked even with imperfect tracking.

Is the ISS visible from every location on Earth?

Almost. The ISS orbits at 51.6° inclination, which means it passes over every location between about 52°N and 52°S latitude — this covers the vast majority of the world’s population. Observers at high latitudes (northern Canada, Scandinavia, far southern Argentina/Chile) may see it in summer but not winter, or only low on the horizon.

Related Guides