7 Telescope Buying Mistakes Every Beginner Makes (And How to Avoid Them)
Telescope Advisor Logo Telescope Advisor
Starry night sky — know what to look for before buying your first telescope

Telescope Buying Guide · Beginner Advice

7 Telescope Buying Mistakes Every Beginner Makes

Most first telescopes end up gathering dust within six months. Not because astronomy is hard — but because these seven buying mistakes turn an exciting hobby into a frustrating one. Here’s every mistake, why it happens, and exactly how to sidestep each one before you spend a penny.

7

Critical mistakes

#1

Magnification hype

Aperture

The spec that really matters

All

Easily avoidable

By Telescope Advisor Editorial Team Published: Updated: Editorial Standards

Astronomy is one of the most rewarding hobbies on the planet. But the telescope industry has a dirty secret: a huge proportion of first scopes are sold on misleading specifications that almost guarantee a bad first experience. The good news is that every single one of these mistakes is avoidable once you know what to look for. Read this before you buy anything.

Quick-scan summary

  1. Buying on maximum magnification
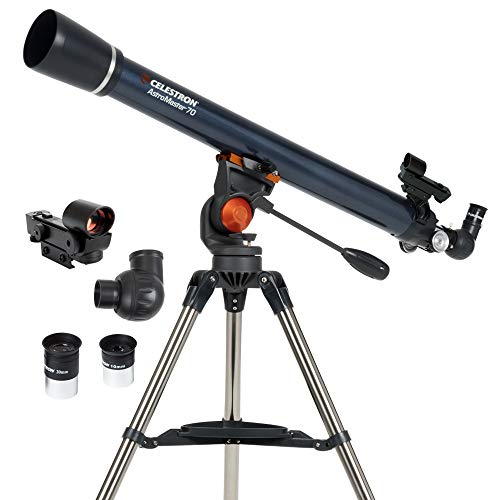
  2. Choosing the wrong mount type
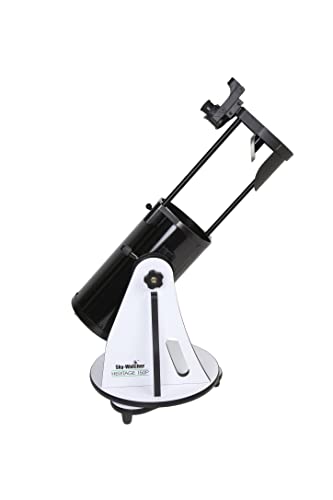
  3. Ignoring aperture — the only spec that really matters
  4. Not knowing what you want to observe
  5. Expecting Hubble views from city skies
  6. Skipping thermal equilibration on the first night
  7. Buying accessories before mastering the basics
1

Buying on Maximum Magnification

The trap: Box says “525× magnification!” You picture incredible close-ups of Saturn. You buy it. First night: dim, blurry, shaky mess at anything above 50×. The scope collects dust by month two.

Maximum magnification printed on telescope boxes is almost entirely a marketing number. It describes what is technically achievable under perfect lab conditions — not what is useful on a real night. A 60mm scope claiming 525× has a maximum useful magnification of around 120×. Beyond that, you are just enlarging a blurry, dim image — no additional detail appears.

The rule of thumb: maximum useful magnification = roughly 50× per inch of aperture (or 2× per mm). A 60mm scope caps at ~120×. A 130mm scope caps at ~260×. Any number above that is “empty magnification.”

❌ Avoid

  • • Any telescope advertised primarily by its maximum magnification
  • • “525×”, “450×” claims on scopes smaller than 100mm
  • • Scopes that include a 3mm or 4mm eyepiece as the “high-power” piece

✓ Instead look for

  • • The aperture (mm) listed first and prominently
  • • Two included eyepieces: 25mm and 10mm is a healthy starting pair
  • • A focal length figure (not just a magnification claim)

Further reading: Aperture vs Magnification — which matters more?

2

Choosing the Wrong Mount Type

The trap: Equatorial mounts look impressive and professional. So beginners buy them. Three sessions of wrestling with polar alignment and confusing dual-axis motion later, the scope is in the back of a cupboard.

There are two main mount types: altazimuth (up/down, left/right — intuitive, beginner-friendly) and equatorial (aligned with Earth’s axis for tracking, complex to set up). Equatorial mounts are genuinely useful for astrophotography and high-power planetary work — but they have a steep learning curve that kills enthusiasm for absolute beginners.

Mount Type Best For Learning Curve Beginner Verdict
Altazimuth Casual visual observing, Moon, planets, star-hopping Very low — point and look Best choice
Dobsonian (alt-az) Maximum aperture per dollar, visual deep-sky Very low — push and look Best choice
Equatorial (manual) Tracking planets over time, some visual work Medium — polar alignment required Intermediate
GoTo (computerised) Automatic slewing, astrophotography, impatient beginners Medium — alignment star setup Optional, pricier

The fix

Start with an altazimuth or Dobsonian mount. You’ll spend your sessions looking at objects, not fighting axes. Add an equatorial mount once you’ve built the observing skills that make it worthwhile.

3

Ignoring Aperture — The Only Spec That Truly Matters

The trap: A beautiful, slender 60mm refractor on a glossy tripod looks like a “proper” telescope. The stubby 130mm reflector next to it for the same price looks clunky. The 130mm will show 3.5× more light and significantly finer detail every single session. Most beginners buy the prettier one.

Aperture — the diameter of the main lens or mirror — controls two things: how much light the telescope collects and how much fine detail it can resolve. Both scale with aperture. Nothing else in the spec sheet substitutes for it.

60–70mm

Entry level

Moon, Saturn rings, Jupiter moons. Tight limit.

100–130mm

The sweet spot

Cassini Division, planetary detail, clusters, nebulae. Best budget choice.

150mm+

Serious

Galaxies, globulars resolved, fine planetary detail. Higher cost.

The fix

Given a fixed budget, always choose the larger aperture — even if the mount is simpler, the tube is shorter, or the scope is less glamorous. A 130mm Dobsonian will outperform a 70mm refractor every night, regardless of every other spec.

Further reading: Aperture vs magnification: the full breakdown

4

Not Knowing What You Want to Observe Before You Buy

The trap: Buying a short, fast f/5 Dobsonian primarily because you want sharp planet views — when a longer focal ratio refractor would serve that goal much better. Or buying a long f/12 refractor hoping to see faint galaxies across the sky — a job that needs aperture, not focal ratio.

Different observing goals genuinely call for different telescope designs. This is not a minor detail — buying the wrong type of telescope for your goal is as important a mistake as buying the wrong size.

🌌 Primarily planets & Moon

  • Long focal ratio (f/8–f/15) — sharp planetary images
  • Refractor or Maksutov-Cassegrain — crisp contrast
  • 70mm–127mm is plenty for visual planetary work
  • Short f/5 Newtonians — fine but harder on cheap eyepieces

🔮 Primarily deep-sky objects

  • Large aperture first — 130mm+ makes a huge difference
  • Short focal ratio (f/5–f/6) — wide field, bright images
  • Dobsonian gives max aperture for the money
  • Long focal ratio refractors — small field, limited aperture

The fix

Before buying, spend one clear night with free apps (Stellarium, SkySafari) or binoculars exploring the sky. You’ll quickly discover whether the Moon and planets or faint fuzzy nebulae and clusters excite you most. That preference should drive your choice. Not sure? A 100–130mm short-tube Newtonian is the best all-rounder — it handles both goals reasonably well.

5

Expecting Hubble-Quality Views from City Skies

The trap: You set up in the back garden, point at Andromeda, and see a barely-there smudge instead of the glorious spiral galaxy from every magazine photo. Disappointment sets in. The scope gets put away.

Those stunning nebula and galaxy images you’ve seen are long-exposure photographs combining hours of light collection and digital processing. Your eye, looking through an eyepiece in real time, cannot replicate that. Light pollution from a city background further washes out faint objects. This is not a telescope failure — it’s a mismatch of expectations.

✅ Great from any city

  • • The Moon (unaffected by light pollution)
  • • Planets (Jupiter, Saturn, Venus, Mars)
  • • Double stars — colour contrast is striking
  • • Bright open clusters (Pleiades, Beehive)

~ Suburban skies needed

  • • Orion Nebula (M42) — visible, but muted
  • • Andromeda Galaxy — oval glow, no structure
  • • Globular clusters (M13)

✖ Dark skies required

  • • Faint galaxies beyond Andromeda
  • • Emission nebulae (Veil, Rosette)
  • • Milky Way star clouds and dark lanes

The fix

In your first months, focus entirely on solar system objects. The Moon, Saturn, and Jupiter are spectacular from city centres and will hook you on the hobby far more reliably than chasing faint fuzzies you can barely detect. Once comfortable with your equipment, plan occasional trips to darker skies for the deep-sky targets.

6

Skipping Thermal Equilibration on the First Night

The trap: Your new telescope arrives. You immediately set it up outside, look at Jupiter, and see a shimmering, detail-free blob. You assume the scope is defective. You box it up for a return. But nothing was wrong — the optics were just warm.

Telescope mirrors and lenses stored indoors are warmer than the night air outside. When placed outdoors, warm air currents rise off the glass and the tube walls, creating turbulence inside the telescope that ruins image sharpness at any magnification above about 40×. This is called “tube currents,” and it goes away once the scope reaches the same temperature as the air around it.

🕐 Cooldown times by aperture

60–80mm refractor 20–30 min
100–130mm reflector 30–45 min
150–200mm reflector 45–90 min
200mm+ Dobsonian 90–120 min

✓ The fix

  • • Put the scope outside 30–60 minutes before you plan to start observing
  • • Keep the caps on during cooldown to protect optics from dew
  • • Start with low-power wide views (Moon, star clusters) while the scope equilibrates
  • • Increase magnification only once you see sharp, stable star images

This is especially important for large reflectors and SCTs. Open-tube Dobsonians equilibrate faster than closed-tube Cassegrains.

7

Buying Accessories Before Mastering the Basics

The trap: Week two. You’ve had two sessions. Now you’re buying a Barlow, a Moon filter, three new eyepieces, a laser collimator, and a red-dot finder. £150 later, the scope still wobbles on the same mount. Nothing improved.

Accessories are real upgrades — once you have the fundamentals right. But beginners often accessorise before they have solved their actual problems: a shaky mount, the wrong eyepiece choice, or simply not knowing the sky well enough to find objects reliably. Money spent on accessories before those basics are sorted is usually wasted.

✖ Skip in your first 3 months

  • More eyepieces — your included 25mm + 10mm covers 90% of sessions
  • Barlow lens — only useful once you have aperture to support it
  • Motorised tracking — learn to find objects manually first
  • Filters (except Moon filter) — faint broadband filters are marginal from city skies

✓ Worth it from day one

  • Stellarium / SkySafari app — free, transforms your ability to find objects
  • Red torch — preserve dark adaptation while reading charts
  • Moon filter — cheap, immediately useful at full Moon
  • A printed sky atlas (Pocket Sky Atlas) — works when your phone battery dies

The fix

Commit to 10 observing sessions with only what came in the box. Learn the sky. Learn the eyepieces. After 10 sessions, you’ll know exactly what’s missing — and you’ll spend any accessory budget on something you actually need.

The Scope That Avoids All Seven Mistakes

If you want one recommendation that side-steps every trap above: the Sky-Watcher Heritage 130P. Large aperture, simple Dobsonian alt-az mount, fast setup, no equatorial complexity, no magnification hype — just crisp views from the first session.

Editor’s Pick — Avoids Every Mistake on This List
Sky-Watcher Heritage 130P Tabletop Dobsonian

Sky-Watcher Heritage 130P Tabletop Dobsonian

130mm parabolic mirror on a push-to altazimuth Dobsonian rocker. Sets up in under 5 minutes. No polar alignment. No magnification hype on the box — just a 650mm focal length and two honest eyepieces. The specs that matter (aperture, focal ratio, mount simplicity) all score highly.

  • 130mm f/5 parabolic mirror — 3.5× more light than 70mm
  • Altazimuth Dobsonian — zero alignment, push and look
  • Collapsible tube — setup under 5 minutes
  • 25mm + 10mm eyepieces included — sensible pair
Celestron AstroMaster 70AZ refractor

Celestron AstroMaster 70AZ — Budget Pick

If a compact refractor better suits your space or budget, the AstroMaster 70AZ gives an honest 70mm aperture with a no-tool altazimuth mount. Smaller than the Heritage but avoids every major mistake: real specs, sensible mount, no misleading magnification claims.

Not sure which telescope is right for you?

Answer 5 quick questions and our telescope finder will recommend the best match for your budget, goals, and experience level — avoiding every mistake on this list automatically.

Use the Telescope Finder Tool →

Frequently Asked Questions

What is the single most common telescope buying mistake?

Buying on maximum magnification. It is the headline number on almost every entry-level scope box, it sounds impressive, and it is almost meaningless. A 60mm scope claiming 525× has a practical useful limit of around 120×. Beyond that you get dim blur, not more detail. Focus on aperture first.

Is an equatorial mount better than an altazimuth for beginners?

No. Equatorial mounts require polar alignment and have a counterintuitive dual-axis motion. For visual observing in your first year, an altazimuth or Dobsonian mount is vastly easier, more enjoyable, and gets you to the eyepiece faster. Equatorial mounts pay off once you understand the sky well and want to track objects or do astrophotography.

How much should I spend on a first telescope?

£120–£200 / $130–$250 is the sweet spot where you get a genuine instrument without overspending before you know your observing preferences. Below £80 you risk the quality problems this guide describes. Above £300 is worth it if you are certain of your interest — but the $200 zone is where most astronomers recommend starting.

Should I buy a GoTo computerised telescope as a beginner?

Only if budget allows and you have a specific reason (physical mobility issues, very limited time per session). GoTo telescopes require an alignment procedure before use, and beginners who skip the manual star-finding phase often miss developing the sky knowledge that makes observing deeply rewarding. Many experienced astronomers still prefer manual scopes for visual observing.

Why does everything look blurry through my new telescope?

Three most common causes: (1) The scope hasn’t thermally equilibrated — take it outside 30–45 minutes before observing. (2) The focuser isn’t at the right position for your eye — focus slowly from one extreme to the other. (3) You’re using too much magnification for the atmospheric conditions — try your 25mm eyepiece first and only increase from there.

Is a reflector or refractor better for a first telescope?

At the same price, a reflector (mirror-based) typically gives more aperture for the money — which matters more than the optical design for a beginner. A 130mm reflector shows significantly more than a 70mm refractor at the same budget. Refractors require no collimation and are robust; reflectors need occasional minor collimation. Both designs work well when properly set up.