Best Portable Telescopes for Travel (2026): Top 5 Ranked + Buyer Guide
Telescope Advisor Logo Telescope Advisor
Travel telescope setup under a dark night sky

Buying Guide · 2026

Best Portable Telescopes for Travel (2026): Top 5 Picks That Are Actually Easy to Use

Travel astronomy is a different problem from backyard astronomy. You need fast deployment, small packed footprint, stable enough mechanics, and useful optics under unknown skies. This guide ranks truly portable telescopes by what matters in field use, not just spec-sheet claims.

5

Travel-ready picks

One-trip carry

Core requirement

Fast setup

10-15 min target

Dark-sky gain

Portable wins

By Telescope Advisor Editorial Team Published: Updated: Editorial Standards

What Is the Best Portable Telescope for Travel? (Quick Answer)

For most travelers, the best portable telescope in 2026 is the Sky-Watcher Heritage 130P. It delivers a serious 130mm aperture in a compact collapsible format that fits car trips, weekend dark-sky runs, and many apartment storage limits. It offers far more deep-sky capability than ultra-small refractors while staying genuinely transportable.

If you prioritize ultra-light packing and daytime dual use, the Celestron C90 Mak is a strong option. If you want full automation and easy sharing, Seestar S50 is a compelling travel-smart telescope. The right choice depends on how you travel: carry-on, car trunk, balcony-to-car portability, or flight-friendly minimal kits.

How This Page Avoids Duplicating Existing Content

This page targets travel portability intent, which is distinct from your existing budget, beginner, and apartment pages. The core decision axis here is transport constraint first, optical class second. Existing pages focus on budget tiers or location use (apartment/city); this guide focuses on packed size, carry profile, setup speed, and field robustness for trips.

PagePrimary IntentMain Decision Axis
Best Telescopes for BeginnersStarter all-around buyingEase and value
Best Telescope for Apartment BalconySmall-space city useStability and footprint
Best Portable Telescopes for Travel (this page)Travel-ready gear selectionPacked size, carry profile, setup in the field

Top 5 Portable Travel Telescopes (Ranked)

Editor's Pick — Best Travel Value
Sky-Watcher Heritage 130P

1) Sky-Watcher Heritage 130P

Best mix of aperture and portability. Collapsible tube plus tabletop Dob base keeps transport easy while still providing meaningful deep-sky capability at dark sites.

View on Amazon →
Celestron C90 Mak

2) Celestron C90 Mak

Ultra-compact optical tube with strong lunar and planetary performance. Excellent for travelers who need minimal packed volume and quick setup.

View on Amazon →
Celestron Travel Scope 70

3) Celestron Travel Scope 70

True budget travel scope. Light and simple, best for Moon, bright planets, and casual trips where weight matters more than deep-sky reach.

View on Amazon →
Celestron NexStar 5SE

4) Celestron NexStar 5SE

Portable GoTo option for travelers who want tracking and quick target acquisition. Strong for mixed city/hotel/dark-site observing workflows.

View on Amazon →
ZWO Seestar S50

5) ZWO Seestar S50

Best travel-smart telescope for app-driven imaging and easy sharing. Performs especially well when travel skies are brighter than expected.

View on Amazon →

Portable Telescope Packing Framework

Choose your telescope based on transport mode, not just optical preference:

Carry-on Priority

Favor compact OTAs like C90 Mak or small refractors. Keep accessory kit minimal and robust.

Car Trip Priority

Heritage 130P class shines here. More aperture while still practical for one-trip setup.

Fast Session Priority

GoTo or smart workflows can rescue short trip windows where setup time dominates.

Choose by Travel Profile, Not by Marketing Category

Most buyers fail at travel telescope selection because they shop by label instead of logistics. A telescope described as "portable" may still be awkward in a real trip workflow if it requires too many pieces, takes too long to stabilize, or needs a large support surface that your destination cannot provide. The better method is to map your observing style to a travel profile and then buy for that profile's constraints.

For example, a weekend road-trip observer with a hatchback and a dark-sky destination can comfortably use a Heritage 130P class instrument and gain significant deep-sky performance. A flight traveler with strict carry-on limits and mixed city-hotel observing windows may be better served by a C90 Mak or a smart telescope workflow that trades visual depth for reliability in short sessions. A family traveler with children often needs ultra-fast setup and robust handling more than peak optical capability.

Travel Profile Typical Constraint Best Telescope Type Why It Works
Car camping observerSpace available, setup time moderateTabletop Dobsonian (130mm class)Best aperture-to-bulk ratio for dark-sky results
Carry-on travelerStrict volume and weight limitsCompact Mak or small refractorPredictable packing and quick deployment
City hotel travelerLimited sky windows, short sessionsSmart telescope or compact GoToHigh success rate when time is scarce
Family trip observerLow patience for complex setupSimple refractor or smart scopeFast, repeatable sessions with fewer failure points

Portable Optics Reality: What You Gain and What You Give Up

A portable telescope is always a negotiation between aperture, focal length, mount stability, and transport friction. The practical question is not "Which portable telescope is strongest?" The right question is "Which portable telescope will I set up often enough to beat a theoretically better scope that stays home?" In real life, consistency beats peak capability.

Small refractors are often easiest to carry and very forgiving mechanically, but they cap deep-sky brightness quickly. Compact Maksutov designs are excellent for Moon and planets in tiny packages, though narrower fields can make target acquisition slower for beginners. Tabletop Dobsonians deliver dramatic aperture value and are often the best visual compromise when you can carry a base and find a stable surface. Compact GoTo and smart options improve success rates under imperfect conditions but require power discipline and some software familiarity.

The biggest hidden trade-off in travel astronomy is not optics, it is context loss. At home, you can wait for excellent seeing and ideal setup conditions. On trips, you observe when weather, timing, and location allow. A slightly smaller scope that starts in 3 minutes often outperforms a larger one that needs 20 minutes plus assembly confidence after a long day of travel.

Field Setup Workflow for Travel Nights

Travel sessions fail most often during setup. Treat setup as a repeatable workflow and your hit rate rises immediately. Use this five-stage routine at every destination, whether you are at a roadside turnout, a rental cabin, or a city balcony.

  1. Site scan first: Identify local lights, obstructions, and the safest observing zone before unloading gear.
  2. Base stability check: Confirm your support surface does not wobble under light pressure.
  3. Finder alignment refresh: Realign quickly on a bright terrestrial or twilight target if transport may have shifted alignment.
  4. Target sequence planning: Start with easy bright targets to validate focus and tracking behavior.
  5. Session shutdown discipline: Cap optics immediately after observing to reduce moisture and dust risk.

This workflow sounds basic, but it prevents the classic spiral where observers spend the first 30 minutes fighting avoidable mistakes. On travel nights, confidence and speed are part of optical performance because your useful observing window is usually short.

Minimal Accessory Kit That Actually Improves Travel Observing

A travel telescope should not become a heavy accessories project. The best kit is intentionally small and selected for reliability under fatigue and time pressure. Most travel observers only need a compact core set that solves focus range, comfort, and dew basics.

Core Kit (High Priority)

  • Two eyepieces with clear roles: low-power wide field and medium-power detail.
  • Simple red flashlight to protect dark adaptation during setup checks.
  • Lens cloth and blower for dust management during transport-heavy nights.
  • Small dew strategy (shield or compact heater) in humid destinations.

Conditional Kit (Use Case Driven)

  • Power bank/cable set for GoTo or smart setups.
  • Basic observing chair or pad for longer sessions at low altitudes.
  • Notebook/app target log for building repeatable trip routines.
  • Collimation tool for collapsible Newtonian travel users.

The objective is not to carry everything; it is to eliminate the two or three failure points that end sessions early. Travelers who keep accessories minimal but purposeful tend to observe more often and with less frustration.

Transport Protection and Mechanical Longevity

Travel telescopes experience more vibration cycles, impact risk, and thermal swings than home setups. Long-term performance depends heavily on how you transport and store gear between sessions. Most optical complaints blamed on quality are actually transport process failures.

Use soft shock isolation inside bags or bins and prevent free movement of heavy components. Keep optics capped during all transfers. Never leave scopes in hot vehicles for extended periods if avoidable, especially adhesive-heavy accessories and battery-powered units. For collapsible designs, check alignment more frequently and treat re-collimation as routine maintenance rather than a defect signal.

After each session, dry down before sealing gear. Moisture trapped in transport bags is one of the fastest paths to mold, coating issues, and corrosion. A disciplined 10-minute post-session routine protects your investment better than most paid accessories.

Travel Target Strategy: High-Confidence Wins First

Portable observing is usually lower margin than backyard observing, so target strategy matters. Start each session with high-confidence objects that validate focus, stability, and seeing. Then move to medium-difficulty targets once your system behavior is confirmed. This sequence improves morale and reduces wasted clear-sky time.

Stage 1: Fast Validation

Moon, Jupiter, Saturn, bright stars. Confirm alignment and focus quickly.

Stage 2: Confidence Targets

Pleiades, Beehive, Orion Nebula (seasonal), bright doubles.

Stage 3: Stretch Goals

Globulars, galaxies, smaller planetaries when sky and seeing allow.

A staged approach also makes comparison shopping easier over time. When you consistently fail at the same stage despite good conditions, you have evidence for your next upgrade choice.

Common Travel Telescope Buying Mistakes

  1. Buying for aspiration, not logistics: If your intended setup routine does not match your actual trip routine, the scope will be underused.
  2. Ignoring support surface needs: Tabletop designs are powerful but require a stable platform plan.
  3. Overpacking accessories: Heavy kits reduce mobility and increase setup friction.
  4. No power strategy: Smart and GoTo users need power discipline as part of trip planning.
  5. No target order: Random object selection early in the night causes preventable frustration.
  6. Treating every trip as a deep-sky night: Urban travel nights often reward Moon/planet workflows more.

Avoiding these mistakes produces a bigger performance gain than chasing small spec differences between similar telescopes. The best travel scope is the one that repeatedly turns short, imperfect opportunities into successful observing sessions.

90-Day Portable Astronomy Improvement Plan

If you are serious about getting better outcomes from travel astronomy, treat the next three months like a practical training block. This turns your telescope from a novelty item into a reliable tool.

Month 1: Standardize setup and teardown. Use the same sequence every night and log how long each stage takes.

Month 2: Build a stable target library for three sky quality levels: city, suburban, dark site.

Month 3: Optimize your kit by removing items you never use and adding one upgrade that solves your most frequent failure point.

By the end of this cycle, your scope choice becomes clearer as well. You will know whether you need more aperture, better portability, more automation, or simply better observing process. That clarity prevents expensive, impulse-driven upgrades.

Destination Playbooks: How to Adapt the Same Telescope to Different Trips

A powerful way to increase travel observing success is to stop changing equipment for every trip and instead change operating playbooks. The same portable telescope can perform very differently depending on destination profile, local lighting, temperature swings, and session duration. Build a repeatable playbook for each destination type and you will extract better outcomes without constant new purchases.

Dark-site car trip playbook: prioritize aperture deployment and target depth. Arrive before sunset, pre-stage equipment, and begin with quick validation targets while twilight fades. Use the first hour for medium-bright objects to stabilize workflow, then move to fainter targets once your eyes and process are fully adapted. In this scenario, tabletop Dobsonian class instruments are often dominant because they maximize visual return per transported volume.

Urban hotel playbook: prioritize fast, low-friction observations and reliable outcomes. Focus on Moon, planets, bright doubles, and selected bright clusters. Use short target sequences that can survive interruptions from travel schedules. Here, compact Maks and smart telescopes often produce the most repeatable results because they perform well with limited sky windows and limited setup surfaces.

Mixed-family vacation playbook: prioritize shareability and setup speed over pure technical performance. Keep sessions short and intentional. Choose two high-confidence targets and one optional challenge target. If family members are observing with you, use lower to medium magnification to keep object acquisition simple and field drift manageable. The goal is not maximum target count; it is maximum positive experience per session.

Quick roadside stop playbook: prioritize stability and safety first. Select one object category in advance and avoid complex target hunting. If your setup requires a table, ensure the platform is safe and non-vibrating before opening accessories. Use this mode for confidence-building targets rather than difficult star hops. Many observers overreach in this context and then conclude incorrectly that their telescope underperforms.

Complete Buyer Brief: How to Make the Right Travel Telescope Decision in One Pass

Use this decision brief when you want one final answer without reopening dozens of tabs. Start by writing down your transport limits in plain terms: how often you fly, whether your scope must fit carry-on dimensions, whether you can carry a tabletop base, and how many minutes of setup you can tolerate after a long day. These factors are more predictive of satisfaction than any single optical specification.

Next, define your real target mix. If 70% of your sessions are Moon and planets from bright locations, a compact planetary-focused setup can be a superior choice to a larger but more cumbersome deep-sky instrument. If your travel patterns include regular dark-site trips by car, aperture per volume becomes more important and the balance shifts toward compact Dobsonian classes. If your observing windows are unpredictable and short, automation can produce more actual target time even if visual depth is lower.

Then evaluate operational overhead. Every scope has overhead: some require collimation checks, some require power management, some require stable support surfaces, and some require app fluency. There is no overhead-free option. The right purchase is the one whose overhead you can execute consistently under travel fatigue. A telescope with theoretically better optics is not better if your workflow breaks down before first target acquisition.

After that, build a "failure map" before you buy. Ask where your sessions are most likely to fail: setup complexity, power reliability, target finding, vibration, or storage friction. Pick the telescope that directly reduces your biggest failure mode. This approach outperforms brand-first shopping because it aligns equipment choice with behavioral reality. It also protects you from buying for rare ideal nights and underpreparing for common imperfect nights.

Now test affordability through usage economics, not price tag alone. A lower-cost scope that you use twice a year is more expensive per successful session than a mid-tier scope you use twice a month. Calculate value as cost per meaningful observing night over 12 months. Include practical accessories required to make your workflow stable. This quickly exposes whether a "cheap" option is truly economical or merely low-cost at checkout.

Also plan your first 10 sessions in advance. If your first sessions fail, you may underuse even the right equipment. Start with a target ladder, fixed setup routine, and minimal accessory set. Early wins create usage momentum, and usage momentum is the strongest predictor of long-term satisfaction. Portable astronomy rewards consistency more than gear churn.

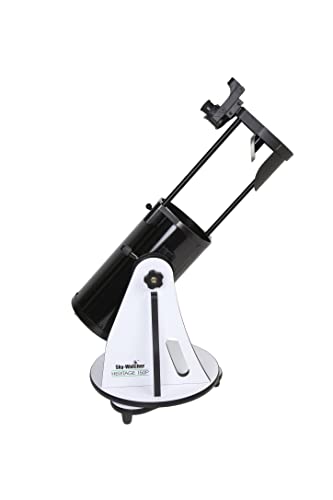
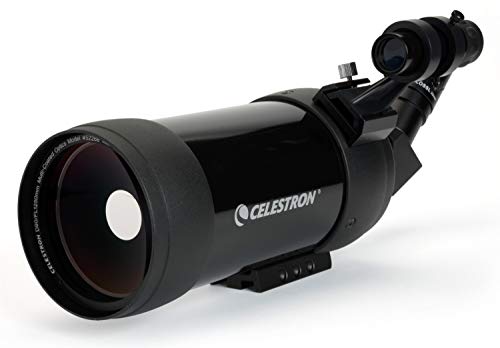
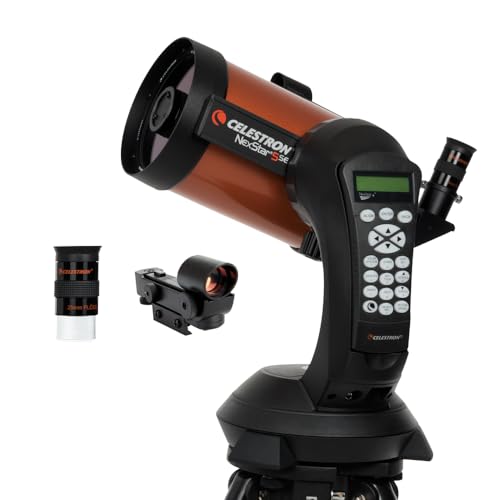
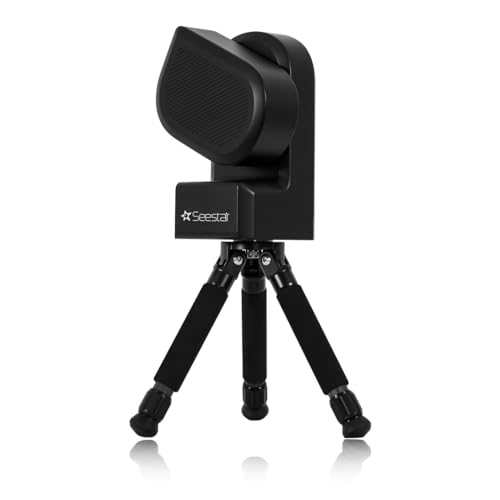
For most readers, the decision summary is straightforward. Choose a Heritage 130P class option when you want the strongest visual performance in a still-manageable travel package and you can support a tabletop workflow. Choose a compact Mak like C90 when compactness and quick deployment dominate your constraints, especially for Moon and planetary emphasis. Choose a smart telescope path when your highest priority is easy capture and sharing during short, uncertain windows.

Finally, commit to a process window before judging your purchase. Run at least 8 to 10 sessions with the same workflow before deciding you chose incorrectly. Most dissatisfaction in travel astronomy is process instability disguised as equipment failure. If you optimize process first, your chosen telescope often performs better than expected. If you still hit a hard ceiling after consistent use, your upgrade path will be evidence-based rather than impulse-driven.

Pre-Trip Checklist for Consistent First-Light Success

Use this checklist 24 hours before departure. It prevents the classic travel telescope failure where clear skies appear but a missing cable, misaligned finder, or forgotten cap ends the session early.

  • Mechanical check: confirm all knobs, clamps, and joints tighten correctly and move smoothly.
  • Optical check: inspect objective/mirror surfaces for obvious dust, moisture, or cap damage.
  • Finder confirmation: perform a daylight alignment test so nighttime acquisition starts fast.
  • Accessory pairing: pack eyepieces by role (acquisition/detail) rather than by random focal length order.
  • Power readiness: verify battery level, cables, and charging options if using GoTo or smart workflow.
  • Target shortlist: pre-select 5 to 7 objects matched to destination sky quality.
  • Weather fallback: define a moon/planet backup plan if transparency is poor.

A checklist may feel simple, but it directly improves usable observing time. Travel sessions are constrained by fatigue, schedule, and environment. Eliminating preventable setup failures gives your telescope a fair chance to perform at its real level.

Frequently Asked Questions

What is the best portable telescope for travel in 2026?

For most buyers, the Sky-Watcher Heritage 130P remains the best overall travel value because it balances meaningful aperture with practical portability.

Can a portable travel telescope see Saturn and Jupiter clearly?

Yes. Good portable telescopes can show Saturn's rings and Jupiter's cloud bands under decent seeing with suitable eyepieces.

Is aperture or portability more important in a travel telescope?

Portability comes first for most travelers. A slightly smaller scope used often is better than a larger scope you avoid bringing.

Is the Seestar S50 worth it for travel astronomy?

For many travelers, yes. Seestar S50 is especially useful when you want quick setup, app-based operation, and easy sharing from bright or mixed-sky locations.