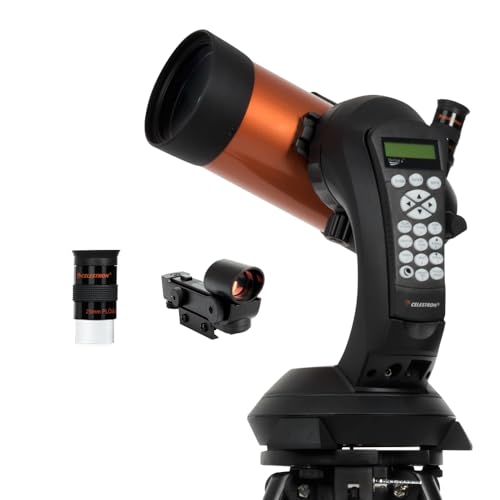
4-Inch Neptune Field Handbook: End-to-End Session Playbook
This handbook is for observers who want repeatable success, not one lucky detection. Neptune sessions fail when planning, locating, and confirming are treated as one step. They are three separate jobs with different tools and different failure modes. Your map work, optical settings, and verification rules should be prepared before darkness, not improvised at the eyepiece. A 4-inch telescope has enough capability to show Neptune's disk, but only if you remove avoidable uncertainty from the process.
Start with planning the right sky window. Neptune is high-value only when it is high enough above your horizon and far enough from bright moonlight contamination. If the Moon is bright and nearby, contrast loss can make initial location surprisingly slow. Use moonless windows when possible and prioritize nights with above-average transparency over nights with only average transparency and excellent seeing. Neptune verification begins with finding the right field quickly; transparency directly affects that step.
Pre-session star map preparation should include two anchor routes, not one. Route A is your primary star-hop from obvious stars to the Neptune field. Route B is a fallback path in case clouds remove one anchor region. Many observers lose time because they know only one route. If that route is blocked by haze or low cloud, the whole session stalls. With two prepared routes, you can pivot instantly and preserve your best dark-adapted interval.
Your eyepiece sequence also needs to be fixed in advance. Use low power for field acquisition, then medium power for candidate verification, then moderate-high power only if the image remains stable. Do not bounce between random eyepieces. Every unnecessary swap increases mechanical disturbance and decision fatigue. A fixed sequence keeps your focus process consistent and lets you compare results from session to session.
A practical confidence framework is helpful: identification confidence, disk confidence, and repeat confidence. Identification confidence means your candidate matches chart position in the expected star geometry. Disk confidence means the object behavior at medium power is less stellar than nearby points. Repeat confidence means you can relocate the same target after stepping away, changing eyepieces, or returning later in the session. If any one confidence layer is missing, do not log the observation as final yet.
Another underused method is controlled defocus comparison. Slightly defocus Neptune candidate and nearby stars at the same power. The way light spreads can differ subtly for planetary disk versus star point under stable seeing. This is not a standalone proof, but it can support disk confidence when combined with chart position and repeat detection. Use this carefully and return to proper focus for final verification.
If your mount has tracking, use it to stabilize visual interpretation, not to skip chart discipline. Tracking helps your eye integrate subtle differences across time, especially with tiny targets. But tracking cannot tell you whether you centered the correct object initially. Good Neptune sessions combine old-school pattern matching with modern mount convenience. Over-reliance on one without the other usually causes either false positives or unnecessary search time.
In suburban conditions, consider an observation timing wedge: begin with low-power acquisition before local lights reach full night glare adaptation threshold, then switch to verification once your eyes settle. Some locations improve later in the night as local thermal plumes drop; others worsen from humidity rise. Track your local pattern over multiple sessions. Site-specific knowledge gives bigger gains than one-time accessory purchases.
For observers struggling to confirm disk shape, use comparison targets as training. Uranus can appear slightly easier in some seasons and can train your eye for subtle planetary non-stellar signatures. Once your eye learns that signature, Neptune confirmation becomes faster. This is not cheating; it is targeted visual training, similar to using bright doubles before difficult splits.
Record objective session metrics: start time, transparency estimate, seeing estimate, first candidate time, first disk-confidence time, and final confidence level. Over five to ten sessions, patterns emerge quickly. You may discover that your best Neptune results happen at lower power than expected, or only after a certain local hour when roofs cool. These patterns are actionable and can transform inconsistent observing into routine success.
Do not chase detail that a 4-inch instrument cannot deliver visually. Neptune ring visibility, cloud bands, and dramatic color gradients are not realistic goals at this aperture for visual observing. If you set unrealistic goals, every successful identification feels like failure. If you set proper goals, each session produces measurable progress and meaningful achievement. In observational astronomy, calibrated expectations are part of technical skill.
A high-quality verification tactic is delayed recheck. After initial confidence, leave Neptune and observe something else for fifteen minutes. Return and re-acquire without using your first eyepiece orientation memory. If you can repeat identification quickly, confidence rises sharply. This simulates real-world repeatability and protects against one-off pattern misreads.
During opposition season windows, prioritize nights where Neptune culminates at convenient local times. Altitude matters. Even a modest increase in altitude can improve contrast and reduce atmospheric smearing. If your site has an obstructed horizon, plan around culmination rather than first visibility. Beginners often waste effort observing too early in the target rise when the atmosphere is thickest.
If you plan outreach or group sessions, assign roles. One person handles star map and verbal coordinates, one operates the mount, and one confirms visual behavior in eyepiece. Group Neptune sessions fail when everyone tries everything at once. Structured division of roles reduces confusion and preserves dark adaptation for the person doing final visual confirmation.
In windy conditions, reduce magnification and protect the optical path from gusts rather than forcing high power. Tiny targets magnify instability brutally. It is better to secure moderate-confidence disk confirmation than to spend an hour attempting unstable high-power detail that never settles. Pragmatic adaptation always outperforms rigid plan adherence under field variability.
For long-term improvement, build a Neptune checklist card and keep it with your eyepiece case. A short checklist outperforms memory under fatigue. Include route anchors, preferred eyepiece sequence, verification criteria, and session logging fields. This simple habit turns Neptune from a rare challenge into a repeatable precision target you can revisit every season with increasing speed and confidence.
When your process becomes stable, a 4-inch telescope is enough to make Neptune one of the most satisfying "small target" achievements in amateur astronomy. Not because the image is dramatic, but because your method is sound. That skill foundation carries directly into tougher planetary and deep-sky work and is often the difference between occasional success and consistent results.