Also popular on Telescope Advisor
Eclipse Gear Guide · Solar Filters
Solar Filter for Celestron NexStar & SCT Telescopes: Complete 2026 Guide
If you own a Celestron NexStar 4SE, 5SE, 6SE, or 8SE — or any Schmidt-Cassegrain telescope (SCT) — you need the correct solar filter to safely observe the August 12, 2026 partial phases and to view sunspots any day of the year. This guide covers exactly which size filter fits your scope, the safety standards to look for, and our top recommendations verified for 2026.
Critical Safety Warning
Never observe the Sun through any telescope without a certified solar filter securely attached to the front of the telescope. Eyepiece filters ("solar" or "moon" filters sold with some telescopes) are NOT safe for solar observation — they can crack from concentrated heat and cause instant, permanent eye damage. Only front-mounted aperture filters that meet ISO 12312-2 are safe. See our eclipse glasses guide for eye protection.
Why You Need a Solar Filter for Your SCT
Schmidt-Cassegrain telescopes (SCTs) like the Celestron NexStar series are excellent for lunar, planetary, and deep-sky observing, but they concentrate light in ways that make solar observation uniquely dangerous. The 8-inch (203mm) aperture of a NexStar 8SE gathers over 800 times more light than the naked eye. Pointing that aperture at the Sun without a filter focuses enough energy to ignite paper in seconds and can permanently damage the telescope's internal baffles and electronics.
A front-mounted solar filter blocks 99.999% of visible light and virtually all ultraviolet and infrared radiation before it enters the telescope. This allows you to observe sunspots, solar granulation, and during the August 12, 2026 partial phases, the Moon's progress across the Sun's disk. During totality (if you are in the path), you remove the filter for the brief window of total coverage. For a complete guide to the eclipse itself, see our Europe eclipse hub.
Filter Sizes for Each Celestron NexStar Model
Solar filters are sized by the outer diameter of the telescope tube or the inner diameter of the lens shade (sunshade). For SCTs, the filter attaches to the front cell of the telescope, not the lens shade. Here are the correct sizes for each popular model:
| Model | Aperture | Filter Size (inner) | Filter Size (outer) |
|---|---|---|---|
| NexStar 4SE | 102mm (4") | 115mm (4.5") | 130–140mm |
| NexStar 5SE | 127mm (5") | 143mm (5.6") | 150–160mm |
| NexStar 6SE | 150mm (6") | 170mm (6.7") | 180–190mm |
| NexStar 8SE | 203mm (8") | 224mm (8.8") | 235–245mm |
| EdgeHD 8 | 203mm (8") | 224mm (8.8") | 235–245mm |
| C9.25 EdgeHD | 235mm (9.25") | 256mm (10.1") | 266–280mm |
| C11 EdgeHD | 279mm (11") | 300mm (11.8") | 310–320mm |
The "inner" size is the measurement across the front cell opening (where the corrector plate sits). The "outer" size is the measurement over the metal retaining ring, which determines the minimum filter frame opening. When ordering a custom-sized filter, provide the inner opening measurement — the filter cell should sit just inside the retaining ring. Most manufacturers offer universal fit filters that use a tension ring or thumbscrews to adapt to different tube diameters.
Recommended Universal Solar Filters
The easiest solution for SCT owners is a universal-fit solar filter that adapts to multiple tube sizes. The Celestron EclipSmart range uses Solar Safe filter material and is available in sizes that fit most SCTs. These filters are ISO 12312-2 certified and have been independently tested by multiple astronomical organisations. Below are our top recommendations:
Celestron EclipSmart Universal Solar Filter
The Celestron EclipSmart Universal Solar Filter is our top recommendation for NexStar and SCT owners. It uses Solar Safe filter material with patented optical coating that blocks 99.999% of visible light and 100% of UV/IR radiation. The universal design uses a spring-loaded tension ring that adapts to tube diameters from 200mm to 260mm, covering the NexStar 8SE, EdgeHD 8, and C9.25. The filter body is rigid aluminium with a scratch-resistant coating. It attaches in seconds and stays secure even at high altitude or in windy conditions.
Affiliate link.
Celestron EclipSmart 70mm Refractor Solar Filter
For smaller refractors and beginner telescopes, the 70mm EclipSmart filter is an affordable option. It fits telescopes with an outer tube diameter of 70-80mm, which covers the AstroMaster 70AZ and similar models. Same Solar Safe material and ISO certification as the universal filter. Note that this filter is NOT suitable for SCTs or larger reflectors — it is designed specifically for small refractors where the objective lens is accessible. For more telescope-specific advice, see our AstroMaster 70AZ review.
Affiliate link.
Important: Order Before July 15
Solar filters for specific telescope models sell out quickly in the weeks before a major eclipse. Order your filter by July 15 to ensure delivery before August 12. If the exact size for your telescope is not in stock, consider a universal-fit filter with a tension-ring mounting system, which can adapt to a range of tube diameters.
Solar Filter Safety Standards Explained
Not all solar filters are created equal. The international safety standard for solar viewing filters is ISO 12312-2:2015, which specifies the maximum transmission of visible, ultraviolet, and infrared radiation through filters intended for direct solar observation. Filters certified to this standard must block 99.997% or more of visible light and have essentially zero transmission in UV and IR bands. The ISO standard also specifies surface quality requirements to ensure the filter material is free of pinholes, scratches, or manufacturing defects that could create dangerous bright spots.
Be wary of filters that claim "NASA-approved" or "space-grade" without ISO certification. Some products sold on Amazon and eBay use mylar or polymer film that claims to be safe but has not been independently tested. Always look for the ISO 12312-2 marking on the product or packaging. Reputable brands like Celestron, Lunt, and Thousand Oaks Optical all certify their solar filters to this standard. If you are unsure whether your filter is safe, do not use it. The cost of a certified filter is negligible compared to the value of your eyesight.
Before each use, inspect your solar filter carefully. Hold it up to a bright indoor light (NOT the Sun) and look for any pinholes, scratches, or separation in the filter material. If you see any defects, replace the filter immediately. Store the filter in its original case when not in use, away from heat, moisture, and direct sunlight. A damaged filter may appear fine to the naked eye but could fail catastrophically when exposed to concentrated sunlight.
How to Attach & Use Your Solar Filter
Using a solar filter with an SCT is straightforward, but there are important procedures to follow:
- Attach before setup: Fit the filter onto the front of the telescope while the dust cover is still on. This prevents accidentally pointing at the Sun without protection.
- Secure the mount: Ensure the filter is firmly attached and the thumbscrews or tension ring is tightened. A filter that falls off during observation could cause catastrophic damage.
- Remove the dust cover: With the filter secure, remove the telescope's front dust cover. The filter is now protecting the telescope.
- Use low power first: Start with your lowest-magnification eyepiece (25mm–40mm) to locate the Sun. The solar image will be bright and detailed even at low power.
- Focus carefully: The Sun's edge (limb) provides a sharp focus target. Use a Bahtinov mask or focus on the edge of a sunspot group for precision.
- Observe safely: Take breaks every 10-15 minutes. The Sun is a dynamic target — sunspot groups evolve over hours, and solar flares can appear suddenly.
- Storage: After use, replace the dust cover before removing the filter. Store the filter flat in its case.
Never leave a telescope with a solar filter unattended in direct sunlight. The heat buildup inside the tube can damage internal components even with a filter attached. For GoTo telescopes like the NexStar series, ensure the mount is properly aligned in daylight before using solar tracking. The NexStar's Solar System tracking mode works well for keeping the Sun centred. See our NexStar 8SE review for more on the mount's solar tracking capabilities.
Glass vs. Film Solar Filters: Which Should You Choose?
Solar filters for telescopes are manufactured using two primary materials: optical glass with metallic coatings, and flexible polymer film (often called "solar film" or "Baader film"). Each type has distinct advantages and trade-offs that are important to understand before making a purchase for the August 2026 eclipse.
Glass solar filters such as the Celestron EclipSmart range use precision-ground optical glass substrates coated with multiple layers of metal alloys (typically aluminium, chromium, and nickel). The glass substrate provides a perfectly flat optical surface that maintains image sharpness across the entire field of view. Glass filters are rigid, durable, and resistant to scratches when handled carefully. They are less prone to pinhole defects than film, and the rigid frame ensures consistent tension and positioning on the telescope tube. The main disadvantages are higher cost (typically $60-150 depending on size) and greater weight, which can be a factor for larger SCTs on lightweight mounts. Glass filters also have a slightly warmer colour cast compared to film, though this is not noticeable for visual observation.
Polymer film filters (most commonly Baader Planetarium's AstroSolar film) use a thin sheet of coated polymer stretched across a lightweight aluminium or plastic cell. Baader AstroSolar film is the gold standard in this category, delivering exceptional optical quality with a neutral white colour rendition. The film is extremely thin (approximately 0.001mm of coating on a polymer substrate) and must be handled with great care to avoid creases, pinholes, or tears. Film filters are significantly cheaper than glass ($30-60 for most sizes), lighter, and produce a slightly cooler colour temperature that some solar observers prefer for detecting subtle granulation detail. The trade-off is reduced durability — film can develop pinholes over time, especially if stored improperly or exposed to moisture. Film filters must be inspected before every use.
For the 2026 eclipse, we recommend glass filters for SCTs and large telescopes, where optical flatness and durability matter most, and film filters for smaller refractors or budget-conscious buyers. Both types are safe when ISO 12312-2 certified and properly maintained. For a comprehensive overview of solar observing equipment, see our eclipse glasses guide for eye protection.
Step-by-Step Filter Attachment Guide for SCTs
Attaching a solar filter to a Schmidt-Cassegrain telescope requires care to ensure safety and optical performance. SCTs have a front corrector plate that is recessed within a metal retaining ring, and the filter must sit securely over this ring without touching the delicate corrector surface. Follow these steps for a safe and secure setup:
Step 1: Prepare Your Equipment
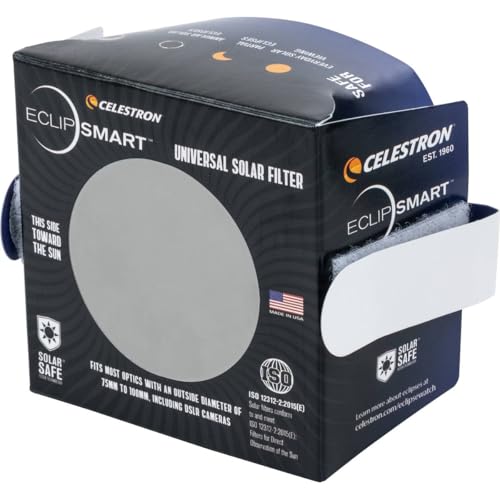
Ensure the telescope is on its mount with the dust cover firmly in place. Never attempt to fit a solar filter while the telescope is pointed at or near the Sun. Lay out the filter, its storage case, and any mounting adapters or thumbscrews. Check that the filter's rubber or silicone grip ring is clean and free of debris — a grain of sand caught between the filter and the telescope tube can scratch the corrector plate's coating.
Step 2: Measure and Set the Filter Opening
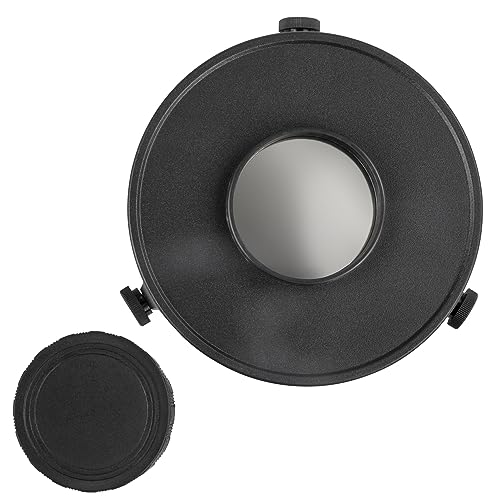
For universal-fit filters with a tension ring or adjustable thumbscrews, set the opening slightly larger than the telescope's outer cell diameter. The NexStar 8SE has an outer cell diameter of approximately 235mm, so set the filter opening to about 240mm. A filter that is too tight can be difficult to remove; one that is too loose may shift during observation. Some filters use a spring-loaded mechanism — gently compress the springs to open the ring, then release onto the tube.
Step 3: Align and Attach
Hold the filter with both hands and approach the telescope from the side (never from above, where you could drop the filter onto the corrector plate). Align the filter so it is concentric with the telescope's front cell. Gently push the filter onto the tube until the retaining ring makes full contact. For thumbscrew-style filters, tighten the screws evenly in a star pattern to ensure the filter sits flat. The filter should be snug but not forced — if you need to force it, the size is wrong.
Step 4: Perform a Security Check
Once the filter is in place, gently try to rotate it with light finger pressure. It should not spin freely or shift. Tug it gently outward — it should resist removal. If it comes off easily, tighten the thumbscrews or adjust the tension ring. A filter that falls off during observation can cause instant, catastrophic eye damage to anyone looking through the eyepiece. Now you can safely remove the telescope's dust cover.
Step 5: Verify Safe Setup
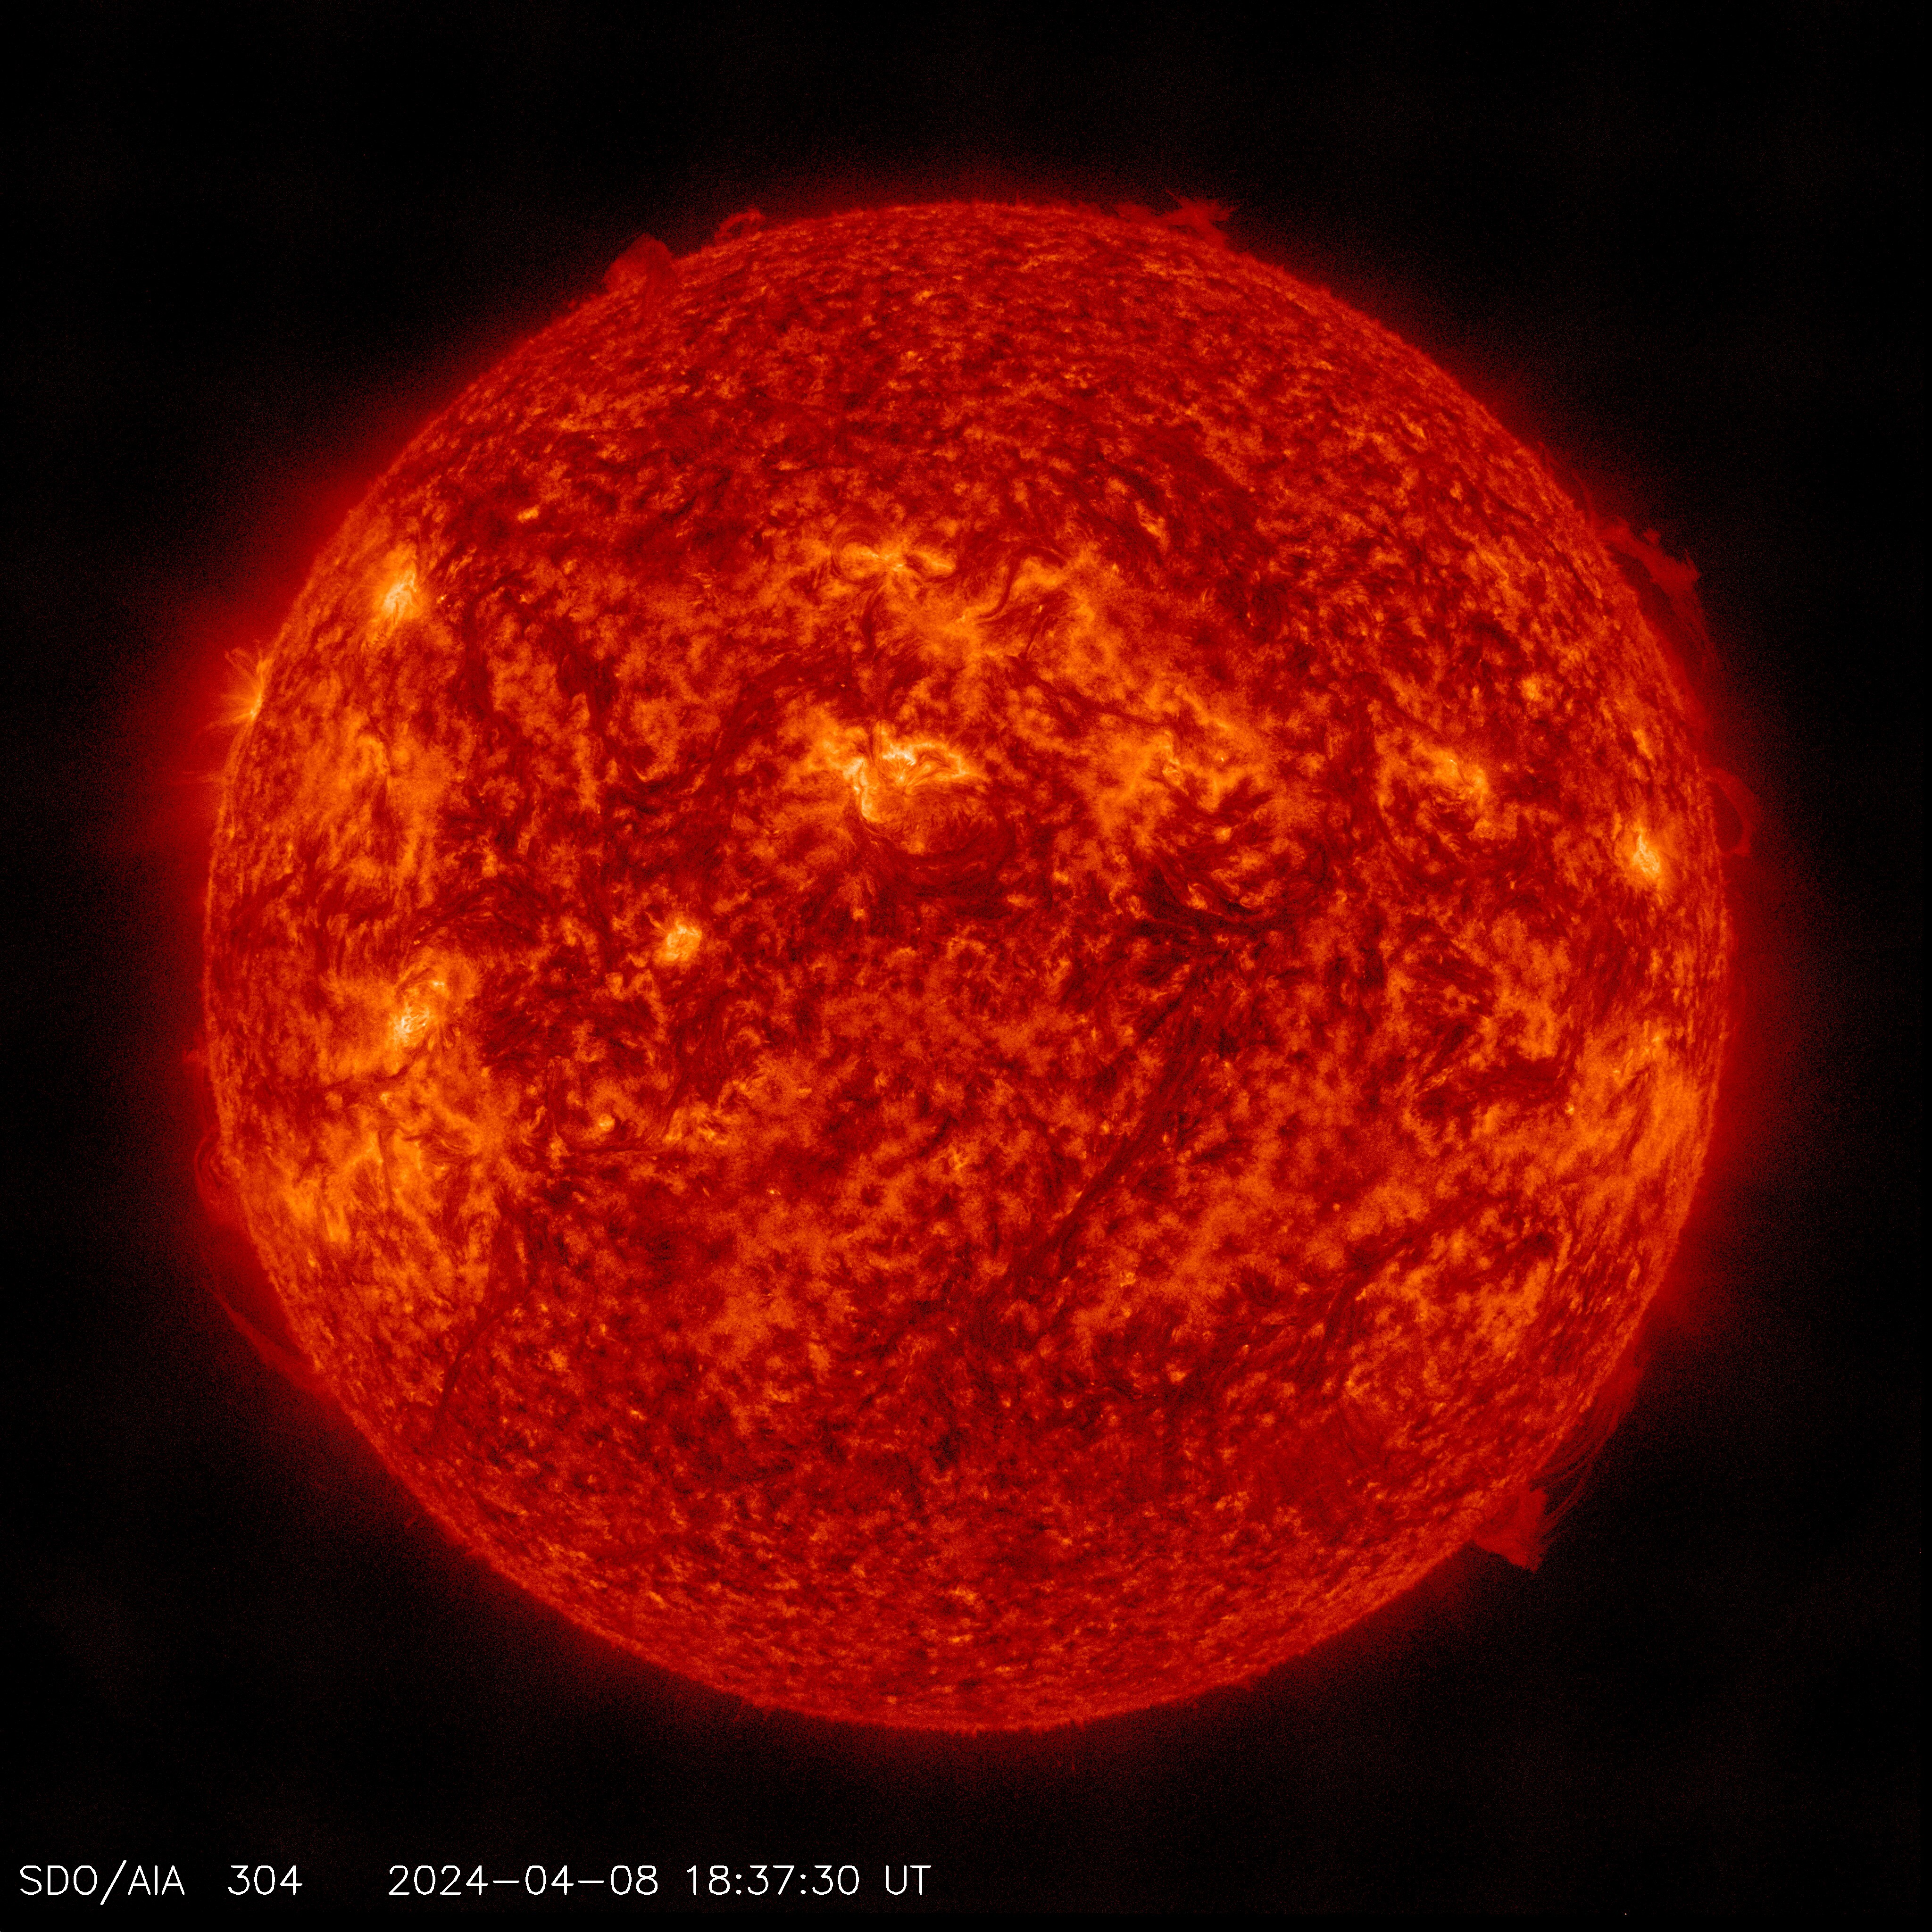
With the filter attached and dust cover removed, point the telescope roughly toward the Sun (use the mount's solar tracking mode or the Sun's shadow on the ground as a guide). Look through the eyepiece briefly — you should see a bright orange or white solar disk with sharply defined edges. If you see any bright streaks, flashes, or uneven illumination, STOP immediately. The filter may be damaged or incorrectly fitted. Remove the filter and inspect it before proceeding. If everything looks normal, you are ready to observe safely.
How to Test Your Solar Filter for Safety
Before every use, your solar filter must be thoroughly tested to ensure it is safe for observing. The consequences of a defective filter are irreversible eye damage, so this procedure should never be skipped. Testing takes only a few minutes and should be performed in a well-lit indoor area.
Visual inspection: Hold the filter up to a bright indoor light source (a 60W equivalent LED bulb or a desk lamp). Look at the filter surface from a distance of about 30cm. Scan the entire surface systematically in a grid pattern, looking for any pinholes (tiny bright spots of light coming through), scratches, cracks, or areas where the coating appears thin or separated. Pay special attention to the edges where the optical material meets the frame, as this is where separation most commonly occurs. A good filter should appear uniformly dark with no bright points. If you see even a single pinhole, the filter must be replaced — a pinhole that passes visible light also passes focused UV and IR radiation that can damage your eyes or camera sensor.
Backlight test for film filters: For Baader AstroSolar film and similar polymer filters, perform an additional backlight test. Hold the filter between your eyes and a bright, uniform light source (such as a computer monitor displaying a white screen). Look for any creases, wrinkles, or areas where the film has stretched unevenly. Even minor creases can create optical aberrations that reduce image quality, though they are not necessarily a safety hazard if the coating is intact. If the film has visible pinholes or tears, discard it immediately.
Scope test: After the visual inspection passes, attach the filter to the telescope and point the scope at the Sun (using the shadow method). Look through the eyepiece. The Sun should appear as a crisp, uniformly illuminated disk. If you see any unevenness, bright edges, or flickering, remove the filter and investigate. Never observe through a filter that shows any visual defects. For a detailed comparison of certified solar filters and eclipse glasses, see our full eclipse glasses guide.
Solar Filter Storage & Maintenance
Proper storage significantly extends the life of your solar filter and ensures it remains safe for years of use. A well-maintained glass or film solar filter can last 5-10 years or more, while a poorly stored filter may develop defects within months. Here are the essential storage and maintenance protocols:
Always use the original case. Solar filters should be stored in the rigid plastic case or padded pouch they were shipped in. The case protects the optical surface from scratches, dust, and accidental impact. If the original case is lost, store the filter in a hard-shell container lined with a soft, lint-free cloth. Never store filters loosely in a telescope accessory case where they can rub against eyepieces, diagonals, or other hard objects.
Control humidity and temperature. Store filters in a cool, dry environment away from direct sunlight. A humidity level below 50% is ideal. Prolonged exposure to high humidity can cause the metallic coating on glass filters to oxidise or delaminate, while film filters can develop mould or fungus between the film layers. If you live in a humid climate, consider storing your filter with a silica gel desiccant pack in an airtight container. Avoid storing filters in a car boot or garden shed where temperature and humidity fluctuate dramatically.
Cleaning your solar filter: In most cases, solar filters do not require cleaning. The optical surface is highly sensitive, and unnecessary cleaning risks scratching the coating. If the filter surface has visible dust, use a rocket blower (not compressed air, which can propel debris at high velocity) to remove loose particles. For persistent smudges or fingerprints, use a microfiber optical cloth specifically designed for coated optics. Breathe gently on the surface to create a light mist, then wipe in a single direction with minimal pressure. Never use cleaning fluids, alcohol, or paper products. For more on caring for your observing equipment, see our telescope accessories guide.