Telescope Advisor Logo Telescope Advisor
Telescope pointed at a starry night sky — troubleshooting guide for telescopes that can't find objects

Troubleshooting Guide

Why Can’t I Find Anything With My Telescope?

You aimed your telescope at the sky, looked through the eyepiece, and saw… nothing. Or a blurry circle. Or just darkness. This is the most common beginner experience — and it is almost always fixable in under 10 minutes. Work through the 7 root causes in this guide and you will find objects tonight.

#1 causeFinder scope not aligned
#2 causeToo high magnification
Fix timeUnder 10 minutes
First targetThe Moon or Saturn
By Telescope Advisor Editorial Team Published: Updated: Editorial Standards

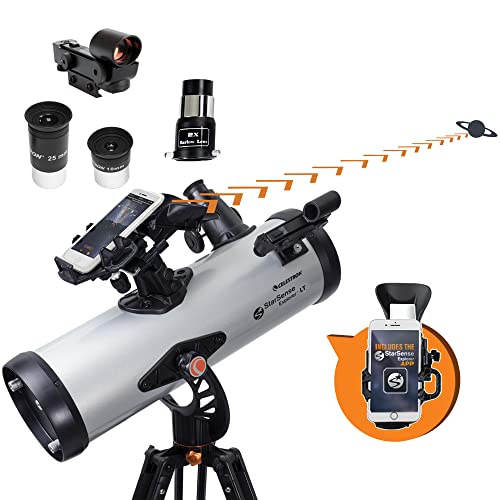
Quick Answer: Why Is My Telescope Showing Nothing?

If your telescope is showing nothing but darkness or a blurry circle, the most common cause is a misaligned finder scope. Fix it in daylight by pointing at a distant landmark, then centre the same object in the main eyepiece and adjust the finder scope crosshairs to match. Once your finder is aligned, finding objects becomes straightforward.

If aligning the finder scope does not solve the problem, work through the 7-cause diagnostic list below. In over 90% of cases, the issue is one of these seven things — and every single one is fixable without spending money.


🔭

Not sure which telescope actually fits your goals?

Answer 5 quick questions about your budget, observing targets, and experience level — our Telescope Finder Tool recommends a specific model in under 2 minutes.

Find My Telescope →

The 7-Step Diagnostic Checklist

Before reading the detailed sections below, run through this checklist. If you can answer “yes” to all seven, skip to “Your First 5 Targets” and start observing.

  1. 1
    Finder scope aligned? Did you align the finder scope on a distant daytime target before going out at night? If not — do this first.
  2. 2
    Using lowest-power eyepiece? You should start with your longest focal-length (highest mm) eyepiece. In most beginner kits, this is the 25mm or 20mm. Use this until you find the object, then swap up in power.
  3. 3
    Eyes dark-adapted? Have you been outside in the dark for at least 20 minutes? Full dark adaptation takes 30+ minutes; in the first 5 minutes your eyes cannot see faint objects that are there.
  4. 4
    Targeting something findable? Your first target should be the Moon, Saturn, Jupiter, or a bright star — not a faint galaxy. If you cannot see your target with the naked eye first, a telescope will not magically make it appear.
  5. 5
    Know where the object actually is? Use a free planetarium app like Stellarium to confirm the object is above the horizon right now and exactly where in the sky to point. Without this, you are guessing.
  6. 6
    GoTo telescope: re-alignment done? If you have a computerised GoTo telescope (Celestron NexStar, Sky-Watcher EQ, etc.), did you complete the 2-star or 3-star alignment procedure tonight? GoTo will not work without correct alignment.
  7. 7
    In focus? Point at a bright star. Slowly rotate the focuser knob from one extreme to the other. At some point during the travel, the star will become a sharp, tiny point — that is focus. If you see a large blurry circle, keep rotating.
1

Finder Scope Not Aligned With the Main Telescope

Most common cause — fix this first

The finder scope is the small telescope mounted on top of (or to the side of) your main instrument. Its job is to act as a low-magnification guide: you look through the finder, centre an object in its crosshairs, and the object should then appear in your main eyepiece. When the finder is not aligned with the main scope, you can centre an object in the finder crosshairs and still see nothing in the main eyepiece. This is the most common reason beginners give up.

Finder scopes drift out of alignment when they are bumped, transported, or knocked — which happens almost every time you move a telescope. They need to be re-aligned regularly, and the correct time to align them is during daylight.

Step-by-Step: How to Align Your Finder Scope in Daylight

  1. Choose a distant, stationary target. An antenna on a rooftop, a church spire, a telephone pole, or a treetop at least 200 metres away. The object must be stationary and have a clear point or edge to aim at.
  2. Set up your telescope with your lowest-power eyepiece (usually the 25mm or 20mm that came with the kit). Do not use a high-magnification eyepiece for alignment — the field of view is too narrow to work with easily.
  3. Centre the target in the main telescope eyepiece. Move the telescope until the target is exactly in the centre of the eyepiece view. Then lock your mount so the telescope does not drift.
  4. Without moving the main telescope, look through the finder scope. Note where the target appears relative to the crosshairs. It will probably be off-centre.
  5. Adjust the finder scope's alignment screws (the three small screws on the finder scope bracket) until the crosshairs are centred on the target. Move the screws in small increments, alternating to maintain even pressure. Check that the main scope has not drifted after each adjustment.
  6. Repeat steps 3–5 until the target is simultaneously centred in both the main eyepiece and the finder scope crosshairs.
  7. Do a final check: Move the telescope to a completely different target, centre it in the finder scope, then look through the main eyepiece. If the target appears in the main eyepiece — or very close to centre — your alignment is good.

Repeat this process every time you transport or reassemble your telescope. It takes 3–5 minutes.

What if I don't have a finder scope?

Some budget telescopes come with a reflex sight (a red dot or illuminated circle projected onto a glass window) instead of a crosshair finder scope. These align the same way — centre the red dot on a distant daytime target while the main eyepiece view is also centred. See our full guide: How to Align a Finder Scope →

2

Starting With Too High Magnification

Second most common cause — easy fix

This is the second most common reason beginners can’t find anything. Higher magnification means a smaller field of view. At 200× magnification, your telescope is looking through a "keyhole" at the sky — the field of view might be only 0.2–0.3 degrees across. That is less than half the apparent diameter of the full Moon. Trying to point a 0.2-degree field at a star you want to observe, without first finding it at low power, is like trying to aim a rifle at a target you can’t see with the naked eye.

Eyepiece focal length Magnification (typical 1000mm scope) Approx. true FOV Use for
25mm (START HERE) 40× ~1.2° Finding objects. Wide field. First look.
20mm 50× ~1.0° Good survey eyepiece. Start with this if no 25mm.
10mm 100× ~0.5° Good detail on planets after you have found them.
6mm 167× ~0.3° High-detail planetary work on steady nights only.
4mm or less (avoid for finding) 250×+ <0.2° Do not start here. Impossible to find objects.

The golden rule of telescope observing

Always start with your lowest magnification (highest mm eyepiece), find the object, centre it, then swap to a higher-power eyepiece if you want more detail. Never start with high magnification. Professional astronomers follow this rule every single night.

3

Dark Adaptation Not Complete

Human eyes are remarkable light detectors — but only after they have had time to adjust to darkness. This process, called dark adaptation, happens because your eyes switch from using cone cells (colour, daylight vision) to rod cells (monochrome, low-light vision) as light levels fall. Rod cells are dramatically more sensitive to faint light, but they take time to become fully active.

5 min

Initial adjustment. Eyes functional in low light but nowhere near peak sensitivity. Many faint stars completely invisible.

20 min

Good adaptation. You can see moderately faint objects. Most casual observers are comfortable here for casual observation.

30–45 min

Full dark adaptation. Maximum rod sensitivity. The difference between 5 minutes and 45 minutes is equivalent to roughly 1.5 magnitudes — objects 4× fainter become visible.

Dark adaptation killers

  • White flashlight/phone screen: A single glance at a bright white light resets dark adaptation almost to zero. Use a red flashlight only — red light affects rod cells much less. Best astronomy apps with red-screen mode →
  • Car headlights, porch lights: Turn off all outdoor lights near your observing site. Ask family members to use red lighting or avoid the observing area.
  • Smartphone at full brightness: Even a quick notification check destroys 5–10 minutes of adaptation. Use your phone’s red-screen mode (astronomy mode) in the night-sky apps.
4

Choosing the Wrong First Target

One of the most demoralising first-night experiences: you set up your new telescope, point it at where you think the Andromeda Galaxy is, and see nothing but empty black sky. This happens to almost every beginner. The Andromeda Galaxy, while technically naked-eye visible under dark skies, is a diffuse smudge that requires dark-adapted eyes, a dark site, and some practice to locate even in a telescope. Starting there is setting yourself up for failure.

There is a much better order for first targets. Each one is brighter and easier to find than the next, building skill and confidence progressively:

1

The Moon — Unmissable starting point

The Moon is the easiest and most spectacular first target for any telescope. Even a 60mm scope at 50× shows craters, mountain ranges, and lava plains in breathtaking detail. If the Moon is up, start there. It also teaches you how your focuser works, how the object moves through the field of view, and how to change eyepieces while keeping the target in view.

2

Saturn — The "wow" planet

Saturn is visible to the naked eye as a steady cream-coloured star. Once the finder scope is aligned, centring Saturn in the finder crosshairs puts it in the main eyepiece field immediately. At 50×, the ring system is unmistakable and creates an instant emotional impact that no photograph or description can prepare you for. Saturn viewing guide →

3

Jupiter — Four moons and cloud bands

Jupiter is the second-most spectacular planetary target. Its four Galilean moons are visible in any telescope at 25×, and two equatorial cloud belts appear at 50–100×. Jupiter viewing guide →

4

The Pleiades (M45) — Easiest star cluster

The Pleiades is a naked-eye star cluster in Taurus, visible as a small knot of blue-white stars. Through binoculars or a telescope at low power, it resolves into dozens of brilliant blue stars surrounded by faint nebulosity. One of the most beautiful sights in amateur astronomy and trivially easy to find.

5

M44 Beehive Cluster (Praesepe) — First deep-sky success

The Beehive is a large, naked-eye open cluster in Cancer. Visible as a fuzzy patch to the naked eye, it resolves into a scattered swarm of roughly 50 bright stars through any telescope at 20–40×. Its large angular size (about 1.5°) makes it easy to locate and impossible to miss once pointed in the right direction.

5

Not Knowing Where to Look — No Star Chart or App

If you do not have a GoTo telescope, you need to know where the objects are in the sky tonight from your location. The sky changes continuously — planets, constellations, and deep-sky objects rise and set throughout the night and shift position night by night throughout the year. Without a real-time sky chart, you are guessing.

Stellarium (free — highly recommended)

Stellarium is a free, open-source planetarium app available for iOS, Android, and as a web app at stellarium-web.org. Enter your location and the current time, and it shows you exactly what is in the sky right now, including the exact direction and altitude of every planet, star, and deep-sky object. Stellarium also has a "telescope pointing" feature that works with some GoTo systems.

Red-night mode: Turn on the red screen mode (under settings) before going outside. This preserves your dark adaptation while you check the app.

SkySafari (iOS/Android — popular paid option)

SkySafari is a premium alternative with a larger database, detailed object information, and more telescope-control options. The basic version is free; the "Plus" and "Pro" versions add GoTo telescope control. Particularly useful for planning your observing session in advance and seeing which objects will be well-placed at specific times tonight.

Both apps share one critical feature: you can hold your phone up to the sky and the display rotates to match the real sky overhead. This makes star-hopping from a naked-eye reference star to a telescope target dramatically easier for beginners. Best astronomy apps guide →

Basic star-hopping technique

Star-hopping is the method of navigating from one known bright star to a target object by moving the telescope in small steps along a mental route. Example: to find M13 (Hercules Globular), you first find the bright star Vega (easy naked-eye), then identify the Keystone asterism of Hercules nearby, then hop the telescope along one of the Keystone sides to where M13 sits. A star chart (paper or app) shows this route clearly. With practice and a low-power eyepiece, star-hopping becomes fast and reliable.

6

GoTo Alignment Failed or Not Completed

GoTo telescopes (Celestron NexStar series, Sky-Watcher EQ6, etc.) use motors and a built-in star database to automatically slew to any object you select on the handset. But they only work correctly if the initial alignment is done properly. A GoTo telescope with incorrect alignment will point confidently in completely the wrong direction — it will say it is pointing at Saturn while showing you an empty patch of sky.

Common GoTo alignment failures

  • Date/time wrong: The handset uses the current date and time to calculate star positions. If the date or time is even a few minutes off (especially timezone), alignment stars will be calculated incorrectly. Double-check before every session.
  • Location wrong: Entering the wrong city/coordinates (even 100km off) causes significant pointing errors. Use GPS if available, or enter your location manually to the nearest city.
  • Alignment star identified incorrectly: During 2-star alignment, if you accidentally centred the wrong star (picking Capella instead of Arcturus, for example), all subsequent GoTo positions will be wrong. Start over if you are unsure.
  • Not centring the star precisely: A rough centre during alignment (star is close but not exact) compounds into large errors at other areas of the sky.

How to re-do GoTo alignment correctly

  1. Verify date, time (to the minute), and location on the handset before starting.
  2. Select "Auto Two-Star Align" or "Two-Star Align" (not "Last Alignment" — that reuses old data).
  3. When the scope slews to the first alignment star, verify you can identify which star it is (use Stellarium). If the scope is far off, use the arrow keys to slew to the correct star.
  4. Centre the star as precisely as possible in the eyepiece — not in the finder scope. Use a high-power eyepiece for the final centring step (the centring accuracy directly determines GoTo accuracy).
  5. Repeat for the second (and third, if using 3-star alignment) star.
  6. Test by GoTo-ing a bright planet like Saturn. If it lands within the eyepiece field, alignment succeeded. If it misses, redo alignment.

Celestron StarSense: alignment-free GoTo

The Celestron StarSense system (built into the StarSense LT and Explorer series) uses your smartphone camera to photograph the star field overhead and automatically align the telescope without any manual star identification. If you are regularly frustrated by manual GoTo alignment, the StarSense technology genuinely eliminates the problem. Celestron NexStar 6SE review → | NexStar 8SE review →

7

Telescope Not in Focus

An out-of-focus telescope shows a large blurry disk of light instead of a sharp star or planetary image. The symptom is unmistakable: a soft, expanding circle that does not resolve into a point no matter how long you stare at it. This is not a broken telescope — you simply have not found the focus position yet.

How to find focus step by step

  1. Point at a bright star or the Moon. A planet works too. Do not try to focus on a faint deep-sky object — you need a bright, obvious target.
  2. Rotate the focuser knob slowly in one direction. Watch what happens: the blurry disk should shrink toward a point, or expand further. If it expands, you are going the wrong way — reverse direction.
  3. Continue rotating until the star/planet reaches its smallest possible size — a sharp, bright point (for a star) or a resolved disk (for the Moon or a planet). This is focus.
  4. Fine-tune: Rotate slightly past focus and back to verify you have found the true sharpest point, not just a local near-minimum.
  5. Note the position: After finding focus with your 25mm eyepiece, changing to a 10mm eyepiece will require a small focus adjustment (different eyepieces have different focal planes). The amount of adjustment is usually small.

Maksutov/SCT users: very long focus travel

Maksutov-Cassegrain and Schmidt-Cassegrain telescopes have a very large focus travel range compared to Newtonian reflectors and refractors. On some Mak/SCT designs, rotating the focus knob many turns from one extreme may be needed to find the focus zone. Do not give up after a few turns — make a full sweep from one end to the other slowly. The focus position also differs significantly from an eyepiece at the standard focus position vs. a camera or Barlow lens. Complete telescope focusing guide →

Telescope-Specific Issues

Beyond the universal causes above, some telescope types have specific additional failure modes.

Newtonian Reflectors (Dobsonians included)

  • Collimation: If the primary and secondary mirrors are not aligned with each other (collimated), the image will be blurry even at perfect focus. Symptom: at high power, stars show a diffuse glow or a comet-like tail. Fix: check and correct collimation before observing. Dobsonian collimation guide →
  • Mirror shifted in transport: If the telescope was transported without securing the secondary mirror holder, it may have physically moved. Check that the secondary mirror is centred in the focuser tube.
  • Optical aberrations: Budget reflectors can show coma (stars look like comets at the edges of the field) or spherical aberration. Optical aberrations guide →

Maksutov-Cassegrain & Schmidt-Cassegrain

  • Very long focus travel: As noted above, SCT/Mak telescopes require extensive focuser rotation. A beginner who stops after 5 turns of the focus knob will miss the focus zone entirely.
  • Thermal equilibration: A closed-tube design traps warm air inside. Allow 30–60 minutes of cooling time before expecting sharp images — warm tube air causes turbulent "heat shimmer" that blurs all images regardless of focus. More blurry image fixes →
  • Dew on the corrector plate: A thin dew film on the front corrector plate blurs all images and is invisible in the dark. Run a dew heater band or check with a flashlight.

GoTo Telescopes (NexStar, Sky-Watcher)

  • Alignment failure: See Cause 6 above — the most common GoTo-specific issue.
  • Meridian flip not performed: Equatorially-mounted GoTo scopes sometimes park the OTA in a position that requires a meridian flip to track properly. If the mount shows unusual behaviour or slews to the wrong side, perform a meridian flip from the handset menu.
  • Battery/power issue: Low batteries can cause GoTo to stop mid-slew or home to wrong positions. Use a dedicated power tank rather than batteries if possible.

Smart Scopes (Seestar S50, Dwarf 3, eVscope)

  • GPS not acquired: Smart scopes use GPS for alignment. If the GPS signal is not acquired (often takes 1–3 minutes outdoors), the scope cannot orient itself. Wait for GPS confirmation before commanding a GoTo.
  • WiFi connectivity: Smart scopes operate via a WiFi hotspot. If your phone disconnects from the scope’s WiFi, you lose control of the slew. Stay within range. Interference from other 2.4GHz devices can cause dropouts.
  • Plate solve failure: If the first plate solve fails (poor sky transparency, too bright), the scope cannot establish its position. Move to a clear patch of sky and retry.

Your First 5 Targets: A Practical Beginner Guide

Once your finder scope is aligned and you are using the correct eyepiece, work through this target list in order. Each target teaches you a different skill while delivering a visually rewarding result. Check which are above the horizon tonight using Stellarium before going outside.

🌙 Target 1: The Moon (When Visible)

Skill learned: Focuser operation, eyepiece changing, tracking manual motion.

What to do: Start with your 25mm eyepiece. Focus on the terminator (the day/night boundary line) — this is where shadows cast by crater walls create the most dramatic detail. Then swap to a higher-power eyepiece (10mm) to zoom in on individual craters. The Moon teaches you everything you need to know about how to use a telescope in a single session.

Best Moon phases: First quarter (half moon) and last quarter. Full Moon is bright but has no shadows — craters look flat. A crescent phase shows dramatic shadows on the lit portion.

🪐 Target 2: Saturn

Skill learned: Finding a dim stellar object using the finder scope; first planets-with-rings experience.

What to do: Confirm Saturn’s current location using Stellarium. It looks like a steady, cream-yellow star to the naked eye (it does not twinkle like real stars do). Centre it in the finder scope, then confirm it is in the main eyepiece. At 50–100×, the ring system is unmistakably there. Titan (Saturn’s largest moon) appears as a star-like dot beside the planet.

Full Saturn viewing guide →

🟤 Target 3: Jupiter

Skill learned: Identifying multiple moons; seeing detail on a planetary disk.

What to do: Jupiter is the third brightest object in the night sky after the Moon and Venus (when visible). At 50× in any telescope, four bright points surround the planet — the Galilean moons (Io, Europa, Ganymede, Callisto). The planet’s disk shows two darker horizontal stripes (the North and South Equatorial Belts). Increase magnification to 100–150× to see more detail on the disk.

Full Jupiter viewing guide →

Target 4: The Pleiades (M45) — Open Cluster

Skill learned: Using Stellarium to find and identify a deep-sky object; understanding cluster types.

What to do: Find the Pleiades naked-eye first (visible autumn through spring in northern-hemisphere skies as a small dipper-shaped cluster). Use Stellarium to confirm its current position. At 20–30× in any telescope, it fills the field with brilliant blue-white stars. This is a satisfying first “deep sky” object because it is bright, obvious, and beautiful.

🌟 Target 5: M44 Beehive Cluster — First “star-hop”

Skill learned: Basic star-hopping; using a star chart to navigate to a non-obvious target.

What to do: M44 is not quite naked-eye from suburban skies but is findable with a star chart. It sits between Pollux (in Gemini) and Regulus (in Leo). Use Stellarium to plan a route from a nearby bright star. At 20–35×, the Beehive is a loose, scattered cluster of ~50 stars with a warm, golden-white colour palette. This is your first true star-hop — a fundamental skill for all manual telescope observing.

Equipment That Makes Finding Objects Easier

If you have worked through all seven causes and are still struggling, one of these equipment options may provide a systematic solution.

Best Solution for Beginners Who Can't Find Anything
Celestron StarSense LT 114AZ telescope with automatic smartphone alignment system

Celestron StarSense Explorer LT 114AZ

StarSense phone alignment 114mm aperture No manual star-hopping required

The Celestron StarSense system fundamentally solves the “can’t find anything” problem. Your smartphone sits in the holder on the telescope, photographs the star field overhead, and automatically calculates your exact aim point. The app then displays an arrow showing which direction to push the telescope and how far to go to reach any target. The telescope tells you when to stop: the object is now in your eyepiece.

This is not GoTo (no motors): You still push the telescope manually, but the StarSense app removes all the guesswork about where to push it. Results: Saturn and Jupiter found in under 60 seconds every time. Deep-sky objects that would take a beginner an hour of star-hopping to find are located in under 2 minutes. All beginner telescope picks →

Check Price on Amazon →

Affiliate link — we may earn a small commission at no extra cost to you.

Green laser pointer for astronomy star-pointing — helps identify stars and navigate the night sky

Green Laser Star-Pointer — Essential naked-eye navigation aid

Green 532nm beam Visible beam in dark sky Star-pointing guide

A green laser pointer is one of the most useful low-cost astronomy accessories. Shining the beam skyward creates a visible green line pointing directly at any star you aim at — making it trivial to identify constellations, locate naked-eye reference stars, and communicate sky positions to other observers. This is invaluable when learning star-hopping: you can trace a route from a bright reference star to your target with the laser, then follow that route with the telescope. Important: never point at aircraft, buildings, or roads. Green lasers require responsible use.

Celestron SkyMaster 15x70 astronomy binoculars — wide field for learning the night sky

Celestron SkyMaster 15×70 Astronomy Binoculars — The best way to learn the sky

4.4° field of view Easy to use Ideal for learning constellations

If you are genuinely struggling to find things with a telescope, the solution may be to step back and first learn the sky with binoculars. Binoculars have a much wider field of view than telescopes, are instantly usable, require no alignment or setup, and show you a recognisable star field that matches your star charts. Spending two or three nights learning to navigate from Orion to M42, from Perseus to the Double Cluster, and from Virgo to M87 with binoculars will dramatically improve your telescope observing skills. Best astronomy binoculars guide →

All product links are affiliate links — see our editorial standards for our review process. Prices subject to change.

FAQ: Can’t Find Anything With My Telescope

Why does my telescope show nothing but black sky?

The most common cause is a misaligned finder scope. If the finder scope crosshairs are not pointing at the same spot as the main eyepiece, you can centre a target in the finder and still see empty sky in the main telescope. Align the finder scope during daylight on a distant landmark. The second most common cause is using too high a magnification — at 200× the field of view is tiny and even a small pointing error puts the object completely off-screen. Start with your lowest-power eyepiece (highest mm number).

How do I align my finder scope?

Align during daylight on a distant landmark (rooftop antenna, treetop, telephone pole). Point the main telescope at the target with your lowest-power eyepiece, lock the mount so the scope cannot drift, then look through the finder scope and adjust its alignment screws until the finder crosshairs are also centred on the same target. Both views should show the same target simultaneously. Full step-by-step guide: How to align a finder scope →

I see a blurry circle, not stars. What is wrong?

A large blurry circle (donut of light) when looking at a star means the telescope is out of focus. Rotate the focuser knob slowly in one direction. The blurry circle should shrink toward a sharp point. If it gets larger, rotate the other way. Keep rotating until the star becomes the smallest, sharpest point possible — that is focus. If the image is slightly blurry even at focus, the problem may be collimation (for reflectors) or atmospheric turbulence. Read our full guide: Why is my telescope blurry? →

My GoTo telescope points at the wrong area. What should I do?

GoTo pointing errors almost always indicate an alignment problem. Re-do the 2-star or 3-star alignment from scratch, being careful to: (1) enter the correct date, time, and location; (2) correctly identify each alignment star (use Stellarium to confirm); (3) centre each alignment star as precisely as possible in a high-power eyepiece before pressing “align.” Also check that the mount’s level bubble is centred and that the polar axis (for equatorial mounts) is roughly aligned with Polaris. Telescope alignment troubleshooting →

What is the easiest thing to find with a telescope for beginners?

The Moon is the single easiest telescope target and the best first lesson. It is unmistakably bright, fills a large portion of your eyepiece field, and teaches you all the basic skills (focusing, tracking, changing magnification). When the Moon is not visible, Saturn and Jupiter are the next easiest: both are bright enough to see with the naked eye, and centring either in a finder scope immediately puts it in the main eyepiece view. The rings of Saturn are visible in any telescope at 50× and never fail to amaze first-time observers. Saturn viewing guide →

Do I need a GoTo telescope to find objects?

No — but it helps significantly for beginners. A manual (push-to) telescope with a properly aligned finder scope and a good astronomy app (Stellarium) is perfectly capable of finding any object in the sky. The skill required is star-hopping: navigating from known bright stars to your target using a star chart or app. The Celestron StarSense Explorer system offers a middle ground: a manual push telescope whose app tells you exactly which direction to push and by how much, without needing to learn star-hopping from scratch. It solves most of the “can’t find anything” problem at a beginner-friendly price point.

Why can't I see the Andromeda Galaxy through my telescope?

The Andromeda Galaxy (M31) is a large, diffuse object with low surface brightness. Unlike a star or planet, it is not a bright point of light but a spread-out smudge. The difficulties: (1) it requires dark-adapted eyes and a reasonably dark sky — under suburban light pollution the core may be the only visible part; (2) at too high a magnification, the surface brightness drops so low it effectively disappears; (3) it is only well-placed in the autumn sky (September–November from northern latitudes). Under dark skies with a properly dark-adapted eye and a low-power eyepiece, M31 is impressive even in a small telescope. Start with the Moon, Saturn, and Jupiter before attempting M31.

Should I buy a new telescope if I can't find anything with my current one?

Almost certainly not. The issues described in this guide are skill problems, not equipment problems. A $5,000 telescope will show you nothing if the finder scope is misaligned or you are using too high a magnification. Work through all seven causes in this guide before concluding your telescope is at fault. The most common exception: if your telescope is a very cheap “department store” scope with flimsy mount, very poor optics, and essentially unusable eyepieces, then yes — a $200–$400 telescope from Celestron, Sky-Watcher, or Orion will be a dramatic improvement. Best beginner telescopes →