Why Does Jupiter Look Like a White Dot? 14 Fixes for Better Planet Detail
Telescope Advisor Logo Telescope Advisor
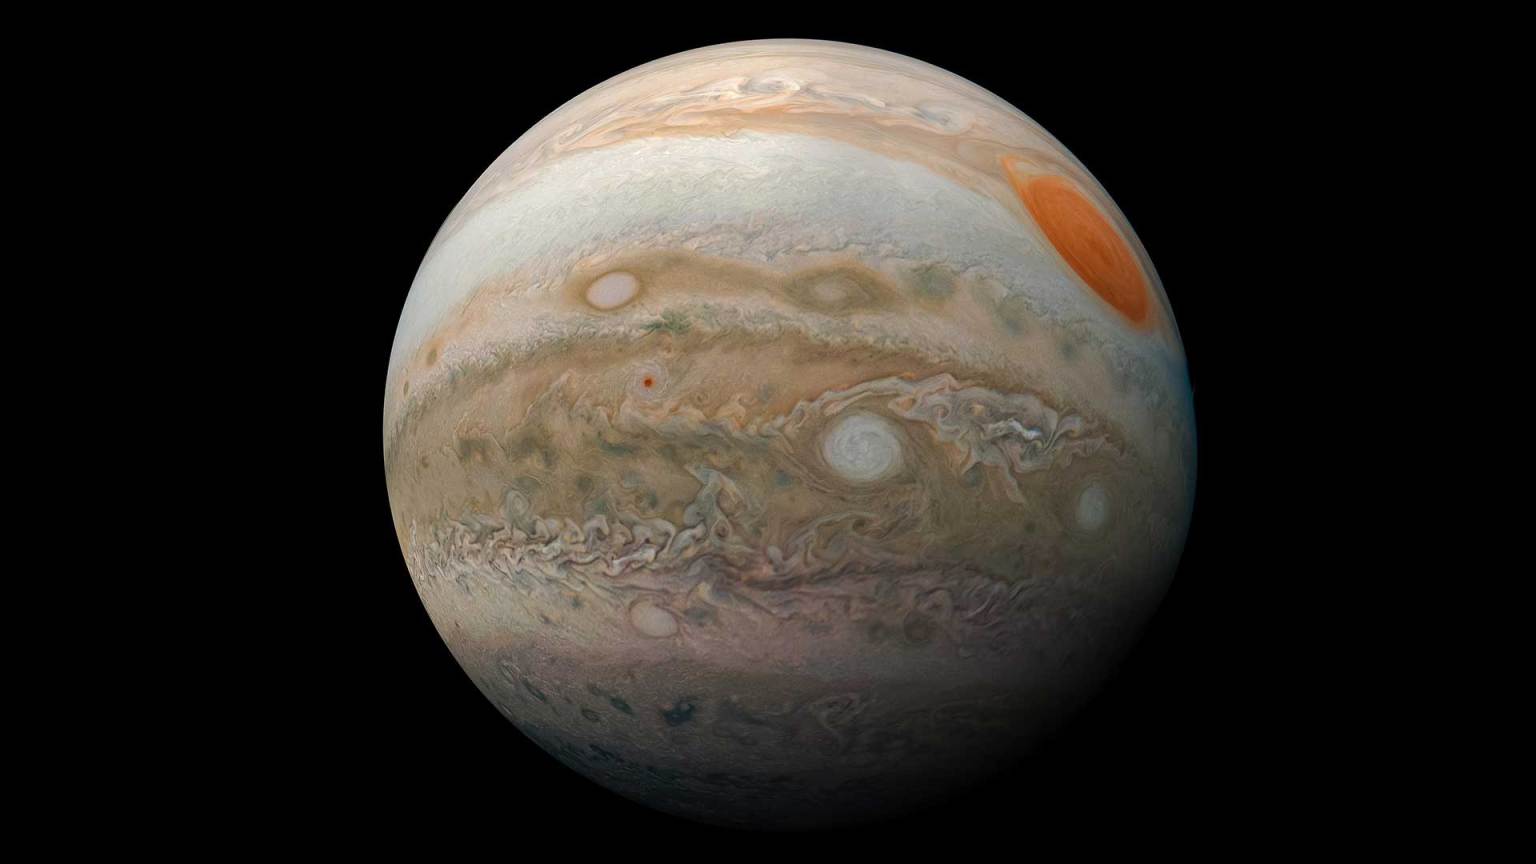
Jupiter viewed through telescope with belts and moons

Planet Troubleshooting · Jupiter

Why Does Jupiter Look Like a White Dot?

If Jupiter looks like a bright white dot or featureless marble, the problem is usually method, not telescope quality. This guide gives an exact diagnostic sequence to recover cloud-belt detail and improve consistency night after night.

60x+

Minimum detail range

100x-180x

Most useful zone

15-45 min

Cooldown often needed

14

Common root causes

By Telescope Advisor Editorial Team Published: Updated: Editorial Standards

Quick Answer

Jupiter looks like a white dot when magnification is too low, focus is slightly off, atmospheric seeing is poor, or the planet is observed too low above the horizon. Less common causes include tube currents from poor cooldown, mirror miscollimation, and mount vibration that prevents precise focusing.

The fastest fix is this: wait until Jupiter is higher, use around 100x to 150x, focus carefully on a nearby star first, and lower magnification if the image boils. Most beginners recover visible belts within the same session by following that sequence.

2-Minute Baseline Check Before You Troubleshoot

  1. Confirm you are actually centered on Jupiter, not a bright star nearby.
  2. Use at least 60x, then step to 100x if image remains sharp.
  3. Refocus slowly and repeatedly, pausing between tiny turns.
  4. Check if Jupiter is high enough; low-altitude views often look washed out.
  5. Reduce magnification immediately if image shimmers strongly.

This checklist isolates the most common failures in under two minutes. If Jupiter still appears as a white point after these checks, continue through the deeper diagnostics below in order. Random accessory swapping usually delays the real fix.

Cause 1: Magnification Is Too Low or Too High

At low power, Jupiter can look like a bright disk with no obvious belts. At excessive power, it grows larger but loses contrast and sharpness. The useful range for most beginner telescopes is 90x to 180x, with local seeing determining the top end. Bigger is not automatically better if detail collapses.

RangeTypical ViewUse
25x-50xBright disk, little structureFinding and centering
60x-100xBelts begin to appearMinimum detail zone
100x-180xBest balance of scale and contrastPrimary observing range
200x+Condition dependent, often softOnly on stable nights

Cause 2: Focus Is Close, Not Correct

Jupiter detail is subtle. A tiny focus error can erase belts and leave a bright white impression. Focus on a nearby bright star first, then return to Jupiter and fine-tune in tiny increments. If your focuser has backlash, always finish turning in the same direction to maintain consistency.

Beginners also overfocus in one motion. Planetary focusing is iterative: move, pause, evaluate, repeat. On nights with moderate seeing, moments of stability appear briefly. You need the planet close to exact focus to use those moments effectively.

Eye fatigue can mimic focus problems. Take short breaks, blink, and return. Structured observation bursts improve detail detection more than staring continuously at an unstable image.

Cause 3: Atmospheric Seeing Is Poor

Poor seeing makes Jupiter appear to boil and brighten irregularly, wiping out fine contrast. This is the single most common reason that a capable telescope produces dot-like results. If stars are twinkling strongly and Jupiter edges shimmer continuously, reduce magnification and prioritize belt-level detail only.

Observe over grass rather than hot rooftops or concrete when possible. Avoid sightlines above buildings releasing heat. Local thermal plumes can be worse than regional weather and are often the hidden variable in city and balcony sessions.

Seeing often improves later in the night. If your first attempt fails, revisit Jupiter one hour later before concluding your setup is inadequate.

Cause 4: Jupiter Is Too Low or Too Early in Session

When Jupiter is low, you are looking through thicker atmosphere and more distortion. The same telescope can show weak detail at low altitude and strong belts later when Jupiter climbs. Timing is a performance multiplier that costs nothing.

Plan around Jupiter's seasonal visibility and local culmination time. If your best sky window is short, prioritize Jupiter when it is highest rather than immediately after setup. This one change improves first impressions dramatically for new observers.

Cause 5: Telescope Thermal or Alignment Issues

Reflectors and catadioptric designs need thermal stabilization. Warm internal air currents soften planetary contrast and can make Jupiter look featureless. Give the scope time to reach ambient temperature before evaluating detail performance.

For Newtonians, collimation matters. Small alignment errors may not ruin wide-field targets but can noticeably degrade planetary sharpness. If stars do not snap cleanly at medium power, check alignment before further troubleshooting.

Clean optics help, but over-cleaning is a bigger risk than light dust. Prioritize alignment, thermal behavior, and focus discipline first. Those variables dominate planetary outcomes in beginner setups.

Cause 6: Mount Vibration Hides Detail

At planetary magnifications, even slight vibration ruins critical focus and short-lived seeing moments. Tighten hardware, shorten tripod extension, and use gentler hand contact while tracking. If touching the focuser causes long oscillations, your practical magnification ceiling is lower than your optical ceiling.

Tracking smoothness also affects detail recognition. If Jupiter drifts quickly and you keep recentering, your eye gets less stable viewing time. Short, repeated observation bursts with controlled re-centering usually improve perceived detail immediately.

What Jupiter Should Look Like by Aperture

ApertureRealistic Jupiter View
60mm-80mmDisk + main belts on decent nights, moons easy.
114mm-130mmBelts reliably visible, occasional finer structure.
150mm-200mmMore frequent fine detail in good seeing.

If you expect stacked-photo detail visually, every telescope will seem disappointing. Visual observing rewards subtle contrast changes and repeatability, not camera-level saturation.

Full Diagnostic Tree: From White Dot to Belt Detail

When Jupiter stays featureless, use a strict yes-or-no diagnostic path rather than random adjustments. This reduces wasted time and quickly identifies the dominant bottleneck. The sequence below is designed for beginners but stays valid for advanced users in difficult city conditions.

Step A: Confirm Target and Baseline Scale

At low power, verify that the target shows nearby Galilean moons in a line. If moons are visible but Jupiter has no belts, move to medium magnification and refocus. If moons are not visible, you may be on a star or out of focus enough that detail is collapsed.

Step B: Evaluate Seeing in 30 Seconds

Defocus a bright star slightly. If the star pattern is rapidly boiling and unstable, seeing is poor. On these nights, forcing higher power creates a larger white blur. Lower power to a stable range and focus on major belts only. Treat fine detail as optional, not mandatory.

Step C: Check Thermal State of the Telescope

If you moved from a warm indoor room to cooler night air, tube currents can erase contrast for 15 to 45 minutes depending on design. If the image appears to shimmer internally even when stars are relatively calm, you are likely seeing local thermal effects. Continue with lower-power targets while the scope settles.

Step D: Verify Focus Repeatability

Use micro-adjustments and pause between each turn. If your best focus point drifts after touching the focuser, mount vibration or focuser backlash is interfering. Finish focus motion in one direction consistently and allow vibration to damp before evaluating detail.

Step E: Altitude and Timing Check

If Jupiter is still low, delay critical observation until it rises. Even 15 to 20 degrees of extra altitude can transform contrast. Many failed sessions are simply early sessions. Recheck the same setup later in the night before changing equipment.

Step F: Optical Alignment and Cleanliness

For Newtonians, verify collimation if detail remains poor after timing and seeing adjustments. Mild dust rarely causes white-dot views; misalignment and thermal effects do. Clean optics only when necessary and use proper methods to avoid introducing new scatter.

This tree works because it addresses dominant failure sources in order of frequency. In most sessions, the answer is found by Step C or Step E, not by buying additional accessories.

Session Rebuild Plan: 4 Nights to Consistent Jupiter Detail

If Jupiter has disappointed you repeatedly, reset your approach with a short structured program. The goal is to remove uncertainty and build repeatable success quickly. Each night has one primary objective and one measurable output.

Night 1: Baseline and Logging

Use only two magnification steps. Record altitude, seeing impression, and best-focus time. Do not chase max power. Success metric: clearly detect at least one cloud belt and two moons with stable framing.

Night 2: Timing Optimization

Observe Jupiter at two different times separated by at least 60 minutes. Keep equipment identical. Compare detail quality directly. Success metric: identify which time window gives better contrast and lock it in for future sessions.

Night 3: Focus and Stability Drill

Practice focus in short cycles: adjust, pause, evaluate, repeat. Minimize tripod extension and reduce touching during observation. Success metric: hold stable belt visibility for at least 20 to 30 seconds in repeated bursts.

Night 4: Detail Confirmation

Attempt detection of secondary belt contrast or small tonal differences while maintaining realism about seeing limits. Success metric: repeatable recognition of at least two planet features beyond the basic disk outline.

After these four nights, most observers stop reporting Jupiter as a white dot. The planet may still vary by conditions, but your process becomes reliable, and you can distinguish environmental limitations from setup errors.

When to Upgrade Hardware

Consider hardware upgrades only after your process is stable and documented. If you can reliably recover belts but want finer detail more often, aperture or tracking upgrades may be justified. If results are inconsistent, continue optimizing timing, thermal management, and focus technique first.

Jupiter performance is a skill amplifier. A stronger process improves outcomes on Saturn, Mars, and lunar detail as well. Fixing this one target usually upgrades your entire observing workflow.

Jupiter Performance Benchmarks by Skill Level

One reason beginners feel stuck is they do not know what counts as normal progress. If you use the wrong benchmark, every session feels like failure. This ladder gives realistic milestones so you can measure improvement correctly and decide whether your bottleneck is process, conditions, or hardware.

Level 1: Foundational Success

You can center Jupiter quickly, hold focus, and identify the Galilean moons consistently. Belt detail appears intermittently but not every session. This is normal for early observers. Your priority is timing and focus repeatability, not magnification escalation.

Level 2: Reliable Belt Detection

Two major belts are visible on most decent nights, and you can tell when seeing is limiting finer detail. You know your practical magnification range and can adapt quickly if conditions degrade. At this level, session quality is mostly determined by timing and altitude planning.

Level 3: Event Awareness and Detail Management

You can track moon positions, notice tonal variation within belts, and occasionally catch transit-related detail under stable air. You stop chasing maximum power and instead choose the sharpest productive setting. This level usually appears after repeated logging and deliberate reacquisition practice.

Level 4: Advanced Visual Consistency

You can evaluate a night in minutes, choose the right target sequence, and consistently extract the best available detail from your setup. Hardware upgrades at this stage produce clearer returns because your process is already efficient and stable.

Use this ladder as a diagnostic mirror. If you cannot consistently hit Level 2 outcomes, focus on timing, thermal management, and stability before changing optics. If you are already at Level 3 and want more frequent fine detail, aperture and tracking upgrades may now be justified.

Common Scenario-Based Fixes

Scenario A: White disk at 50x, belts absent. Solution: step to 100x range, re-focus on nearby star, then return to Jupiter. Low power often hides contrast.

Scenario B: Belts appear then vanish every few seconds. Solution: seeing is unstable. Lower one magnification step and observe in short bursts during calmer moments.

Scenario C: Belts visible but image shakes during focus. Solution: reduce tripod extension, stabilize hand technique, wait for damping after each touch.

Scenario D: Session starts poorly but improves later. Solution: likely altitude and thermal effects. Plan future sessions around later, higher-altitude windows and earlier cooldown starts.

Scenario E: Detail always weak from balcony, better at park. Solution: local heat plumes and structural vibration are likely dominant. Optimize site choice and placement before replacing telescope components.

60-Second Pre-View Routine for Better Jupiter Contrast

  1. Center Jupiter at low-medium power with relaxed eye posture.
  2. Take one deep breath and settle body contact points to reduce micro-shake.
  3. Run a fine-focus pass with small one-direction turns.
  4. Observe for 10 to 15 seconds without touching the scope.
  5. Only then decide whether to increase, hold, or reduce magnification.

This routine seems simple, but it consistently raises planetary output by removing rushed decisions. Most white-dot complaints come from skipping one or more of these steps and evaluating too early.
Real Jupiter Case Studies: Why White-Dot Sessions Happen

Case-study thinking helps you diagnose faster than generic advice. Most white-dot outcomes fall into repeatable patterns. By matching your session to a known pattern, you can apply the correct fix immediately instead of changing many variables at once.

Case 1: Low-Power Lock-In

Observer remains at finder-level power and judges detail too early. Result: bright disk, moons visible, no belts. Correction: move to productive medium magnification, re-focus precisely, and hold the image stable for short bursts.

Case 2: Over-Magnification Spiral

Observer sees weak detail and responds by jumping to maximum power. Result: larger but softer white blur with lower contrast. Correction: step down to the last sharp setting and evaluate actual detail gain rather than image scale.

Case 3: Thermal Misread

Scope moved from warm interior to cool night and judged immediately at high power. Result: unstable contrast and false assumption of optical weakness. Correction: allow cooldown, use interim low-medium targets, then reassess Jupiter later.

Case 4: Altitude Timing Error

Jupiter observed while still low through thick atmosphere. Result: washed-out brightness with little belt separation. Correction: wait for higher altitude window and repeat with identical optical settings for fair comparison.

Case 5: Mount Instability

Focusing motion introduces shake that persists several seconds. Result: observer never sees the brief calm moments where belts appear. Correction: reduce tripod extension, improve damping, and pause after each focus adjustment.

Case 6: Expectation Mismatch

Observer expects camera-like color and scale in real-time visual view. Result: technically good session still feels like failure. Correction: evaluate success by repeatable feature detection, not photo comparison.

Fast Recovery Protocol for the Next Session

  1. Start with one baseline eyepiece known to be sharp.
  2. Confirm moon positions and basic disk clarity first.
  3. Run a controlled focus cycle with micro-adjustments.
  4. Increase power one step only if detail remains stable.
  5. If detail drops, return to previous setting immediately.
  6. Log altitude, seeing impression, and best-performing range.

This protocol usually resolves white-dot complaints within one or two nights because it removes the most common process errors. If your outcomes remain poor after repeated protocol-based sessions under decent conditions, then evaluate collimation and hardware factors next.

A key takeaway: Jupiter observing is rarely fixed by one dramatic change. It is fixed by small, repeatable decisions made in the right order. Once you build this order, other planetary targets become much easier too.

Jupiter White-Dot Quick Recap

When Jupiter looks like a white dot, run the sequence: raise productive magnification, stabilize focus, wait for higher altitude, and match power to seeing. Do not diagnose from a single quick glance. Give each adjustment enough time to show whether detail improved. If belts become repeatably visible across multiple nights, your system is working and your process is on track.

If results remain poor after structured sessions, evaluate collimation, thermal control, and mount stability before making major purchases. Most cases resolve with method, not replacement.

Jupiter Consistency Plan for the Next 4 Sessions

If Jupiter still appears small and washed out, stop changing multiple variables at once. Run four structured sessions with one improvement target per session: first focus discipline, then magnification control, then timing at higher altitude, then stability and cooldown. Keep notes short but repeatable: best eyepiece, best five-minute window, and one feature you confirmed. This approach turns uncertain impressions into trackable progress.

In practice, most observers see a clear shift by session three: Jupiter stops looking like a bright blank disk and starts showing recurring features with confidence. That is the milestone that matters. Continue from there and expand slowly rather than jumping to extreme power.

When those recurring features appear on multiple nights, you can trust your process. At that point, incremental refinements in timing and focus rhythm will usually deliver more benefit than any sudden accessory change.

FAQ

Is Jupiter supposed to look white?
It can look bright white at low power or in poor seeing, but belts should appear with proper magnification and focus.

Why can I see moons but not belts?
Moons are easier point targets. Belts require better focus and steadier air.

Will a bigger telescope always fix this?
Only if the root cause is aperture. Most first-time issues are seeing, focus, and timing.