Laser Collimator Guide 2026: How to Collimate Your Reflector Telescope Step by Step
Telescope Advisor Logo Telescope Advisor
Night sky — collimation is the key to sharp views through any reflector telescope

Learning Center · Telescope Maintenance

Laser Collimator Guide: How to Collimate Your Reflector Telescope

A misaligned telescope cannot deliver sharp images — no matter how much you spent on it. Collimation is the process of aligning your reflector's mirrors so that light converges correctly at the eyepiece. This guide covers everything from choosing the right collimation tool to step-by-step alignment you can complete in under 10 minutes.

10 min

Typical Collimation

Laser

Easiest Tool Type

$20–$80

Tool Price Range

Every Session

Check Frequency

By Telescope Advisor Editorial Team Published: Updated: Editorial Standards

Quick Answer: What Collimation Tool Should You Buy?

The Celestron Collimation Eyepiece (Cheshire-type) is the best first collimation tool for most reflector owners. It is simple, requires no batteries, and teaches you to understand the optical alignment visually. For faster collimation in the dark, a laser collimator is the upgrade choice — insert it into the focuser, turn it on, and adjust the mirrors until the laser beam returns to its source. Expect to spend $20–$40 for a basic Cheshire eyepiece and $40–$80 for a reliable laser collimator. Our step-by-step guide below works with both types.


🔭

Not sure which telescope actually fits your goals?

Answer 5 quick questions about your budget, observing targets, and experience level — our Telescope Finder Tool recommends a specific model in under 2 minutes.

Find My Telescope →

What Is Collimation and Why It Matters

Collimation is the alignment of all optical elements in a telescope so that light travels along the correct path from the front of the tube to your eye. In a Newtonian reflector (the most common type that requires collimation), you need to align two mirrors: the large primary mirror at the bottom of the tube and the smaller secondary mirror near the top.

Why it matters more than many beginners realize: an out-of-collimation telescope cannot deliver sharp focus at high magnification. Stars appear comet-shaped or have a "seagull" flare on one side. Planetary detail blurs. The problem gets worse at higher magnification — exactly where you need sharpness most. A telescope that is perfectly collimated will outperform a larger telescope that is poorly aligned.

How often should you collimate? Transporting a telescope almost always knocks it slightly out of alignment. Even moving it from indoors to a observing spot in the yard can shift the mirrors. The rule: check collimation at the start of every observing session. It takes 5 minutes and guarantees you see the best your telescope can deliver. Tabletop Dobsonians with collapsible tubes (like the Heritage 130P) need checking more frequently because the collapsing mechanism introduces slight play.

For a Dobsonian-specific walkthrough with photos, see our dedicated Dobsonian collimation guide.

Types of Collimation Tools

There are three main types of collimation tools, each with different strengths. Choosing the right one depends on your budget and how comfortable you are learning the process.

Tool Type How It Works Price Best For
Cheshire eyepieceSighted through like an eyepiece; uses crosshairs and reflection rings$15–$35Beginners learning the visual alignment process
Laser collimatorProjects a red laser beam; adjust until beam returns to source$30–$100Fast, dark-friendly collimation for experienced users
AutocollimatorUses repeated reflections to show alignment errors at 2× sensitivity$40–$80Advanced users chasing perfect high-power performance

Recommendation: Start with a Cheshire collimation eyepiece. It teaches you the visual cues that matter, requires no batteries, and is indestructible. Once you are comfortable, a laser collimator saves time in the dark. Some experienced users own both. Avoid ultra-cheap laser collimators under $30 — they are often poorly collimated themselves, meaning the laser beam is misaligned with the collimator body, introducing errors rather than fixing them.

Step-by-Step Collimation Workflow

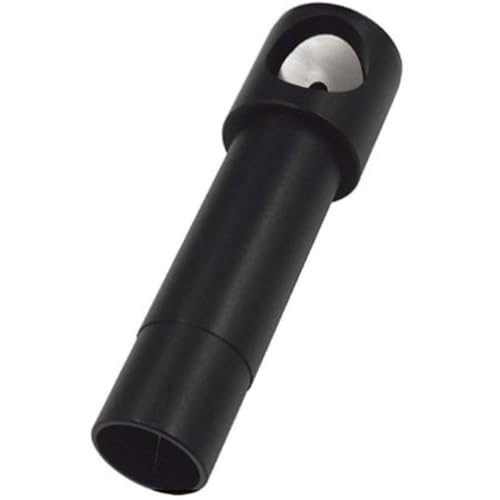
This workflow works for both Cheshire eyepieces and laser collimators. Follow these steps in order.

Step 1: Prepare the Telescope

Point the telescope at a bright wall or daytime sky (never the Sun!). Remove the eyepiece and insert the collimation tool into the focuser. Tighten the focuser thumbscrew snugly. If using a laser, turn it on and check that the beam is centered in the drawtube.

Step 2: Align the Secondary Mirror

Look into the collimation tool. The secondary mirror should appear centered in the focuser drawtube — an evenly spaced ring around the secondary mirror holder. If it is off-center, adjust the center screw on the secondary mirror holder (the one that attaches it to the spider vane). Loosen it slightly, center the mirror, then tighten. Do not confuse this with the three smaller tilt adjustment screws.

Step 3: Tilt the Secondary Mirror

Now adjust the three small tilt screws on the secondary mirror holder so that the primary mirror reflection is centered in the secondary. With a Cheshire, you should see the primary mirror's center marker (if your telescope has one) centered in the crosshairs. With a laser, adjust the tilt screws until the laser beam hits the center of the primary mirror.

Step 4: Align the Primary Mirror

This is the final and most common adjustment. Using the three collimation knobs at the rear of the telescope tube (behind the primary mirror), tilt the primary mirror until the collimation tool shows everything centered. With a Cheshire, the three clips holding the primary mirror should be evenly visible around the edge. With a laser, adjust until the returning laser beam hits the center of the collimator's target.

Step 5: Verify with a Star Test

Point the telescope at a moderately bright star (magnitude 2–3) at medium-high magnification (100–150×). Defocus slightly: a properly collimated telescope shows concentric rings around the star. An out-of-collimation scope shows lopsided rings. If the star test shows uneven rings, make slight adjustments to the primary mirror collimation knobs while watching the star, then re-center.

The "don't panic" rule

If your star test shows a slight asymmetry but the view through the eyepiece looks sharp on planets and the Moon, your collimation is good enough. Perfect collimation is only critical for high-magnification planetary observing and astrophotography. For general deep-sky observing at low power, small collimation errors are invisible. Do not over-adjust.

Recommended Collimation Tools

Editor's Pick — Best First Collimation Tool
Celestron Collimation Eyepiece — Cheshire-type collimation tool

Celestron Collimation Eyepiece (Cheshire)

This is the standard recommendation for any reflector owner. It is a Cheshire-type eyepiece that slides into the focuser like a normal eyepiece. Look through it, and you see crosshairs and reflection rings that show you exactly how your mirrors are aligned. No batteries, no calibration, no electronics. It works every time, forever. At under $30, it is the highest-value accessory you can buy for a reflector telescope.

Recommended telescope: Sky-Watcher Classic 200P

The Classic 200P has well-designed collimation knobs at the rear of the tube, clearly labelled and accessible without tools. Combined with a Cheshire eyepiece, collimation becomes a 2-minute routine. See all Dobsonian options →

Collimation Maintenance Tips for Long-Term Success

Good collimation habits extend beyond the initial setup. Here are practical maintenance practices that keep your reflector performing at its best over months and years of use.

Check collimation at the start of every session. Even if the telescope has not moved, thermal expansion from temperature changes can subtly shift mirror alignment. A 30-second laser check before observing prevents an entire evening of soft views. Make it part of your routine, like focusing the finder scope.

Transport triggers re-collimation. Any time you drive with the telescope, assume collimation has shifted. Dobsonian mirrors can shift during even gentle car rides. Budget 5 minutes for a full collimation check when you arrive at your observing site. This is normal, not a sign of poor equipment.

Mark your adjustment knobs. Once you achieve perfect collimation (verified by a star test), mark the position of your primary mirror adjustment knobs with a permanent marker or a small piece of tape. If collimation slips during transport, you can return to the marked position quickly and then fine-tune. This is a time-saving trick used by experienced Dobsonian owners.

Upgrade your adjustment knobs. Many Dobsonians come with small plastic knobs that are hard to turn in the dark. Replacing them with larger aluminum thumbscrew knobs (available for under $15) makes collimation adjustments significantly easier, especially when wearing gloves in cold weather. Bob's Knobs is the most popular aftermarket brand for this upgrade.

Troubleshooting Common Collimation Problems

Symptom Likely Cause Solution
Stars have comet-shaped tailsPrimary mirror tilt errorAdjust primary mirror collimation knobs while watching a defocused star
Laser beam does not return to its sourcePrimary mirror tilt offAdjust primary mirror knobs until the returning beam hits the laser aperture
Secondary mirror appears off-center in the focuserSecondary mirror position errorLoosen the center mounting screw, slide secondary into position, retighten
Laser beam traces a circle when you rotate the collimatorLaser collimator itself is misalignedCollimate the collimator using its adjustment set screws, or replace it
Good collimation at low power, blurry at high powerCollimation not precise enough for high magnificationRe-collimate more carefully using a star test at 150×+

If you are still having trouble after multiple attempts, check that your telescope's primary mirror is properly cooled to ambient temperature. Thermal currents inside the tube can mimic collimation errors at high power. Allow 30–60 minutes for the telescope to cool down before precision collimation.

FAQ: Laser Collimator and Telescope Collimation

Do I need to collimate every time I use my telescope?

For Newtonian reflectors (Dobsonians), checking collimation before every session is good practice. Transport, tube movement, and even thermal expansion can shift alignment. Once you learn the routine, it takes 2–5 minutes. Refractor and Schmidt-Cassegrain telescopes do not require user collimation.

Is a laser collimator better than a Cheshire?

For speed and ease in the dark, a laser collimator wins. For accuracy and teaching you what is happening optically, a Cheshire wins. Many experienced owners use both: Cheshire for initial learning and verification, laser for quick dark-session touch-ups. The Celestron Collimation Eyepiece (Cheshire) at under $30 is the recommended first purchase.

Why is my laser collimator showing errors even after adjustment?

Cheaper laser collimators are often not collimated themselves — the laser beam may not be perfectly aligned with the body of the tool. To test, insert the collimator into the focuser and rotate it. If the laser spot traces a circle on the primary mirror, your collimator needs calibration. Quality laser collimators have adjustment screws for this purpose.

Can I collimate without any tools?

Yes — you can collimate using the "star test" method without any tools. Point at a medium-bright star at 150×, defocus slightly, and adjust the primary mirror knobs until the diffraction rings around the star are concentric. This is the most accurate collimation method. However, a Cheshire or laser collimator is faster and works in daylight.

Do refractors or SCTs need collimation?

Refractors rarely require collimation — the lens cell is factory-aligned and stays that way unless physically damaged. Schmidt-Cassegrains (like the NexStar 8SE) have a fixed secondary mirror and rarely need collimation. If an SCT is knocked out of alignment, it requires adjusting the three screws on the secondary mirror housing. This is less common and more involved than Newtonian collimation.


Related Guides