Telescope Advisor Logo Telescope Advisor
Aurora borealis — brilliant green and purple curtains of northern lights dancing across a dark starry sky, photographed from a dark-sky location during Solar Cycle 25 maximum

Aurora Photography Guide · Solar Maximum 2026

How to Photograph the Northern Lights: Camera Settings, Gear & Locations

Solar Cycle 25 is at maximum in 2026 — auroras are appearing at record-low latitudes across the US and Europe. This guide gives you the exact camera settings, gear choices, and preparation steps to capture stunning northern lights images, whether you're using a flagship mirrorless or a smartphone.

Recommended ISO800–3200 (start at 1600)
Shutter speed8–25 seconds
Aperturef/1.4–f/2.8 (widest available)
Best 2026 windowSept–Oct & Feb–Mar
By Telescope Advisor Editorial Team Published: Updated: Editorial Standards

The Short Version: Aurora Photography Settings at a Glance

For a typical KP5–KP7 aurora storm from a dark-sky location (Bortle 3–4), these settings give you a solid starting exposure on most cameras:

Setting Slow/Faint Aurora Active Aurora Fast/Intense Storm
Shutter Speed20–25 sec8–15 sec1–4 sec
ISO1600–3200800–1600400–800
Aperturef/1.8–f/2.8f/2.0–f/2.8f/2.8–f/4
FocusManual, ∞Manual, ∞Manual, ∞
White Balance3500–4500K3500–4500K3500–4500K
File FormatRAWRAWRAW

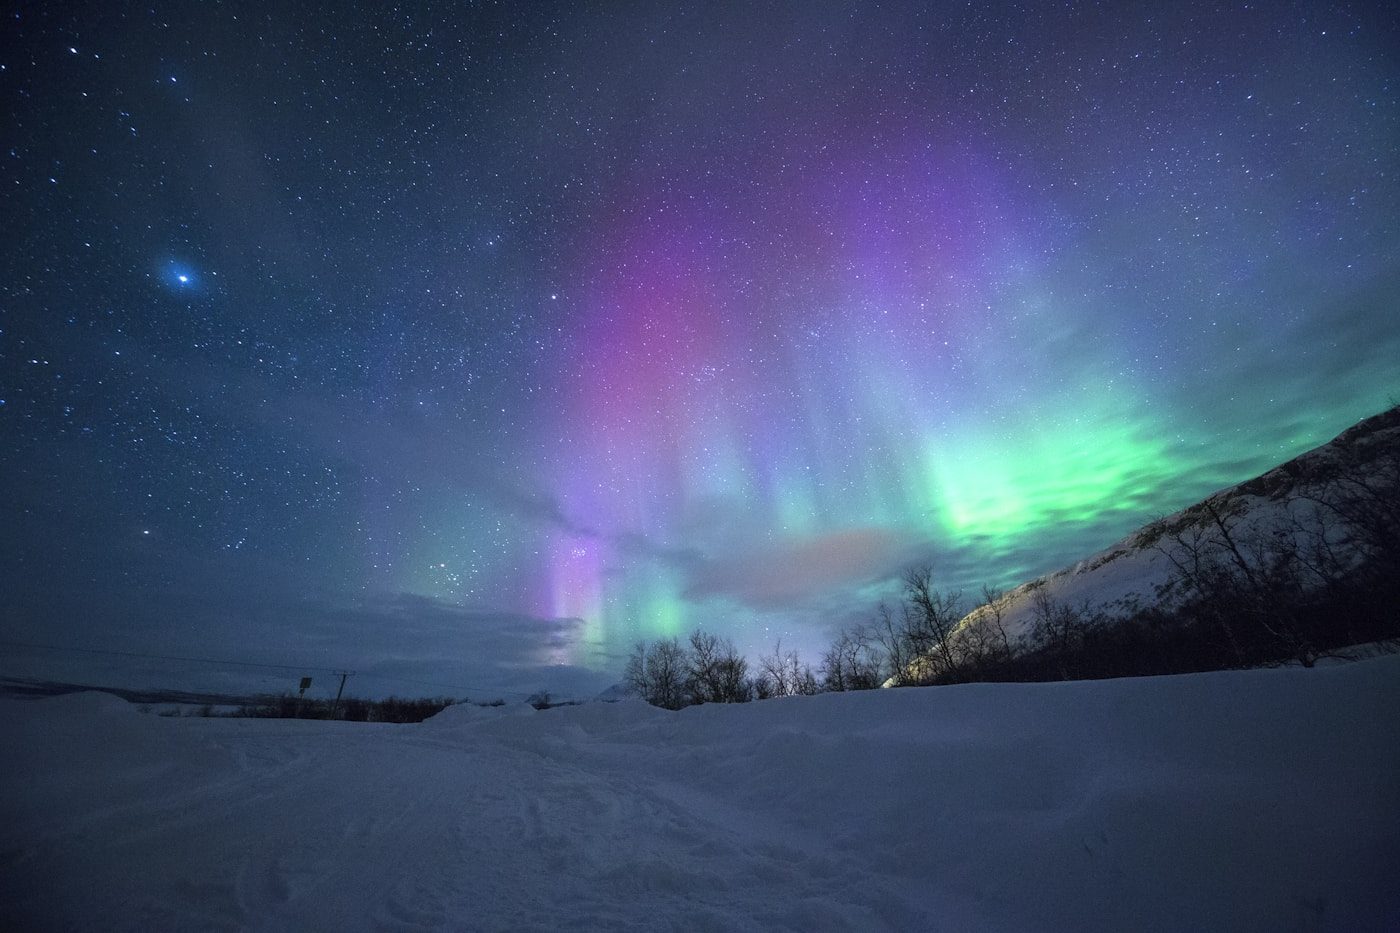
Key principle: Aurora intensity varies enormously — from a faint green smear to explosive curtains that fill the sky in seconds. Always shoot RAW so you can recover exposure in post-processing. Start at ISO 1600, f/2.8, 15 seconds, evaluate the histogram, and adjust from there. The 500 Rule (500 ÷ focal length = max seconds before stars trail) applies if you want pin-sharp stars — but aurora-only shots can use longer exposures since the aurora itself blurs under the shutter.

Smartphone users

Modern phones (iPhone 15 Pro, Pixel 8, Samsung S24) can photograph auroras in Pro Night Mode. Use a tripod, 5–30 second exposure, ISO 800–1600. Results are surprisingly competitive for KP5+ storms.

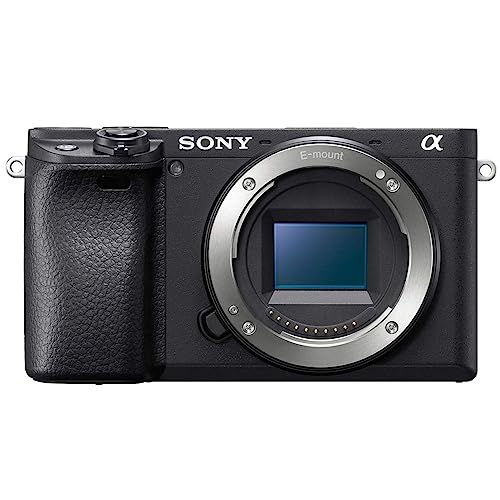
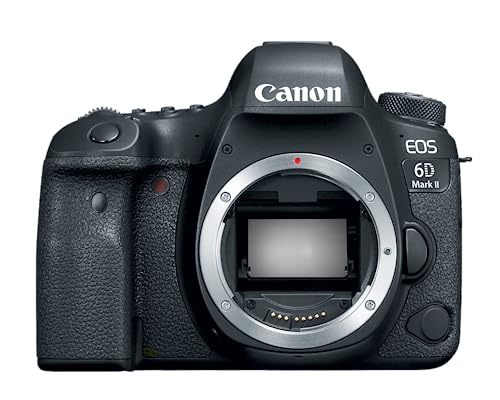
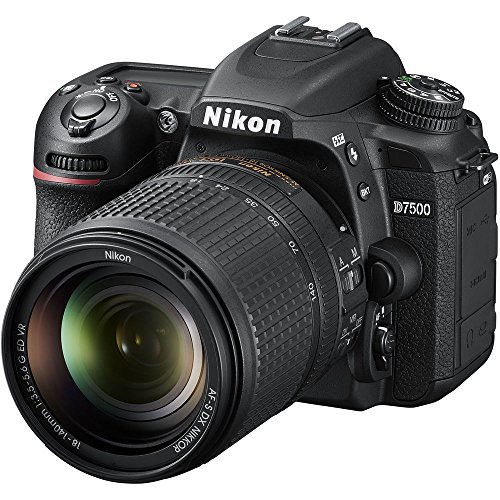
DSLR / Mirrorless users

Full manual mode, RAW files, and a wide fast prime lens (14–24mm, f/1.8–f/2.8) give you the best results and the most control. Mirrorless bodies have an edge in high-ISO performance due to newer BSI sensors.
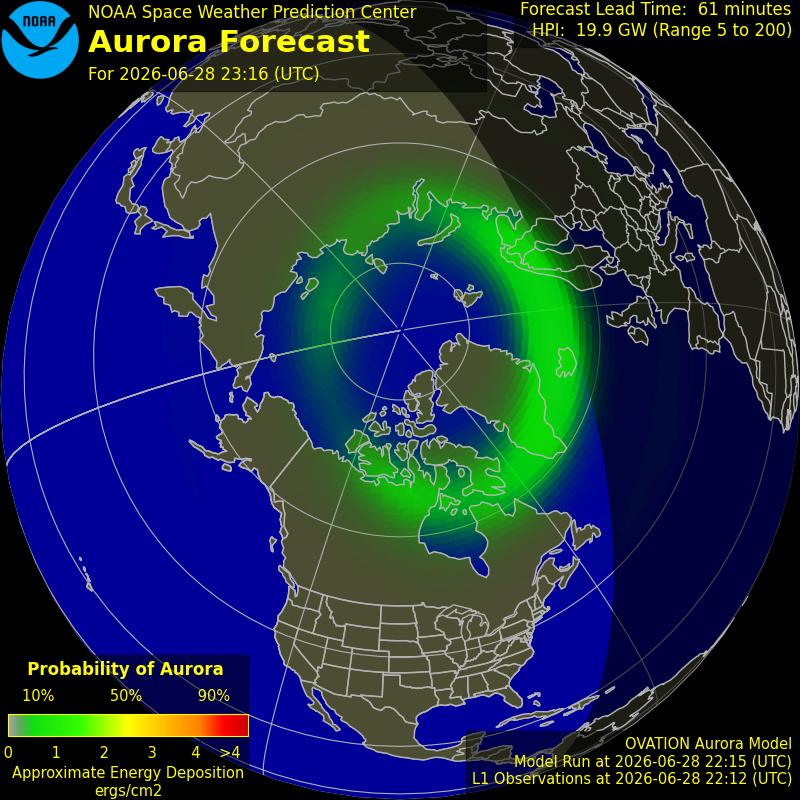
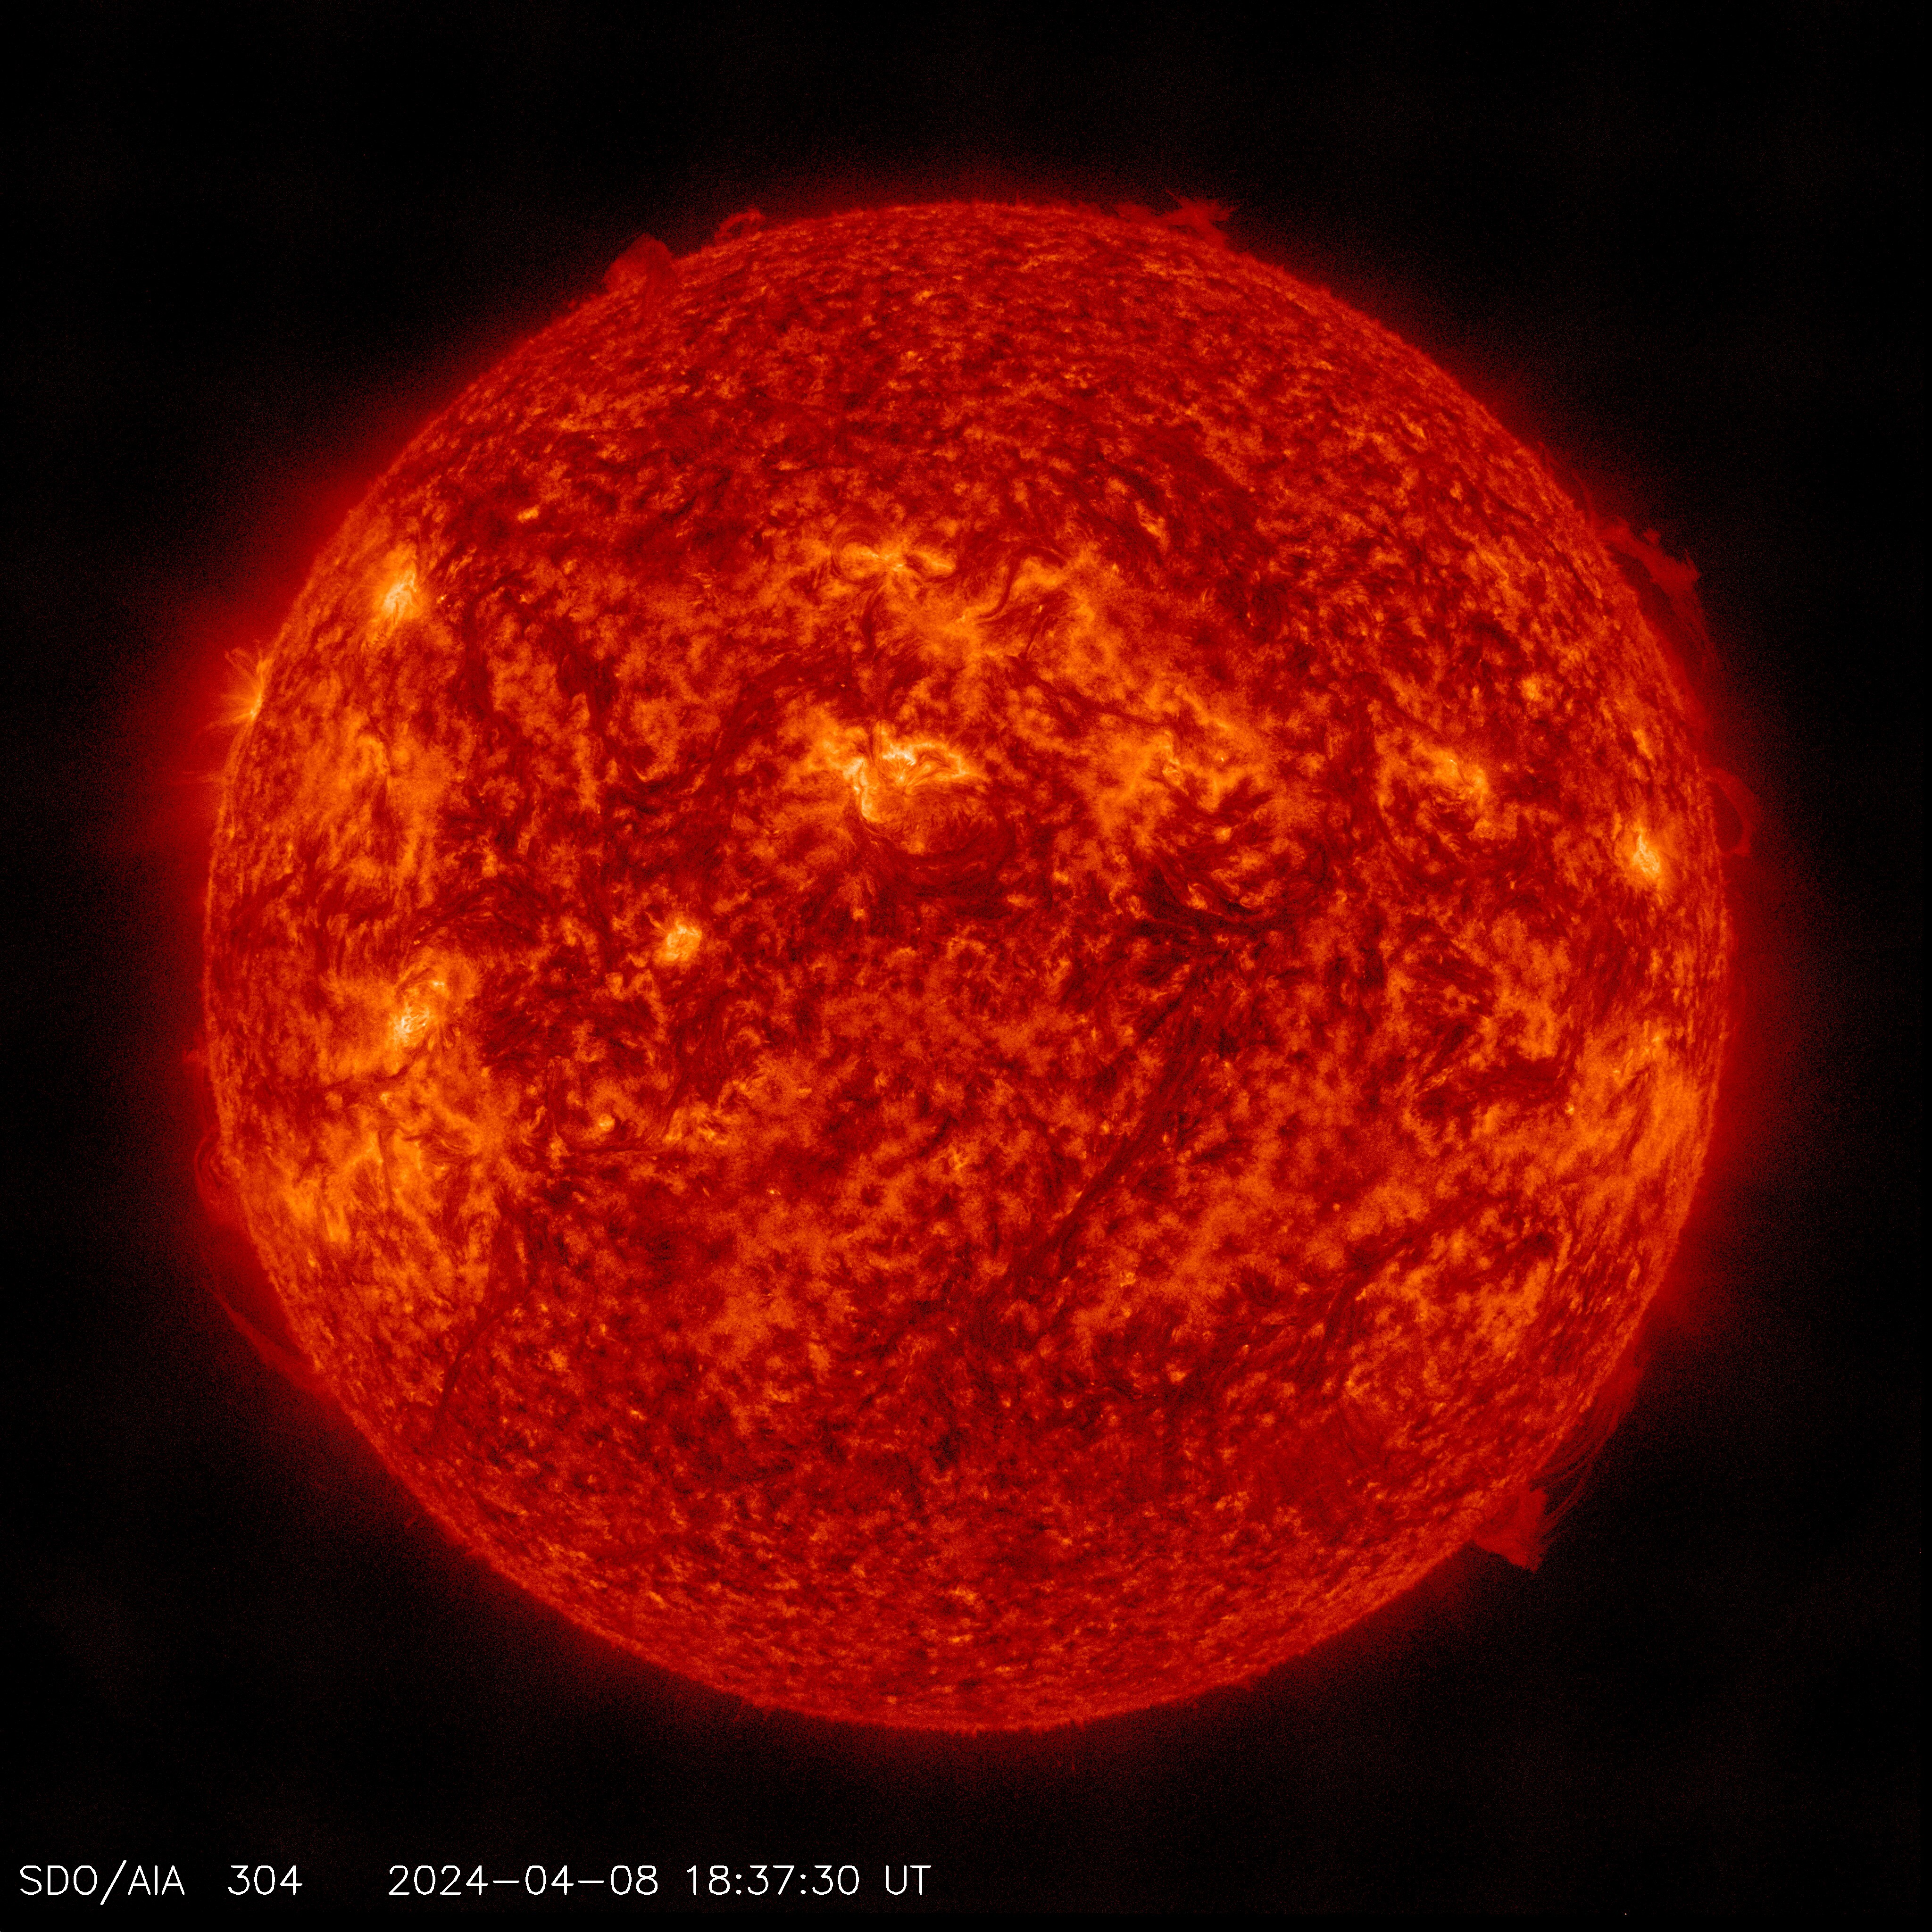
Why 2026 is special

Solar Cycle 25 is near or at maximum. Auroras appeared as far south as Texas and Spain in spring 2024. Frequency of KP5+ storms is highest in 11 years — if you've wanted to photograph the aurora, 2026 is the best year in a decade.


Understanding Aurora Intensity: What You're Actually Photographing

The aurora borealis is caused by charged particles from the Sun colliding with Earth's upper atmosphere at altitudes of 100–300 km (60–185 miles). These collisions excite atmospheric oxygen and nitrogen molecules, which then release photons of specific wavelengths as they return to their ground state. The result is the signature color palette of aurora displays:

  • Green (most common): Oxygen atoms at 100–150 km altitude, excited to emit 557.7 nm wavelength light. This is the brightest aurora color and the easiest to photograph.
  • Red: Oxygen at higher altitudes (200–300 km), emitting 630 nm. Rarer, fainter, and often only captured in long exposures.
  • Purple/violet: Nitrogen molecules at the lowest aurora altitudes (<100 km). Appears at the base of strong auroral curtains during intense storms.
  • Pink/magenta: A mix of red oxygen and nitrogen emission. Most visible to cameras rather than naked eyes because sensors are more sensitive to red wavelengths than human rods are.
  • Blue and white: Nitrogen molecules, very rare, seen in the most intense geomagnetic storms.

The KP Index — Your Go/No-Go Metric

KP 1–2 High Arctic only. Only visible from Iceland, northern Norway, northern Alaska.
KP 3–4 Northern US states: northern Minnesota, UP Michigan, Alaska visible with dark skies.
KP 5–6 Much of northern US visible. States like Idaho, Montana, Vermont, Washington get good displays.
KP 7–9 Extreme event. 2024 saw KP8–9 storms visible from Texas and Spain. Camera essential — naked eye may see limited colors.
NOAA SWPC aurora forecast map showing the auroral oval — the green ring shows where aurora is currently predicted to be visible from the northern hemisphere

NOAA Aurora Forecast — Northern Hemisphere Auroral Oval

This real-time forecast map from NOAA's Space Weather Prediction Center shows the predicted location and intensity of the auroral oval. The green/yellow/red ring indicates where aurora is likely visible at any given moment. The outer edge shows the equatorward boundary — during KP7+ events this ring expands dramatically southward. Credit: NOAA / Space Weather Prediction Center (public domain — US government work).

Critical insight for 2026: During Solar Cycle 25 maximum, KP5+ storms are occurring several times per month, compared to once or twice per year at solar minimum. The aurora belt — the latitude ring around Earth where auroras are consistently seen — has pushed significantly south. People in northern Minnesota, Michigan's Upper Peninsula, Idaho, Vermont, and even northern Pennsylvania are regularly seeing KP5+ displays. Check the northern lights forecast for the USA tonight before heading out.

NASA Solar Dynamics Observatory image of the active Sun during Solar Cycle 25 maximum — sunspots and solar flares are driving geomagnetic storms and aurora displays

Solar Cycle 25 Maximum — NASA Solar Dynamics Observatory

Solar maximum in 2026 means more frequent and more powerful geomagnetic storms — directly translating to more aurora photography opportunities at lower latitudes than usual. Credit: NASA/SDO.

Planning Your Aurora Photography Session

Aurora photography is part preparation, part patience, and part luck. The three variables you must control are solar activity (KP index), weather (cloud cover), and light pollution (your Bortle number). Miss any one of them and you'll return home empty-handed.

Step 1: Monitor the KP Index

The KP (planetary K) index measures global geomagnetic activity on a 0–9 scale. For most photographers in the northern US, you need KP5 or higher. Two reliable sources:

  • NOAA Space Weather Prediction Center (spaceweather.gov): The authoritative US government source. Their 3-day KP forecast is the gold standard.
  • SpaceWeatherLive and My Aurora Forecast apps: Both deliver push notifications when KP rises above your threshold — set yours to KP5. This is your alarm clock.
  • 27-day outlook: The Sun rotates roughly every 27 days. If an active sunspot region produced a large geomagnetic storm, it may produce another roughly 27 days later when that region rotates back into view.

Step 2: Check the Weather — Cloud Cover Is the Enemy

Aurora photography requires clear skies. Cloud cover renders even the strongest geomagnetic storm completely invisible. Check:

  • Clear Outside app: Specifically designed for astronomers — shows cloud cover, seeing quality, transparency, and aurora probability on a single screen.
  • Windy.com Cloud layer: The high-resolution cloud animation lets you identify gaps in overcast systems and time your shooting window.
  • Satellite imagery: NOAA provides near-real-time cloud satellite imagery for planning drives to clear-sky zones.

Step 3: Find Your Dark Sky Location

Light pollution drowns out all but the most intense auroras. You need at minimum Bortle 4 skies; Bortle 3 or darker is ideal. Even during a KP8 storm, a city observer will see only a faint reddish glow on the horizon while a rural observer 30 miles away watches curtains of green fill the entire sky. Use:

  • Light Pollution Map (lightpollutionmap.info): The Falchi 2016 atlas overlaid on Google Maps. Find the green-to-black Bortle zones near you.
  • IDA-certified dark sky parks: Pre-vetted dark sky locations — see our guide to stargazing in national parks.
  • Look north — aurora displays in the northern hemisphere radiate from the north celestial pole. Your view to the north horizon must be unobstructed by trees, hills, or buildings.

Step 4: Time Your Session

Time Window Why It Matters
Astronomical twilight endSky reaches true darkness. In summer at high latitudes, this may not happen at all — another reason autumn/winter is preferred.
22:00–02:00 local timeThe auroral oval passes most directly overhead around local magnetic midnight (~23:00–00:00). Peak probability window.
New moon ± 5 daysMoonlight significantly reduces contrast for faint/moderate auroras. Plan shoots around the new moon phase.
Equinox periods (Mar/Sep)Earth's magnetic field orientation at the equinoxes creates a statistical enhancement of geomagnetic storm frequency — the "Russell-McPherron effect." More storms, more aurora.

Plan a 3-night trip, not a 1-night gamble

Cloud cover is unpredictable 5+ days in advance. The best aurora photographers book 3-night stays at dark-sky-adjacent accommodations during periods of high solar activity and simply wait for the nights to clear. One night out of three is a realistic expectation even in prime locations.

Essential Gear: Camera, Lens, Tripod & Cold-Weather Prep

Camera: Mirrorless or DSLR with Full Manual Control

Any camera with manual mode, RAW capture, and ISO 1600+ is capable of aurora photography. The key variables that determine image quality are sensor size (larger = less noise at high ISO), sensor generation (newer BSI/stacked sensors clean up dramatically at ISO 3200), and battery life in cold (lithium batteries lose 30–50% capacity below 0°C — always carry spares).

Full-frame DSLR / Mirrorless

Best high-ISO performance. At ISO 3200, full-frame sensors show significantly less noise than APS-C. 14–24mm f/2.8 lenses cover more sky per frame. Battery life better in cold due to larger body. Best choice for dedicated astrophotographers.

APS-C DSLR / Mirrorless

Excellent for aurora at ISO 1600–3200. The Sony a6400, Nikon D7500, and Canon EOS Rebel series all deliver strong results. More affordable lenses available. The crop factor (1.5×) means a 10mm lens gives the same view as a 15mm full-frame — still wide enough.

Micro Four Thirds

OM System OM-5, Panasonic G9 II, and newer Olympus bodies handle ISO 1600 well for aurora work. The 2× crop factor requires a 7–8mm lens for the same wide view. Lighter and more portable — a real advantage when hiking to dark sky locations.

Lens: Wide and Fast Is Everything

Your lens choice matters more than your camera body for aurora photography. The ideal aurora lens has two properties: wide angle (to capture large swathes of sky including the full auroral arc) and fast aperture (f/1.4–f/2.8, to collect light quickly without blurring the aurora with long exposures). Common recommendations:

  • Full-frame: 14mm f/2.8, 16mm f/1.8, 20mm f/1.8, 24mm f/1.4. All are excellent aurora lenses. The Sigma 14mm f/1.8 Art is considered the definitive aurora lens by many professionals.
  • APS-C: 10–18mm f/4.5–5.6 (wide but slow — manageable at ISO 3200), or 10–20mm f/2.8 alternatives. The Tokina 11–20mm f/2.8 is popular for crop-sensor aurora work.
  • Kit lenses at f/4–f/5.6: Usable but require higher ISO (3200+) and longer exposures — aurora structure starts to blur at 20+ seconds during active displays. Push the ISO rather than the shutter.

Tripod: Non-Negotiable

Aurora photography uses exposures from 2–25 seconds. Handheld is physically impossible. Your tripod must be stable in wind (aurora chasing often involves coastal, mountain, or open-field locations), functional in cold (avoid plastic leg locks that seize in freezing temperatures — go for aluminum or carbon fiber with twist locks), and quick to set up in the dark (a storm can start and peak in under 20 minutes).

Cold-Weather Essentials

  • Spare batteries: Carry at least 2–3 fully charged batteries in an inner pocket close to your body. Rotate cold batteries inside your jacket to rewarm them.
  • Lens warmer/dew heater: Essential at dew point temperatures. Condensation on your front element ruins images silently — you only discover it in post.
  • Red flashlight: Preserves your night vision while allowing you to check camera settings. See our astronomy apps guide for phone red-mode options.
  • Intervalometer/remote shutter: Lets you trigger exposures without touching the camera (avoids vibration from button press). Many modern cameras have a built-in intervalometer in their menus.

Camera Settings: A Complete Step-by-Step Walkthrough

Aurora photography requires full manual control. Here is every setting you need to configure before you shoot your first frame, in the order you should set them.

1. Shoot Mode: Full Manual (M)

Aurora varies too quickly and unpredictably for any auto mode to track correctly. Auto will consistently underexpose dark areas or blow out bright auroral curtains. Manual mode is the only workable option. Set it before you leave home — fumbling through menus in the dark wastes your window.

2. File Format: RAW (not JPEG)

RAW files retain all the data your sensor captures — 12–14 bits of tonal information per channel versus 8 bits for JPEG. In practical terms, this means a RAW file that looks dark or underexposed can be recovered by 2–3 stops in post-processing. JPEG cannot be recovered. Aurora colors are also poorly reproduced in in-camera JPEG processing — RAW captures the full spectral range including reds and magentas that cameras often clip in JPEG.

3. Aperture: Widest Available (f/1.4–f/2.8)

Open your aperture to its maximum value. For f/1.4 lenses, use f/1.8 or f/2.0 — most lenses are slightly softer wide open at the corners, and stopping down by 1/3–2/3 stop gives sharper star points while losing minimal light. For f/2.8 lenses, shoot wide open — f/2.8 is the sweet spot between light collection and sharpness for most aurora lenses.

4. ISO: Start at 1600

ISO 1600 is the safe starting point for most modern cameras. Check your histogram after the first frame: if the aurora peaks are clipping the right edge, reduce ISO. If the histogram is pushed entirely to the left and the aurora is barely visible, raise ISO. On older sensors (pre-2016), noise at ISO 3200+ can be intrusive — prefer longer exposures (up to 25 seconds) over raising ISO further. On modern sensors with BSI or stacked CMOS technology, ISO 3200 and even ISO 6400 are often acceptable.

5. Shutter Speed: Use the 500 Rule as a Guide

Stars rotate across the sky at a rate that creates trailing streaks in long exposures. The 500 Rule gives the maximum exposure time before star trails become visible: 500 ÷ focal length (full-frame equivalent) = max seconds. For a 20mm lens on full-frame, that's 25 seconds. For a 24mm lens, it's ~20 seconds. For APS-C, divide the actual focal length by the crop factor first: a 16mm lens on a 1.5× APS-C camera has a full-frame equivalent of 24mm, so max shutter is ~20 seconds.

During fast-moving aurora storms (KP7+), expose for only 2–8 seconds — longer exposures will blur the aurora's rapidly-shifting curtain structure into an amorphous green blob. The drama of the aurora is captured in its movement and structure; freeze it with short exposures during active periods.

6. White Balance: 3500–4500K (Kelvin Manual)

Auto White Balance often shifts aurora greens toward yellow-green or cyan depending on the ambient light. Set a manual Kelvin value of 3500–4500K for a cooler, more accurate representation of the aurora's true colors against the blue-black sky. If shooting RAW, you can adjust this in post — but setting it correctly in-camera gives you a more accurate histogram to evaluate on-location.

7. Long Exposure Noise Reduction: OFF

Most cameras have a Long Exposure NR feature that takes a "dark frame" of the same duration as your exposure and subtracts the hot pixels. While it works, it means every 15-second exposure takes 30 seconds total — you miss half the aurora during an active display. Turn it off and deal with hot pixels in post using dedicated noise reduction software (Lightroom, DxO PhotoLab, Topaz DeNoise AI).

Focusing in the Dark: The Hardest Part of Aurora Photography

Autofocus fails in the dark. The camera cannot find contrast to lock onto, and even when it does, the AF system often "hunts" past infinity, giving you a slightly soft image. Precise manual focus is the difference between sharp stars and soft blobs.

Method 1: Live View Magnification (Best Method)

  1. Enable Live View on your camera (the rear LCD view).
  2. Point at a bright star — Vega, Sirius, Jupiter, or any easily identifiable bright point.
  3. Magnify the Live View to maximum zoom (5×–10× depending on camera).
  4. Slowly turn the focus ring until the star reduces to its smallest, sharpest point. You'll see it bloat as you approach infinity and sharpen as you reach the correct focus.
  5. Lock the focus ring with tape or note the barrel position, then switch to Manual Focus (MF) mode to prevent the camera from hunting.

Method 2: Pre-Focus During Daytime

  1. During the day, set your lens to its distance scale and manually focus at the actual infinity mark (∞). Note: the white ∞ mark on many lenses is not optically correct for all focal lengths — test first.
  2. Take a test shot of a distant object (a building, mountain, or tree line more than 500 meters away).
  3. Verify sharpness by zooming into the image on your camera's LCD at 100%.
  4. Mark the correct focus ring position with a small piece of white tape or a paint pen dot — easy to find in the dark.

Check your focus every 30 minutes

Focus can shift slightly as your lens thermally contracts in cold temperatures. A lens that was perfectly focused at 15°C may be slightly off at −10°C. Check a magnified test star frame periodically throughout your session, especially in the first 30 minutes as the lens equilibrates to ambient temperature.

Composition: Making Aurora Images That Don't Look Generic

Most aurora photos look the same: green blob in a dark sky. What separates compelling images from forgettable ones is composition. The aurora is your subject, but you need a supporting story in the frame.

Rule of Thirds

Place the horizon at the lower third of the frame, leaving two-thirds for sky. Or flip it: one-third sky, two-thirds silhouetted landscape for a more intimate feel. Avoid the horizon at center — it gives the image nowhere to breathe.

Foreground Anchors

The strongest aurora images include a recognizable element: a frozen lake reflecting the aurora, a lone tree, a lighthouse, a log cabin with a lit window, or a mountain silhouette. The foreground provides scale and grounds the ethereal display in a tangible place.

Reflections

Still water (lake, pond, flooded field) doubles your aurora. The reflection creates symmetry that is visually powerful. Find the calm side of a lake protected from wind. The reflection of KP7+ auroras in water is one of the most striking images in outdoor photography.

Orientation: Horizontal vs. Vertical

Landscape (horizontal) orientation captures the full arc of the aurora across the sky — best when the display is wide and low. Portrait (vertical) orientation works exceptionally well for tall corona displays where the aurora extends from horizon to directly overhead, or for including a prominent foreground element that naturally fills the vertical frame. Shoot both — you'll have options in editing.

Including People in Aurora Images

A silhouetted person in an aurora image provides powerful scale and human connection. The challenge is keeping the person still for 10–20 seconds. Ask them to stand against the brightest part of the aurora and not move. If they're carrying a flashlight, a "light painting" effect where they briefly illuminate themselves during the exposure can create striking results — but test this so the duration doesn't blow out the person against the dark sky.

Post-Processing RAW Aurora Images

RAW aurora images from the field often look underwhelming on first import — flat, slightly underexposed, with muddy colors. The processing stage is where these images come alive. Aurora photography rewards careful editing.

Exposure & Highlights/Shadows

Raise exposure until the aurora is correctly bright without clipping. Then pull highlights down aggressively to prevent the brightest aurora bands from washing out. Raise shadows to reveal detail in the dark foreground without making it look day-lit.

White Balance Correction

Shift white balance cooler (reduce Kelvin or slide toward blue) to make the sky appear deep blue-black rather than warm gray. Most aurora images look best at 3200–4000K in post. This shift also makes the green aurora pop against the cooler background.

Vibrance and Saturation

Raise Vibrance (not Saturation) by 20–40 points. Vibrance protects already-saturated colors from oversaturation while boosting muted colors — this specifically pulls out the pinks, reds, and magentas in aurora images that the eye barely perceived but the sensor captured.

Noise Reduction

Luminance noise reduction at 30–60 in Lightroom, with detail at 50–60 and smoothness at 40–50, handles most ISO 1600–3200 images well. For ISO 6400+, consider Topaz DeNoise AI or DxO PhotoLab's PRIME noise reduction, which are significantly more effective than Lightroom's built-in NR at extreme ISOs.

Clarity & Texture for Structure

Adding Clarity (+15 to +35) dramatically brings out the rayed and banded structure of the aurora that the camera captured but that is not immediately obvious in the flat RAW file. Do not over-apply — it quickly makes the image look like a bad HDR composite.

Smartphone Aurora Photography: What's Actually Possible

Modern flagship smartphones have reached a remarkable level for aurora photography. During KP7+ storms, the iPhone 15 Pro, Pixel 8 Pro, and Samsung Galaxy S24 Ultra can capture colors and structure that rival entry-level DSLRs from five years ago. The key is understanding what smartphones can and cannot do.

What works well

  • Strong KP5+ displays where the aurora is bright enough for Night Mode to detect (typically a few seconds per frame)
  • Wide-angle main lens (most flagship phones have an effective 23–24mm equivalent) — good for landscape aurora shots
  • Computational Night Mode stitches multiple exposures together to reduce noise
  • RAW or Apple ProRAW/ProRes capture on supported devices enables post-processing

Limitations vs. a camera

  • Small sensor means more noise at equivalent ISO — fine for web sharing, problematic for large prints
  • Night Mode algorithms can over-smooth aurora structure and create surreal, painterly effects
  • No optical zoom for aurora detail — digital zoom in the dark is unusable
  • Less control over individual settings (shutter speed particularly) in Night Mode
  • You still need a tripod or solid mount — hand-held at 10+ second Night Mode exposures produces motion blur

Best smartphone approach for aurora:

  1. Mount on a small tripod or rest on a solid surface — absolutely no handheld
  2. Enable Night Mode (iPhone) or Pro mode with 10–25 second exposure (Android)
  3. Set ISO manually to 800–1600 if Pro mode available; let Night Mode auto-expose otherwise
  4. Use a 2-second self-timer or Bluetooth shutter trigger to avoid camera shake from button tap
  5. Point the main (wide) lens north; tilt up to include 60–70% sky

For aurora astrophotography beyond what a smartphone offers, see our guide to smartphone astrophotography adapters and techniques, and our beginner astrophotography guide for stepping up to a dedicated camera.

Recommended Cameras & Gear for Aurora Photography

Every product below is currently available on Amazon. All links are affiliate links — we earn a small commission at no additional cost to you, which helps support this site. We only recommend gear we would use ourselves.

Editor's Pick — Best for Aurora Photography
Sony Alpha a6400 APS-C mirrorless camera — excellent high ISO performance for aurora and night sky photography

Sony Alpha a6400 Mirrorless Camera

APS-C BSI CMOS Sensor 24.2 MP ISO 100–32000 RAW + JPEG

The Sony a6400 consistently ranks as the top pick for entry-to-intermediate aurora and astrophotography. Its back-illuminated (BSI) APS-C sensor delivers excellent signal-to-noise ratio at ISO 1600–3200, which is the core requirement for aurora work. The Real-time Eye AF and subject tracking are irrelevant for aurora, but the tiltable LCD screen is genuinely useful for composing wide-angle shots at ground level on a tripod without kneeling in snow. The compact body is lighter in a cold-weather pack than an equivalent DSLR.

What to pair it with: Sony's 11mm f/1.8 APS-C prime is purpose-built for astrophotography at f/1.8. On the a6400's APS-C sensor, 11mm gives a 16.5mm full-frame equivalent — wide enough for full auroral arcs and fast enough to use ISO 1600 at 15-second exposures.

🛒 View Sony a6400 on Amazon

Affiliate link — we may earn a small commission at no extra cost to you.

Canon EOS 6D Mark II full-frame DSLR — excellent low-light performance for aurora photography

Canon EOS 6D Mark II — Best full-frame DSLR for aurora

Full-Frame CMOS 26.2 MP ISO 100–40000 Built-in GPS

The 6D Mark II is the most affordable full-frame Canon DSLR and remains one of the best aurora cameras in its class. Full-frame sensors have larger photosites that collect more light per pixel — at ISO 3200, the 6D Mark II produces cleaner images than most APS-C cameras at the same sensitivity. The fully articulating touchscreen LCD is a significant advantage over entry-level Canon bodies and competing cameras, allowing easy composition of low-angle shots without contorting in winter gear. The built-in GPS automatically geotags your aurora images — useful if you're shooting from multiple locations in one night.

Nikon D7500 APS-C DSLR — excellent dynamic range and high-ISO performance for aurora borealis photography

Nikon D7500 — Best mid-range APS-C DSLR for aurora

APS-C CMOS 20.9 MP ISO 100–51200 Weather-sealed body

The D7500 is the sweet spot in Nikon's APS-C DSLR lineup for aurora work: excellent high-ISO performance, weather-sealing that matters when you're shooting in rain, snow, or sea spray, and Nikon's well-regarded tilting LCD. The same BSI-derived sensor technology used in the D500 flagship means the D7500 resolves aurora detail at ISO 3200 that older Nikon APS-C bodies would have struggled with. The 100-shot buffer also means you can shoot rapid-fire sequences during fast-moving aurora without waiting for the camera to catch up.

Amazon Basics 60-inch Lightweight Tripod — essential for aurora photography requiring long exposures

Amazon Basics 60-Inch Lightweight Tripod — Essential tripod for aurora work

Aurora photography demands a stable tripod — there is no workaround. For most photographers who won't be hiking into extreme wilderness, a sturdy 60-inch aluminum tripod is sufficient. The Amazon Basics 60-inch model offers 3-section legs, a ball head, and a quick-release plate at an entry-level price that makes it the default recommendation for first-time aurora photographers. Pair it with a hand-warmer pack attached to the head if you're working in sub-zero temperatures to prevent the ball head from seizing. For serious expeditions to Iceland, Norway, or Alaska, consider upgrading to a carbon fiber tripod from Peak Design or Gitzo — carbon fiber remains flexible and non-brittle in extreme cold where aluminum can conduct heat away from your hands uncomfortably.

All links are affiliate links — see our editorial standards. Prices shown on Amazon are live and may differ from what's listed at the time of our writing.

Northern Lights Photography FAQ

What camera settings should I use for the northern lights?

Start with: Manual mode, f/2.8 (or widest available), ISO 1600, shutter speed 15 seconds, white balance 3500–4200K, RAW format. Take a test shot and evaluate the histogram. If the aurora fills only the lower quarter of the histogram, raise ISO to 3200 or lengthen the shutter. If the bright bands are clipping against the right edge, reduce ISO or shorten the shutter. During fast-moving, intense storms (KP7+), shorten your shutter to 2–5 seconds to freeze the aurora's structure — long exposures during fast movement produce blurry results.

Can I photograph northern lights with a kit lens?

Yes, but with trade-offs. Kit lenses (typically 18–55mm f/3.5–5.6 or 18–135mm f/3.5–6.3) are slower than dedicated wide primes, requiring higher ISO to compensate. At the wide end of a kit lens (18mm, f/3.5), you can photograph KP5+ auroras at ISO 3200, 20–25 second exposures, and get usable results from modern cameras. The image quality and noise level will be noticeably worse than a prime at f/1.8, but the images will still capture the aurora with color and structure.

Why are my northern lights photos blurry?

The most common causes: (1) Focus is off — the lens is not focused at true infinity. Check focus with Live View magnification on a bright star. (2) Camera shake — ensure you are using a tripod, not hand-holding, and triggering with a 2-second self-timer or remote trigger. (3) Aurora movement blur — during fast storms, the auroral curtains move quickly. Shorten your shutter to 2–5 seconds to freeze the structure. (4) Wind vibration — in open fields with strong wind, even a tripod can vibrate. Hang your bag from the tripod center column to lower the center of gravity, or switch from a ballhead to a 3-way pan head that holds position more rigidly.

How do I know when the northern lights will appear?

Monitor the KP index in real-time using NOAA's Space Weather Prediction Center (spaceweather.gov) or apps like SpaceWeatherLive or My Aurora Forecast. Set a push notification alert at KP4 so you have advance warning before the display ramps up. For longer-range planning (3–5 days), NOAA's 3-day Geomagnetic Forecast provides storm probabilities. See our northern lights tonight forecast for the USA for tonight's current conditions.

Can you see more colors with a camera than the naked eye?

Yes — significantly. Human eyes perceive aurora colors poorly in dim light because our rod cells (used for night vision) are largely colorblind. At low aurora intensities, many observers see only gray-green with the naked eye while a camera with ISO 1600 records vivid green, purple, and pink. During intense storms, the human eye begins to perceive colors better as cone cells (color-sensitive) engage when the aurora brightens — the transition from "gray blob" to "vivid green curtains" to "reds and purples" as storm intensity increases is a real physiological phenomenon. Your camera always records more color than your eye sees.

Is solar maximum really better for aurora photography?

Substantially, yes. Solar Cycle 25 maximum in 2026 has already produced multiple KP8–9 extreme geomagnetic storms — events that might occur only 2–3 times in a decade at solar minimum. The frequency of KP5+ storms (the threshold for good aurora photography at northern US latitudes) is roughly 5–10× higher at solar maximum than at minimum. The May 2024 geomagnetic superstorm produced auroras visible from Spain, Texas, and the Florida panhandle — unprecedented in modern memory. If 2024 and 2025 were an indication, 2026 will continue to deliver exceptional aurora opportunities across a much wider latitude range than normal.