Telescope Advisor Logo Telescope Advisor
The aurora borealis photographed by NASA — vivid green northern lights curtains against a star-filled sky

Aurora Photography · Camera Settings Guide

Best Camera Settings for Northern Lights Photography — ISO, Shutter, Aperture Guide

Getting sharp, vivid aurora photos comes down to three settings: ISO 1600–3200, aperture as wide as your lens allows (f/1.8–2.8), and shutter speed between 5–15 seconds depending on how fast the aurora is dancing. This guide covers every setting in detail — including what to change when the aurora is faint versus explosively bright.

ISO1600–3200
Aperturef/1.8–2.8 (widest)
Shutter5–15 seconds
FocusManual — set to infinity
By Elena Reyes Published: Updated: Reviewed & approved by Juhi Sahni, Senior Editor Editorial Standards

Quick Answer: The Perfect Aurora Camera Settings

Start here, then adjust based on conditions: Set your camera to manual mode, ISO 1600, aperture at its widest (f/1.8 if your lens supports it, or f/2.8 for a typical zoom), shutter speed 10 seconds, and manual focus set to infinity. Take a test shot. If the aurora is faint, increase ISO to 3200 or lengthen shutter to 15 seconds. If the aurora is bright and dancing fast, shorten shutter to 4–6 seconds to freeze the structure. If stars are trailing, shorten shutter or use the 500 rule (500 ÷ focal length = max shutter in seconds).

The most common mistake beginners make is using too long a shutter speed — aurora moves, and a 20-second exposure turns sharp green curtains into a green blur. The second most common mistake is not focusing sharply. Autofocus fails in darkness; you must manually focus using live view on a bright star.

Vivid green aurora borealis photographed by NASA — the northern lights with sharp curtain structure visible through proper camera settings

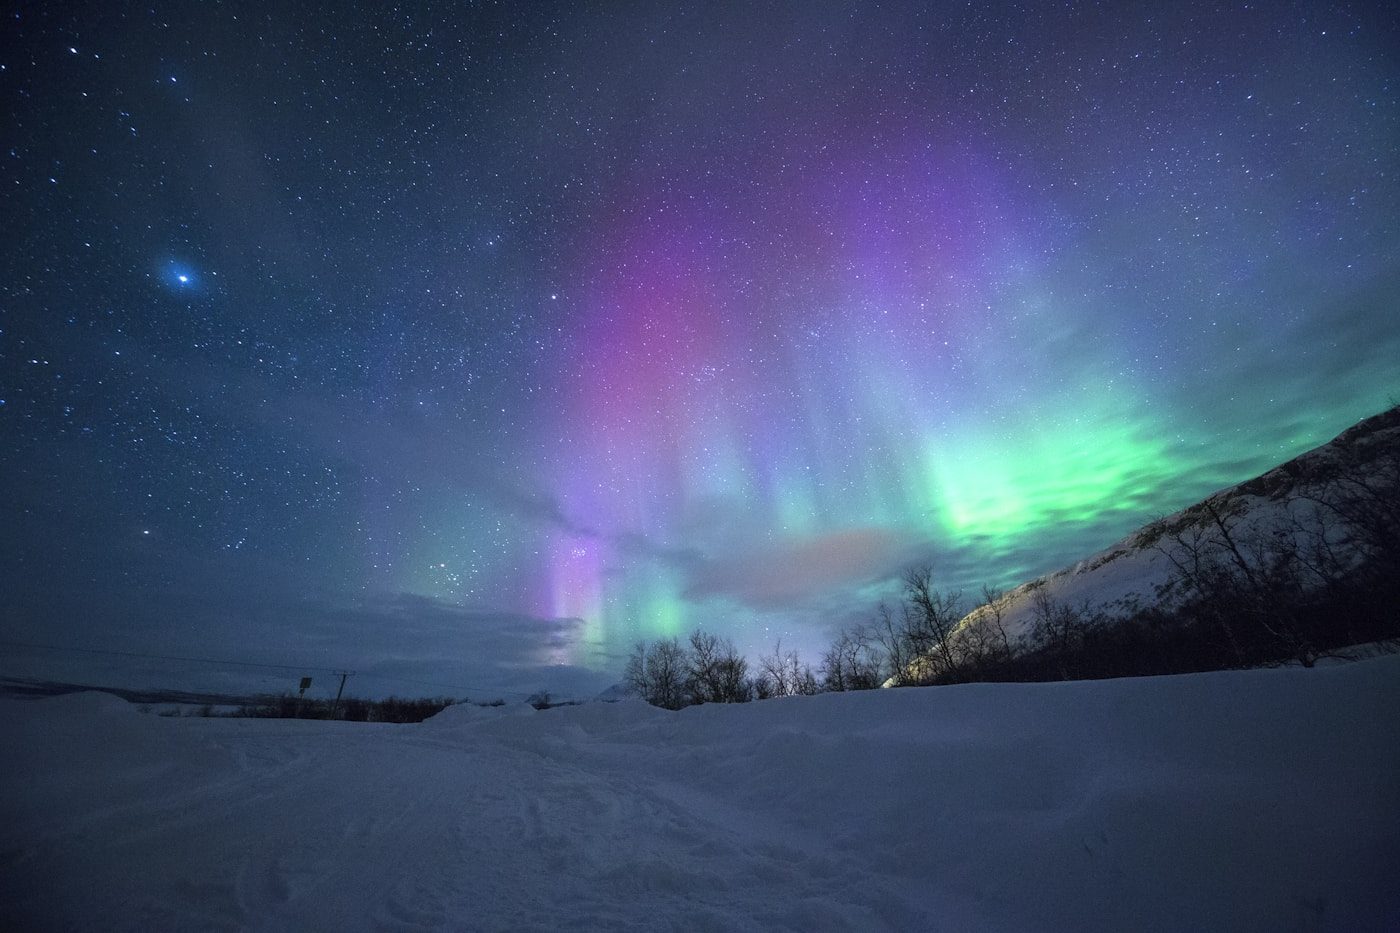
The Aurora Borealis — Captured with Proper Settings

Sharp aurora photography requires the right balance of ISO, aperture, and shutter speed. The green curtains shown here were captured at ISO 1600, f/2.8, 8 seconds — the sweet spot for moderate aurora displays. Credit: NASA.

Why Camera Settings Matter More for Aurora Than Any Other Night Subject

Aurora is different from other low-light photography subjects because it moves — sometimes slowly, sometimes in rapid, unpredictable bursts. A 30-second exposure that works beautifully for a static Milky Way shot will turn dancing aurora curtains into a featureless green blur. This is why shutter speed is the most critical variable in aurora photography, and why you need to adjust it dynamically as the aurora changes intensity and movement speed.

Additionally, aurora emits light at specific wavelengths — primarily 557.7nm (green) from atomic oxygen at lower altitudes and 630nm (red) from atomic oxygen at higher altitudes. This means white balance settings affect the color rendition significantly. A daylight white balance (5500K) will render greens accurately but may make reds appear orange. A cooler setting (3500–4000K) produces more dramatic, saturated colors that match what the eye sees under dark skies.


ISO Settings for Aurora Photography

ISO controls your camera sensor's sensitivity to light. For aurora photography, you need higher ISO than you'd ever use in daylight — but not so high that noise ruins the image.

ISO 800–1600 (Faint aurora)

Use when the aurora is barely visible to the naked eye (Kp 3–4). The low ISO keeps noise minimal, but you'll need longer shutter speeds (10–15 seconds). Best for static aurora bands or glows. Requires a sturdy tripod.

ISO 1600–3200 (Moderate aurora)

The sweet spot for most aurora photography. ISO 1600 balances brightness and noise on modern cameras. ISO 3200 gives brighter images with acceptable noise for social media sharing. Use when aurora is clearly visible with structure (Kp 5–6).

ISO 3200–6400 (Dancing aurora)

Use only when the aurora is bright and fast-moving (Kp 7+). The high ISO lets you use shorter shutter speeds (2–5 seconds) to freeze detailed structure. Noise will be visible but can be reduced in post-processing. Better to have a noisy sharp image than a clean blur.

Shutter Speed — Freezing vs Blurring the Aurora

Shutter speed is the most dynamic setting in aurora photography because aurora moves at varying speeds. A slow, pulsing aurora band can handle a 15-second exposure. A fast, dancing corona needs 2–4 seconds or the structure blurs into a green smear.

Aurora TypeShutter SpeedISOResult
Faint glow / static band10–15 sec1600Smooth, low-noise image of the auroral arc
Moderate curtains / bands6–10 sec1600–3200Good balance of structure and brightness
Fast dancing / corona2–5 sec3200–6400Sharp structure with some noise
CME impact (very bright)1–3 sec800–1600Sharp, vivid, low-noise — rare opportunity

Quick-Reference Settings Table

ScenarioISOApertureShutterWhite Balance
Starting point (all-purpose)1600Wide open (f/1.8–2.8)10 sec4000K
Faint aurora (Kp 3–4)1600Wide open12–15 sec3800K
Moderate aurora (Kp 5–6)1600–3200Wide open6–10 sec4000K
Bright, fast aurora (Kp 7+)3200–6400Wide open2–5 sec4200K
Camera phone (if no DSLR)Auto (night mode)Fixed2–5 sec (hold steady)Auto

For a complete guide that covers composition, location selection, and post-processing, see How to Photograph the Northern Lights.

Frequently Asked Questions About Aurora Camera Settings

Can I photograph the aurora with a smartphone?

Yes — modern smartphones with night mode can capture aurora. Use a tripod (or hold very still), set to night mode (3–5 second exposure), and tap to focus on a bright star. Results won't match a DSLR but are surprisingly good for sharing on social media.

Why are my aurora photos coming out blurry?

Two likely causes: (1) The aurora moved during a long exposure — shorten shutter speed. (2) Focus was off — use live view on a bright star, zoom in 10×, and adjust focus manually until stars are pinpoints. Never use autofocus at night.

Should I shoot in RAW or JPEG?

Always RAW. Aurora photos benefit significantly from post-processing — adjusting white balance, reducing noise, and recovering highlight detail in the brightest parts of the aurora. RAW gives you the flexibility to make these adjustments without losing image quality.

What lens is best for aurora photography?

A wide-angle lens (14–24mm full-frame equivalent) with a fast aperture (f/1.8, f/2.0, or f/2.8) is ideal. The wide focal length captures the full sky and allows longer exposures before star trailing. Fast aperture gathers enough light for short shutter speeds to freeze aurora movement.