Astrophotography Equipment Guide: Cameras, Mounts & Gear for Beginners
Telescope Advisor Logo Telescope Advisor
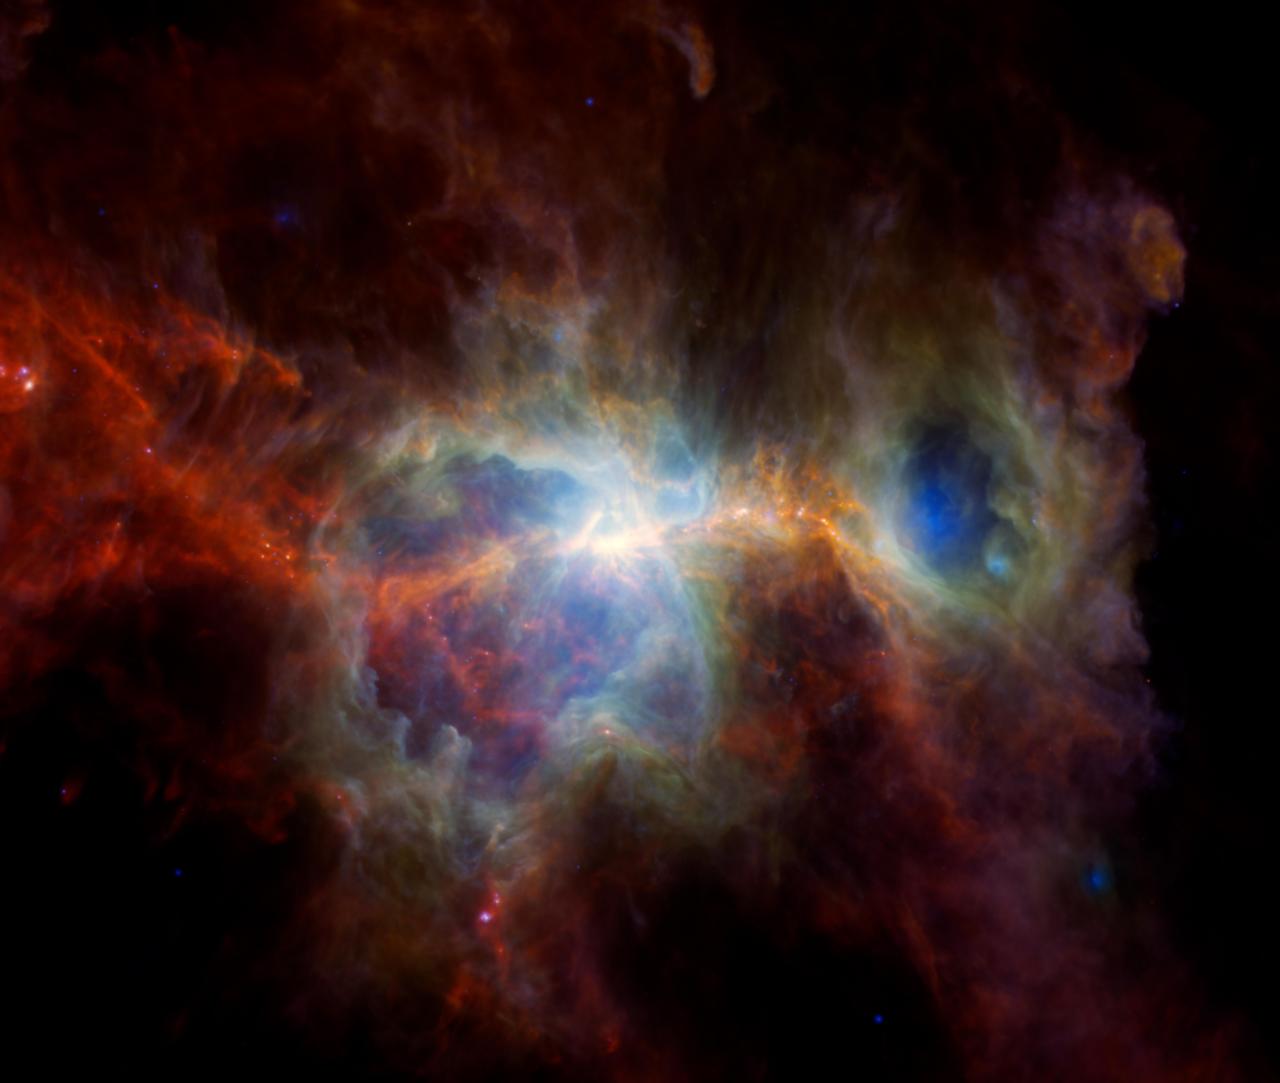
Orion Nebula captured by Hubble Space Telescope

Astrophotography · Equipment Guide

Astrophotography Equipment Guide: Cameras, Mounts & Gear for Every Level

From phone-on-eyepiece to dedicated CCD rigs — this guide covers every piece of astrophotography equipment you need, in the right order, at every budget level.

Start hereDSLR + tripod + kit lens
Next stepStar tracker + telephoto lens
Deep-skyEQ mount + telescope + camera
PlanetarySCT + planetary camera + Barlow
By Telescope Advisor Editorial Team Published: Updated: Reviewed & approved by Juhi Sahni, Senior Editor Editorial Standards

Astrophotography is the most equipment-intensive branch of amateur astronomy. The line between a stunning image and a frustrating blur is almost always drawn by the gear — not the photographer's skill. But the right gear bought in the right order makes the learning curve manageable and the results rewarding from the first night.

This guide organises astrophotography equipment into three levels: beginner (under $500 total), intermediate ($500–$3,000), and advanced ($3,000+). Within each level, we cover the essential components: camera, mount, telescope, filters, and accessories. The guiding principle is that the mount is more important than the telescope, and the telescope is more important than the camera. Spend accordingly.

Level 1: Beginner Astrophotography (Under $500)

The most common mistake beginners make is buying an expensive dedicated astrophotography camera before they have mastered the basics. Start with equipment you may already own: a DSLR camera and a sturdy tripod. With just a DSLR, a standard kit lens (18–55mm), and a tripod, you can capture stunning wide-field images of the Milky Way, star trails, and constellations.

Essential beginner setup: A DSLR or mirrorless camera (any model made in the last 5 years works), a fast wide-angle lens (f/2.8 or faster is ideal; f/3.5–f/5.6 is acceptable for starting), and a sturdy tripod. A remote shutter release or intervalometer prevents camera shake during long exposures. Processing software: DeepSkyStacker (free) and GIMP (free) or Adobe Photoshop.

Beginner targets: the Milky Way arch, star trails, constellation portraits, lunar close-ups through a telescope with a phone adapter. These teach you focus, exposure, framing, and post-processing without the complexity of tracking and guiding.

Level 2: Intermediate — Adding Tracking ($500–$3,000)

The single biggest improvement you can make to your astrophotography is adding an equatorial mount or star tracker. Tracking eliminates star trails at exposures longer than 15–30 seconds, revealing faint nebulae and galaxy detail that untracked imaging cannot reach. A star tracker like the Sky-Watcher Star Adventurer 2i or iOptron SkyGuider Pro lets you track accurately with a DSLR and camera lens for 1–3 minute exposures.

Intermediate setup: Existing DSLR + star tracker + telephoto lens (135mm f/2 or 200mm f/2.8). A telephoto lens on a tracker captures detailed images of the Orion Nebula, Andromeda Galaxy, Rho Ophiuchi, and dozens of other deep-sky objects. At this level, a simple 50mm guidescope and guide camera (or the built-in Star Adventurer guiding port) improves tracking accuracy enough for 3–5 minute exposures.

For planetary imaging, a dedicated planetary camera (ZWO ASI224MC or similar) replaces the DSLR. Planetary imaging uses video capture (thousands of frames) rather than long exposures, so it does not require tracking — an alt-az GoTo mount is sufficient. A 2× or 3× Barlow lens increases the image scale for detailed Jupiter, Saturn, and Mars images.

📸

RECOMMENDED

ZWO ASI224MC Planetary Camera

The ASI224MC is the most popular entry-level planetary camera. Its Sony IMX224 sensor delivers low-noise 1.2MP video at 100+ fps, ideal for capturing Jupiter's belts, Saturn's rings, and lunar detail. USB 3.0 ensures fast data transfer. Compatible with all telescopes via a 1.25" nosepiece.

Level 3: Advanced Deep-Sky Imaging ($3,000+)

At the advanced level, every component is specialised. The mount is a heavy-duty German equatorial mount (HEQ5 Pro, EQ6-R Pro, or similar) that carries the imaging train with zero compromise. The telescope is a refractor (60–100mm aperture, f/5–f/7) chosen for its flat field and colour correction — essential for sharp stars across the entire frame. The camera is a dedicated astrophotography camera with a cooled sensor that suppresses thermal noise during long exposures.

Advanced deep-sky setup: EQ6-R Pro mount (or equivalent), 80mm f/6 ED refractor, cooled CMOS camera (ZWO ASI533MC Pro or similar), guide scope + guide camera, electronic auto-focuser, filter wheel with LRGB and narrowband filters, and a mini-PC for remote control. Total investment: $4,000–$10,000. This setup can produce publication-quality images of galaxies, nebulae, and star clusters.

For narrowband imaging (H-alpha, O-III, S-II), add a set of 1.25" or 2" narrowband filters and a filter wheel. Narrowband filters isolate specific emission lines from ionised gases, allowing imaging from light-polluted suburban skies and even under moonlight. The Hubble Palette (SHO) mapping creates the iconic false-colour images seen in NASA releases.

Filters for Astrophotography

Filters are the astrophotographer's secret weapon. A light pollution filter blocks the yellow sodium and mercury vapour lines from streetlights, improving contrast on emission nebulae from suburban skies. A UHC (ultra-high contrast) filter is more aggressive — it passes only the H-beta and O-III wavelengths, making it ideal for nebulae under moderate light pollution. An O-III filter isolates a single oxygen emission line, revealing the faintest planetary and supernova remnant structures that are invisible without it.

🌙

RECOMMENDED

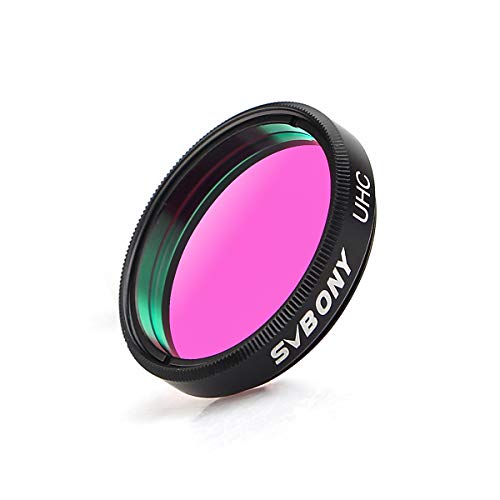
SVBONY UHC Filter (1.25")

A UHC filter is the best first filter for deep-sky astrophotography from suburban skies. It transmits the specific wavelengths emitted by nebulae (H-beta at 486nm and O-III at 501nm) while blocking common light pollution wavelengths. Use it on emission nebulae like the Orion Nebula, Lagoon Nebula, and Veil Nebula for dramatically improved contrast.

Software and Processing

Equipment captures the data; software turns it into an image. The processing pipeline typically involves: stacking (DeepSkyStacker, Siril, or PixInsight), calibration (darks, flats, bias frames), stretching (histogram transformation to reveal faint detail), and final adjustments (colour balance, noise reduction, sharpening).

DeepSkyStacker is the standard free stacking tool for beginners. Siril is a free, more capable alternative with full processing workflow. PixInsight ($230) is the professional standard — steep learning curve but unparalleled results. For planetary imaging, AutoStakkert! (free) stacks the best frames from video captures, and RegiStax (free) handles wavelet sharpening.

Frequently Asked Questions

Can I use a regular DSLR for astrophotography?

Yes. Any DSLR or mirrorless camera made in the last 5–10 years is capable of excellent astrophotography. A modified DSLR (removed IR-cut filter) captures more hydrogen-alpha emission, but unmodified cameras work well for broadband targets like galaxies and star clusters, and for Milky Way wide-field images.

What is the most important piece of astrophotography equipment?

The mount. Astrophotography requires tracking accuracy measured in arcseconds. No amount of camera quality or telescope aperture compensates for a mount that cannot track smoothly. A good rule: spend at least as much on the mount as on the telescope and camera combined.

Do I need a guide scope and guide camera?

For focal lengths under 400mm, an autoguider is optional if your mount has low periodic error and you keep exposures under 2 minutes. For longer focal lengths, an autoguider is essential. A 50mm guide scope with a monochrome guide camera is the standard entry-level setup.

Can I do astrophotography from a city?

Yes, but with limitations. Light pollution filters help with emission nebulae. The Moon and planets are unaffected by light pollution. Broadband targets (galaxies, star clusters) are best imaged from dark sites. Narrowband imaging (H-alpha, O-III) can produce excellent results from cities because the filters only pass specific wavelengths.

What is the best beginner astrophotography target?

The Orion Nebula (M42) is the classic first target — it is bright, large, and rich in detail. The Andromeda Galaxy (M31) is another excellent first target for wide-field setups. For planetary imaging, Jupiter and Saturn are the most rewarding targets for beginners.

How much should I budget for an astrophotography setup?

A decent beginner setup (DSLR + tripod + kit lens) costs essentially nothing if you already own a camera. A star tracker setup costs $400–$700. A serious deep-sky setup with an EQ mount, telescope, and cooled camera starts at $2,000–$3,000. Professional-level setups can exceed $10,000.

Guide Scopes and Autoguiding

Autoguiding is the next step after you have mastered basic tracking. A guide scope and guide camera sit alongside your main imaging telescope and send real-time corrections to the mount, compensating for periodic error, polar alignment drift, and wind shake. This allows exposure times of 5–20 minutes per sub-frame, essential for capturing faint nebulae and galaxies.

A standard 50mm guide scope with a monochrome guide camera (such as the ZWO ASI120MM Mini) is the standard entry-level setup. The guide scope should have a focal length of 120–200mm. The guide camera should be monochrome (not colour) because monochrome sensors are more sensitive and can guide on fainter stars. Software like PHD2 (free) handles the guiding loop, connecting to the mount via ASCOM or a direct ST-4 cable.

Off-axis guiding (OAG) is an alternative to a separate guide scope. An OAG uses a prism to pick off a small portion of the main telescope's light path and direct it to the guide camera. OAG eliminates the flexure that can occur between a separate guide scope and main telescope, which is especially important at focal lengths above 1,000mm. The trade-off is that finding a guide star with OAG is more difficult because the pick-off prism only captures a small fraction of the field.

For most imagers, a 50mm guide scope is the right starting point. Upgrade to OAG only when flexure becomes the limiting factor in your image quality — typically when imaging at focal lengths above 1,500mm with pixel sizes under 3 micrometres.

Essential Accessories for Astrophotography

Beyond the camera, mount, and telescope, several accessories are essential for successful astrophotography. An intervalometer or remote shutter release is the first purchase — it triggers exposures without touching the camera, eliminating vibration. A Bahtinov mask makes focusing on stars fast and accurate, especially for DSLR lenses. A dew heater system keeps the telescope's objective or corrector plate clear during humid nights. A red flashlight preserves night vision during setup. And a comfortable observing chair makes the long hours of imaging much more enjoyable.

Power management is a frequently overlooked aspect of astrophotography. A single 100Ah deep-cycle battery powers a mount, camera, dew heaters, and a mini-PC for an entire night. Anderson Powerpole connectors are the standard for astrophotography power distribution. A 12V-to-USB adapter keeps phones and tablets charged for remote control via WiFi.

Cable management prevents snags during slewing and meridian flips. USB and power cables should be routed along the mount's arms and secured with Velcro ties. A USB hub mounted on the telescope ring reduces cable tension on the camera port. Retractable cable spirals keep cables tidy when the mount rotates.

Field flatteners and focal reducers are often necessary for sharp star images across the entire frame. A field flattener corrects the off-axis coma that refractors produce at the edge of the image circle. A focal reducer shortens the effective focal length, increasing speed and widening the field — useful for larger sensors or faster imaging. Most dedicated astrophotography refractors have matching flatteners designed for their specific focal ratios.

Choosing the Right Camera for Astrophotography

The camera choice depends on what you want to image. For planetary and lunar imaging, a dedicated planetary camera (ZWO ASI, Player One, or QHY) is the best choice. These cameras capture high-speed video at 60–200 fps, letting you record thousands of frames and stack the sharpest ones. The small sensor (typically 1/2" to 1/3") matches the small image circle of high-magnification planetary imaging.

For deep-sky imaging, a cooled CMOS camera is the current standard. The cooling reduces thermal noise during long exposures (30 seconds to 10 minutes per sub-frame). Cameras with the Sony IMX533, IMX571, or IMX455 sensors are popular choices at different price points. A one-shot-colour (OSC) camera is simpler for beginners — it captures colour in every exposure. A monochrome camera with a filter wheel produces higher-quality images but requires separate LRGB or narrowband exposures.

For wide-field and nightscape imaging, a standard DSLR or mirrorless camera remains the best tool. Modern full-frame cameras like the Sony A7 series or Nikon Z series deliver excellent low-light performance. A modified DSLR (with the IR-cut filter removed) captures three to four times more hydrogen-alpha emission from nebulae, revealing detail that unmodified cameras miss.

Building Your Astrophotography System in Phases

The best approach to building an astrophotography system is to buy in phases, mastering each component before adding the next. Phase 1: a DSLR, sturdy tripod, and intervalometer for untracked wide-field Milky Way and star trail images. This teaches you framing, exposure, focus, and basic processing without the complexity of tracking.

Phase 2: a star tracker (Sky-Watcher Star Adventurer or similar) added to the DSLR setup. This enables 1–5 minute tracked exposures with camera lenses, revealing nebulae and galaxy detail that untracked imaging cannot reach. You learn polar alignment, tracking, and guiding concepts without investing in a full equatorial mount.

Phase 3: a dedicated astrophotography telescope and equatorial mount. The mount should be purchased before the telescope — an HEQ5 Pro or EQ6-R Pro carries any telescope you are likely to buy in the first 3–5 years. Start with a wide-field refractor (60–80mm aperture, f/5–f/6) before moving to longer focal lengths.

Phase 4: autoguiding, cooled camera, narrowband filters, and automation. Each addition improves image quality incrementally. The key is to master each phase before buying the next piece of equipment — otherwise you end up with a pile of expensive gear and no clear path to using it effectively.

Related Guides

Elena Reyes — Senior Science Editor

Elena Reyes

Senior Science Editor

Covers NASA missions, space science discoveries, and astronomical events for Telescope Advisor. Translates complex astrophysical research into practical insights for backyard observers. Based in the San Francisco Bay Area.

Content reviewed by our editorial team. Research and drafting assisted by AI to ensure unbiased, data-driven analysis. Learn more about our editorial process.