Best Smartphone Telescope Adapters: Capture the Moon & Planets with Your Phone
Telescope Advisor Logo Telescope Advisor
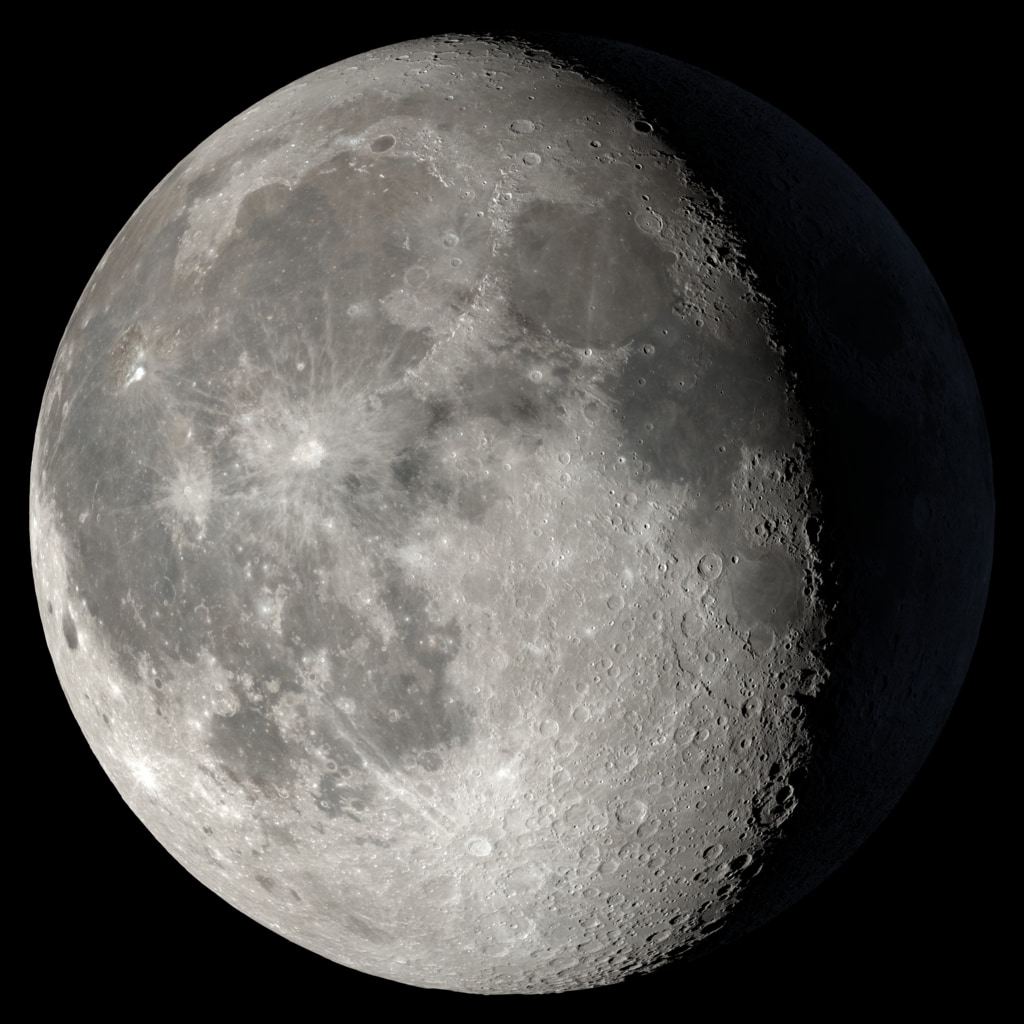
Waning gibbous Moon showing Tycho crater — a popular smartphone astrophotography target

Astrophotography · Smartphone Adapters

Best Smartphone Telescope Adapters: Capture the Moon & Planets with Your Phone

The Moon, Jupiter, Saturn, and even the Orion Nebula — all through your telescope and captured on the phone in your pocket. A smartphone adapter turns any telescope into a camera for under $50.

Best overallCelestron NexYZ
Budget pickSvbony universal adapter
Best targetThe Moon
Total cost$15–$100
By Telescope Advisor Editorial Team Published: Updated: Reviewed & approved by Juhi Sahni, Senior Editor Editorial Standards

A smartphone telescope adapter is the cheapest upgrade you can buy for your telescope. For $15 to $50, it turns any telescope eyepiece into a camera lens, letting you capture the Moon's craters, Jupiter's cloud belts, Saturn's rings, and even bright deep-sky objects with the phone you already own.

The concept is simple: the adapter holds your phone's camera lens directly over the telescope eyepiece. A spring-loaded clamp or screw mechanism centres the phone, and fine-adjustment knobs align the camera sensor with the eyepiece's exit pupil. Once aligned, the telescope becomes a telephoto lens for your phone, delivering magnifications of 50× to 200×.

Top Smartphone Adapters Compared

Celestron NexYZ 3-axis smartphone adapter
EDITOR'S CHOICE

Celestron NexYZ 3-Axis Smartphone Adapter

The NexYZ is the best smartphone adapter on the market. Three-axis adjustment (X, Y, and Z) aligns the phone camera precisely with the eyepiece. Spring-loaded clamp holds phones up to 85mm wide. All-metal construction, fits 1.25" and 2" eyepieces. The adapter that works first time, every time.

📱

BEST BUDGET

Svbony Universal Smartphone Adapter

The Svbony universal adapter is the best value option. Screw-adjustable clamp fits most phones, works with 1.25" eyepieces. Plastic construction is adequate for occasional use. Less precise than the NexYZ but workable once you learn the technique. Ideal for beginners wanting to try without significant investment.

How to Use a Smartphone Adapter

  1. Start with the Moon. Centre the Moon in a 25mm eyepiece at low magnification.
  2. Attach the adapter to the eyepiece. Tighten the thumbscrew firmly. The adapter should not rotate.
  3. Open your phone's camera app. Set exposure compensation to -1 or -2 stops.
  4. Place the phone in the adapter clamp. Centre the camera lens over the eyepiece as close as possible without touching.
  5. Adjust alignment. Use X and Y knobs to centre the bright circle on your phone screen.
  6. Focus. Use the telescope's focuser, not tap-to-focus. The terminator should be sharp.
  7. Use a timer or remote. A 2-second timer or Bluetooth remote avoids camera shake.

Best Targets and Tips

The Moon is the best target — craters and the terminator look spectacular. Use a 10–15mm eyepiece for crater detail, 25–30mm for full-disk shots. Jupiter shows cloud belts at 150× in a 6-inch scope — use video mode and a Barlow. Saturn's rings are visible at 100× in a 4-inch scope. Venus shows its crescent at 60× with reduced exposure.

Use manual camera apps (ProCamera, NightCap) for ISO and exposure control. Shoot in RAW if available. Take multiple shots at different exposures. Process images in Snapseed or Lightroom Mobile. For planets, capture 30–60 seconds of video and stack the sharpest frames in PIPP and AutoStakkert! — free software that dramatically improves image quality.

Frequently Asked Questions

Will a smartphone adapter work with any telescope?

Yes — any telescope using standard 1.25" or 2" eyepieces is compatible. The NexYZ fits both sizes out of the box.

Why is my photo showing a black circle with a bright crescent?

The phone camera is not aligned with the eyepiece. Adjust the X and Y knobs to centre the bright circle. If oval rather than round, the phone is tilted — reseat it parallel to the eyepiece.

Why are my photos blurry?

Three causes: (1) telescope not in focus — focus through the eyepiece first; (2) camera shake — use a timer or remote; (3) atmospheric turbulence — wait for steadier air after midnight.

Can I capture deep-sky objects with a smartphone?

Only the brightest. The Orion Nebula, Andromeda's core, and the Pleiades are achievable with a manual camera app at 5–15 second exposures. A tracked mount helps significantly. Faint galaxies are beyond phone capability.

Which is better — Celestron NexYZ or a budget adapter?

The NexYZ is better: three-axis adjustment, metal construction, fits both eyepiece sizes. Budget adapters work but require more patience. If you plan to take more than a few photos, buy the NexYZ.

Recommended Apps for Smartphone Astrophotography

The camera app you use matters more than the phone model. The stock camera app limits exposure time to 1–3 seconds, which is insufficient for deep-sky objects. A manual camera app unlocks the full capability of your phone's sensor. ProCamera ($15) provides full manual control over ISO (100–3200), shutter speed (1/4000s to 30s), focus (manual peaking), and RAW capture. NightCap Camera ($15) is optimised for low-light and astrophotography, offering a dedicated astro mode with automatic stacking. Open Camera (free, open-source) provides manual controls without the cost.

For post-processing, Snapseed (free) is the best mobile editing app for lunar and planetary images. Its selective adjustment tool lets you brighten the dark sky without overexposing the bright Moon. Lightroom Mobile (free with limited features) provides curves, colour grading, and noise reduction. For stacking multiple exposures on a phone, DeepSky Camera (Android, free) and NightCap Camera (iOS) can align and stack frames directly on the phone — no computer needed.

For planetarium and target finding, SkySafari 7 is the gold standard. It shows real-time sky maps, object descriptions, and rise/set times. Point your phone at the sky and it identifies what you are looking at — invaluable for finding targets before attaching the adapter. Stellarium Mobile (free version available) is an excellent alternative with a beautiful interface and accurate star positions.

Choosing the Right Adapter: What to Look For

When choosing a smartphone adapter, the most important feature is the number of adjustment axes. A single-axis adapter (left-right only) requires you to slide the phone manually for vertical centring, which is imprecise and often shifts when you tighten the clamp. A two-axis adapter (X and Y) is easier to use. The three-axis NexYZ adds Z-axis adjustment (the distance between the phone and the eyepiece), which optimises the image scale and prevents vignetting — the dark corners that appear when the phone is too far from the eyepiece.

Eyepiece compatibility is another consideration. Most adapters fit 1.25" eyepieces. Some also fit 2" eyepieces (the NexYZ, for example). Check the adapter's maximum eyepiece diameter if you use 2" wide-field eyepieces. The clamp must grip the eyepiece securely without slipping — a set-screw design is more reliable than a spring clamp for heavier phones.

Phone size and case compatibility vary significantly between adapters. Measure your phone's width with its case on before purchasing. The NexYZ fits phones up to 85mm wide, which covers most modern phones with slim cases. Some budget adapters only fit phones up to 75mm — too narrow for iPhone Pro Max or Samsung Ultra models with cases.

Build quality matters for long-term use. All-metal construction (NexYZ) lasts for years and survives being transported in a telescope case. Plastic adapters are adequate for occasional use but the locking mechanisms can wear out after 20–30 uses. The difference between a $20 adapter and a $50 adapter is typically in the precision of the adjustment mechanism and the durability of the phone clamp.

Processing Your Smartphone Astrophotos

Post-processing turns a raw phone snap into a share-worthy astrophoto. For lunar images, start with a photo editing app like Snapseed (free) or Lightroom Mobile. Increase contrast to bring out crater detail. Use the structure or clarity slider to enhance the terminator shadows. Reduce highlights to prevent the bright lunar surface from washing out. A slight increase in sharpness (radius 0.5–1.0) makes crater rims pop without introducing noise.

For planetary images, the processing workflow is entirely different. Instead of editing a single photo, you extract the sharpest frames from a video. Free software called PIPP (Planetary Imaging PreProcessor) stabilises the video and selects the best frames based on contrast and sharpness. AutoStakkert! then stacks the selected frames into a single image with dramatically reduced noise and improved detail. RegiStax applies wavelet sharpening to bring out fine detail in Jupiter's belts or Saturn's Cassini Division.

For deep-sky smartphone images, use DeepSkyStacker (free) to align and stack multiple exposures. Even 10–20 seconds of exposure on the Orion Nebula benefits from stacking — the noise reduction reveals faint nebulosity that a single exposure misses. Final adjustments in GIMP or Photoshop balance the background sky (keep it dark grey, not black) and stretch the histogram to reveal faint detail in the nebula.

Common Mistakes and How to Avoid Them

Mistake 1: Using too much magnification. Beginners often try to use a 4mm eyepiece or 3x Barlow with a phone adapter. At 300×+, the image is dim, shaky, and atmospheric turbulence blurs everything. The sweet spot for smartphone astrophotography is 60×–120×. Use a 10–15mm eyepiece for the Moon and a 12–20mm eyepiece for planets.

Mistake 2: Ignoring focus. The telescope must be perfectly focused before attaching the phone. Autofocus on the phone will not work because the telescope eyepiece is too far from the camera. Use the telescope's focuser while watching the phone screen at 2× digital zoom. The terminator (Moon) or a bright star should be as sharp as possible.

Mistake 3: Overexposing the Moon. The Moon is surprisingly bright through a telescope. At high magnification, the camera's automatic exposure often overexposes the lunar surface, washing out all detail. Set exposure compensation to -1 or -2 stops. On iPhone this is done by tapping the screen and sliding the sun icon down. On Android, use the manual exposure control in your camera app.

Mistake 4: Expecting Hubble results. A smartphone camera sensor is tiny (typically 1/2" to 1/3") compared to a dedicated astrophotography camera. Smartphone photos will show the Moon's craters and Jupiter's cloud belts, but they will not look like NASA images. Manage your expectations — smartphone astrophotography is about documenting what you see at the eyepiece, not producing gallery-quality prints.

Mistake 5: Giving up after one try. Smartphone astrophotography has a learning curve. The first attempt will likely produce a blurry, off-centre, overexposed image. Adjust the adapter alignment, refocus, reduce exposure, and try again. After 3–5 sessions, you will develop a workflow that produces consistently good results. The NexYZ adapter reduces the learning curve significantly because its three-axis adjustment makes alignment repeatable.
Related Guides

Elena Reyes — Senior Science Editor

Elena Reyes

Senior Science Editor

Covers NASA missions, space science discoveries, and astronomical events for Telescope Advisor. Translates complex astrophysical research into practical insights for backyard observers. Based in the San Francisco Bay Area.

Content reviewed by our editorial team. Research and drafting assisted by AI to ensure unbiased, data-driven analysis. Learn more about our editorial process.