First Night With a New Telescope: Setup Checklist (2026)
Telescope Advisor Logo Telescope Advisor
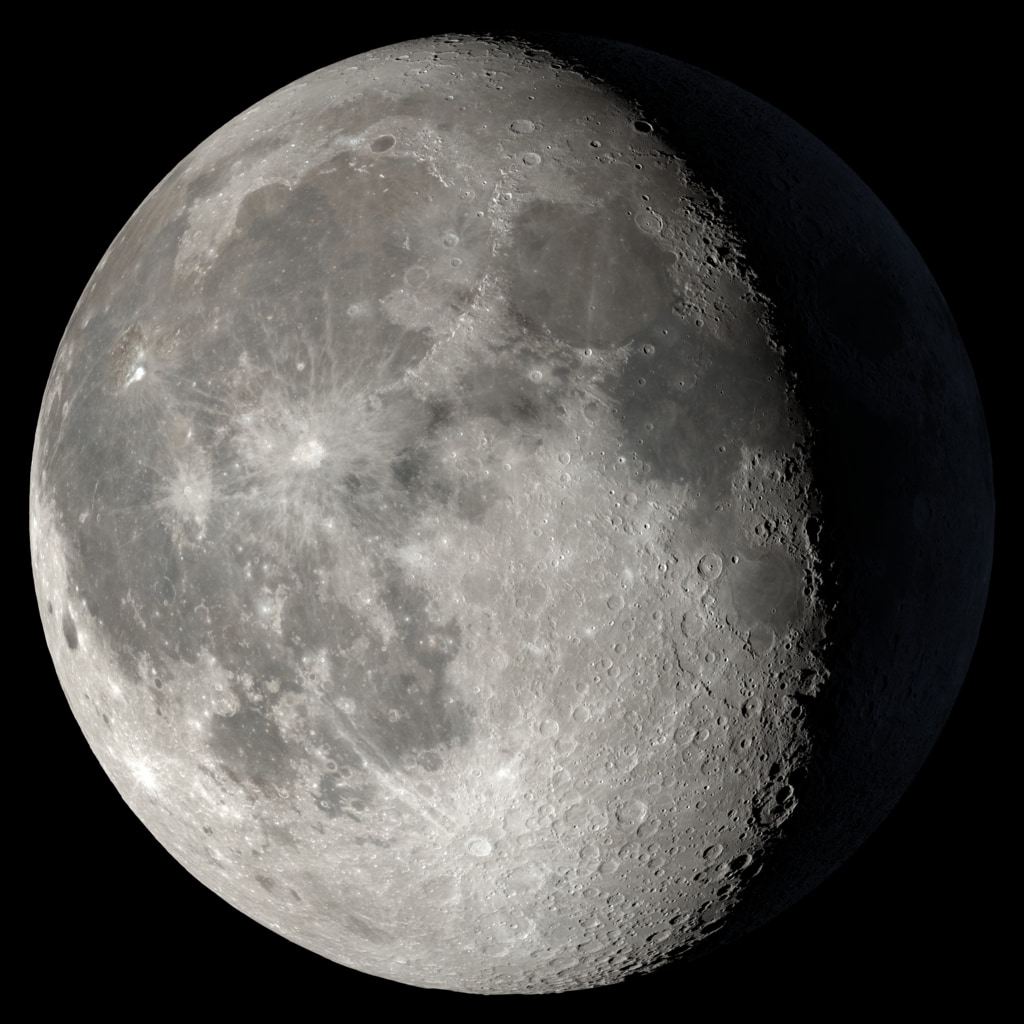
The Moon's cratered surface, the best first target for a new telescope

Beginner Guides · Printable Checklist

Your First Night With a New Telescope: The Complete Checklist

Most first nights go wrong for the same four reasons: an unaligned finder, too much magnification, a warm telescope, and a target that is too hard. Do the setup in daylight, start low and bright, and your first night will be the one that keeps you observing.

Daytime

Align the finder

Biggest mm

Eyepiece first

30–60 min

Cool-down

Never

Point at the Sun

By Telescope Advisor Editorial Team Published: Updated: Editorial Standards

Quick Answer: What to Do on Your First Night

Assemble the telescope and align its finder in daylight, using a distant treetop or rooftop (never the Sun). At dusk, put the scope outside to cool for 30 to 60 minutes. Start with the eyepiece that has the largest number on it (usually 25mm or 20mm), because that gives the lowest magnification and the widest, easiest view. Aim first at the Moon or the brightest planet, then focus slowly. Save the high-power eyepiece and the Barlow lens for a later night.

This page is the first-night plan. For step-by-step help assembling a tripod, mount, and tube, see our telescope setup guide for beginners, then come back here when it is built.


The Printable First-Night Checklist

In daylight

  • Assemble the telescope indoors and read the manual once
  • Remove every dust cap, including the small one on the focuser
  • Insert the longest-focal-length eyepiece (largest mm number)
  • Focus on a distant treetop or rooftop, 300 yards or more away
  • Align the finder on that same target
  • Put batteries in the finder, and the mount if it is a GoTo
  • Charge smart telescopes and update their apps

At dusk

  • Carry the telescope outside to cool (30–60 minutes)
  • Set up on grass or soil, not a wooden deck
  • Turn off porch lights, and switch your phone to night mode
  • Have a red light, warm layers, and a chair ready
  • Check which planets and Moon phase are up tonight

After dark

  • Start with the Moon or the brightest planet
  • Center it in the finder, then look through the eyepiece
  • Focus slowly, in one direction, then back
  • Only then try the next eyepiece up in power
  • Note what worked, then pack up before you get cold
  • Let dew dry indoors with the caps off, then re-cap

Before Dark: The Daytime Setup That Makes the Night Work

Almost every “my telescope doesn’t work” story starts with trying to do everything for the first time in the dark. Twenty minutes in daylight prevents it.

1. Start with the lowest-power eyepiece

Eyepieces are labeled in millimeters, and the larger the number, the lower the magnification. A 25mm eyepiece in a typical beginner telescope gives around 30x to 50x, a wide, bright, forgiving view. A 10mm or 6mm eyepiece gives several times more power. At that magnification the field is tiny, targets drift out in seconds, and every shake of the tripod is magnified too. Always start with the biggest number.

2. Find focus on something far away

Point the telescope at the most distant thing you can see: a treetop, a water tower, a chimney a few blocks away. Turn the focus knob slowly in one direction until the image sharpens. If it only gets worse, go the other way, and keep going, because new telescopes are often shipped far from focus. Remember roughly where the focus knob ended up. Stars focus very close to that position, and knowing it saves minutes of hunting in the dark.

3. Align the finder, the step nobody skips twice

With that distant object centered in the eyepiece, look through the finder (a red-dot sight or a small finder scope) and adjust its screws until it points at the same spot. That is it. Now, at night, anything you center in the finder will appear in the eyepiece. An unaligned finder is the number-one reason new owners “can’t find anything”. Our finder alignment guide covers each finder type with photos.

4. Let the telescope cool down

A telescope carried out of a warm house has warm air currents inside the tube that blur the view, especially planets. Small refractors settle in 15 to 20 minutes. Reflectors and Dobsonians need 30 to 45. Closed-tube Schmidt-Cassegrains and Maksutovs can take 45 to 60 minutes on a cold night. Carry it out at dusk and set up while you wait for full dark.

The One Rule: Never Point a Telescope at the Sun

Looking at the Sun through a telescope or finder without a certified solar filter causes permanent eye damage in a fraction of a second. It can also melt plastic parts inside the finder or eyepiece. During daytime setup, keep the Sun behind you, cover the finder when you are not using it, and never leave a telescope unattended around children in daylight. The only safe way to observe the Sun is with a certified front-of-tube solar filter. Eyepiece “sun filters” that screw into an eyepiece are dangerous and should be thrown away.

Want to view sunspots safely later? See our guide to solar telescopes vs regular telescopes.


Next Best Step

Need the fastest next step?

Pick the path that matches where you are right now: get a recommendation, compare buyer guides, or narrow by budget.

Open Finder Tool →

🎄 Holiday season: Telescope Christmas Gift Guide 2026 · Smart telescope Black Friday deals

Notes for Your Type of Telescope

The checklist above works for every telescope, but each design has one or two extra quirks worth knowing before the first night.

Refractors (long thin tube, lens at the front)

The simplest first night of any type: no collimation and a short cool-down. Use the included star diagonal for comfortable viewing. The image will be mirror-reversed left to right, which is normal. On inexpensive short refractors, bright objects may show a faint purple fringe. That is chromatic aberration, not a defect.

Reflectors and Dobsonians (mirror at the bottom)

Allow the longer cool-down. Glance down the focuser in daylight: you should see the small secondary mirror centered, with the reflection of the big mirror around it. If stars look like comets even at best focus, the mirrors need collimating, a five-minute job once you have done it. Tabletop Dobs need a sturdy table or crate.

GoTo and computerized telescopes

Level the tripod, and enter the date, time, time zone, and daylight-saving status exactly. Wrong time settings are the most common cause of a failed alignment. Choose bright, widely separated alignment stars. Fresh batteries matter: weak AAs cause erratic slewing, and many owners switch to a 12V power pack. Our GoTo vs manual guide explains how alignment works.

Smart telescopes (Seestar, Dwarf, Vespera)

Charge fully and update both the app and the firmware indoors on WiFi the day before. Updates in the field can take 20 minutes. Place the telescope on level ground with a clear view of the sky, not beside the house. Start with a bright target like the Orion Nebula or the Pleiades, and give live stacking several minutes to build the image.
What to Look At First: Realistic Targets for December 2026

If your telescope arrives for the holidays, these are the targets that reward a beginner in the December 2026 evening sky, roughly in the order we would try them. Times and positions are approximate for mid-northern latitudes (most of the U.S., UK, and Europe). A free app like Stellarium or SkySafari will show exact positions for your location.

TargetWhere and whenWhat you will actually see
The MoonFull on Dec 24 (the evening of Dec 23 in the Americas). The best crater views come in the week before full and the days after the last quarter.Craters, mountains, and long shadows along the day/night line. At full Moon the view is flat and dazzling, so look along the edge, where craters show.
JupiterRising in the east during the evening, well placed by mid to late evening. Opposition is Feb 10–11, 2027.A bright disk with two dark cloud belts, plus up to four Galilean moons in a line that changes nightly.
SaturnSouthwest in early evening, setting earlier each week through December.A small, sharp ring system around a pale globe. The rings are still fairly narrow after their 2025 edge-on crossing, but they are clearly visible at 50x or more.
The Pleiades (M45)High in the east by mid-evening.Dozens of blue-white stars, best at your lowest power. It often looks better in binoculars or a finder than at high power.
Orion Nebula (M42)Rising in the east after about 8–9 p.m., better placed later in the evening.A gray-green glowing cloud with four tiny stars (the Trapezium) at its heart. It won’t look like the colorful photos, but it is unmistakable.
Andromeda Galaxy (M31)High overhead in early evening.An elongated fuzzy glow: the light of a trillion stars, 2.5 million years old. Use low power and a dark sky.

Dec 13–14

Geminid meteor shower peak. Use your eyes, not the telescope; a telescope’s tiny field shows almost no meteors.

Dec 24

Full Moon. On Christmas night the Moon is still nearly full and bright, which is great for kids but washes out faint objects.

Feb 10–11 & Feb 19, 2027

Jupiter and then Mars reach opposition, the best views of the winter for a new telescope.

For a night-by-night calendar, see the night sky in December 2026, and for more beginner-friendly targets year-round, our list of easy objects to see with a telescope.

Moon phase and opposition dates were checked against published ephemeris sources on September 26, 2026. Opposition dates can shift by a day depending on your time zone.

Quick Fixes When Something Is Wrong

Nearly every first-night problem has a simple cause. Work down this table before assuming the telescope is faulty, and before you pack it back into the box to return it.

ProblemMost likely causeFix
I see nothing, or just blackA dust cap is still on, or the telescope is pointed at empty skyCheck all caps, then point at the Moon. Full guide
Everything is a blurFar out of focus, or the tube is still warmTurn the focuser a long way both directions, and wait for cool-down. Focusing guide
Planets won’t sharpenToo much magnification, or turbulent airDrop to a lower-power eyepiece. Planet focus fixes
The view is upside downNormal for astronomical telescopesNothing to fix; there is no up in space. Why it happens
The finder and eyepiece disagreeThe finder isn’t alignedRealign on a distant object or the Moon. Finder troubleshooting
Objects drift out of viewEarth’s rotation, which is worse at high powerUse lower power and nudge the scope to follow the object.
The view shakes when I touch itTripod legs fully extended, or set up on a deckShorten the legs and set up on solid ground. Stability fixes
Lenses fog upDew on cold glassDon’t wipe it. Let it dry indoors with the caps off, and use a dew shield next time.

Five First-Night Mistakes to Avoid

  1. Starting with the Barlow lens or the smallest eyepiece. The box may advertise 600x, but a beginner telescope’s useful maximum is roughly twice its aperture in millimeters, and far less on an average night. High power first means dim, blurry, jittery views.
  2. Observing through a window. Glass panes and the warm-to-cold air boundary wreck the image. Always go outside, even onto a balcony.
  3. Expecting Hubble colors. Your eye can’t see color in faint objects. Nebulae and galaxies appear gray, and that is normal. Planets and the Moon are where the “wow” comes on night one.
  4. Chasing faint galaxies from a lit backyard. Start with the Moon, planets, and bright clusters. Save faint deep-sky objects for a moonless night at a darker site.
  5. Giving up after one cloudy or frustrating night. The second session is always easier than the first. Keep the box and receipt until you have had two clear nights, then decide.

If you are buying a telescope as a gift rather than receiving one, pair it with this checklist. It is the difference between a present that gets used and one that ends up in a closet. Our telescope Christmas gift guide covers which scopes give the easiest first night.

The First-Week Kit: What Actually Helps

You don’t need to buy anything for the first night. But after a few sessions, these small, inexpensive items are the ones new owners tell us made the biggest difference. They are ordered by how early you will want them.

DARKBEAM Red Light Flashlight

DARKBEAM Red Light Flashlight

Night 1: read charts and find eyepieces without ruining your dark adaptation. White light resets your night vision in seconds.

David Chandler The Night Sky 30°–40° Planisphere

The Night Sky 30°–40° Planisphere

Night 1: dial in the date and time to see what is up, with no phone glare and no battery.

Cambridge University Press Turn Left at Orion

Turn Left at Orion

Week 1: the classic beginner observing guide, showing what each object really looks like in a small telescope.

SVBONY Variable Polarizing Moon Filter

SVBONY Variable Polarizing Moon Filter

Week 1: dims a bright Moon so you can study craters comfortably, which is especially useful near full Moon.

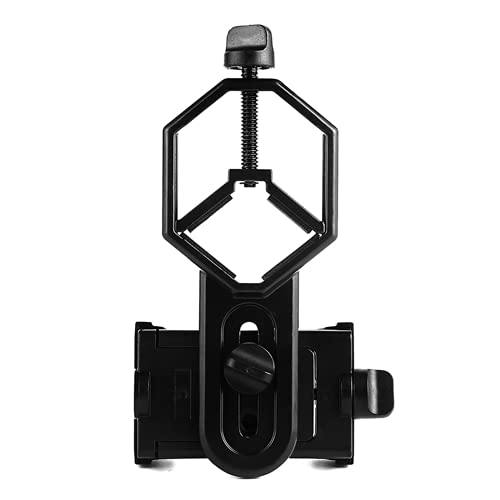
SVBONY Universal Phone Adapter

SVBONY Universal Phone Adapter

Week 1: holds your phone at the eyepiece for Moon photos to share. Far steadier than hand-holding.

Celestron StarPointer Red Dot Finder

Celestron StarPointer Red Dot Finder

If your scope came with a tiny, hard-to-use finder scope, this red-dot upgrade makes aiming painless.

For week two and beyond: a quality 2x Barlow lens doubles every eyepiece you own once you are comfortable at low power. Reflector owners should add a collimation eyepiece. GoTo owners tired of AA batteries should look at a 12V lithium power tank. For more ideas, see our best telescope accessories for beginners.

Frequently Asked Questions

What should I look at first with a new telescope?
The Moon, if it is up, followed by the brightest planet in the sky. Both are easy to find, bright enough to focus on, and impressive at low power. Leave faint galaxies and nebulae for later nights.
Which eyepiece should I use first?
The one with the largest number in millimeters, usually 25mm or 20mm. It gives the lowest magnification and the widest field, which makes targets easy to find and focus. Switch to smaller numbers only once the target is centered and sharp.
Why can’t I see anything through my new telescope?
Usually a dust cap is still on, the finder is not aligned, or the focus is far off. Remove every cap, point at the Moon using low power, and turn the focuser slowly through its whole range.
How long should a telescope cool down before use?
About 15 to 20 minutes for a small refractor, 30 to 45 minutes for a reflector or Dobsonian, and up to an hour for a Schmidt-Cassegrain or Maksutov on a cold night. Setting up at dusk lets the cool-down happen while the sky darkens.
Is it normal that the image is upside down?
Yes. Most astronomical telescopes show an inverted or mirror-reversed image, because correcting it would add glass and dim the view. It makes no difference for the Moon, planets, or stars.
Can I use my telescope to look at the Sun?
Only with a certified solar filter that covers the entire front of the telescope. Never look at the Sun through an unfiltered telescope or finder, and never use eyepiece-mounted sun filters. Instant, permanent eye damage can result.


Continue Exploring

Keep the session going with the next useful answer

Choose the next page based on whether you need a recommendation, a comparison, or a practical observing plan.

Use Finder Tool →

🎄 Holiday season: Telescope Christmas Gift Guide 2026 · Black Friday deal tracking